Blog

Positive and Negative Space in Illustrator| Design Tip of the Week
Positive and Negative Space in Illustrator
We all know that Illustrator is great for creating dynamic linework and wonderful shapes, but what about creating lines WITH shapes? You know, positive and negative space? Get what I’m saying? Picking up what I’m putting down? Smelling what I’m stepping in? If you’re still unsure, no problem. I’ll walk you through it, and by the end you will have another method to illustration in your repertoire.

Does this little guy look familiar?

Yep! He’s the mini version of the cosmic robot Buddha illustration I did for Weapons of Mass Creation Fest 6. This little dude also was featured on the WMC Fest 6 kid’s shirt.
Anyways, let’s get into it.

Pasted in the Illustrator artboard is the original sketch for my illustration. From this I outlined and created silhouetted shapes…
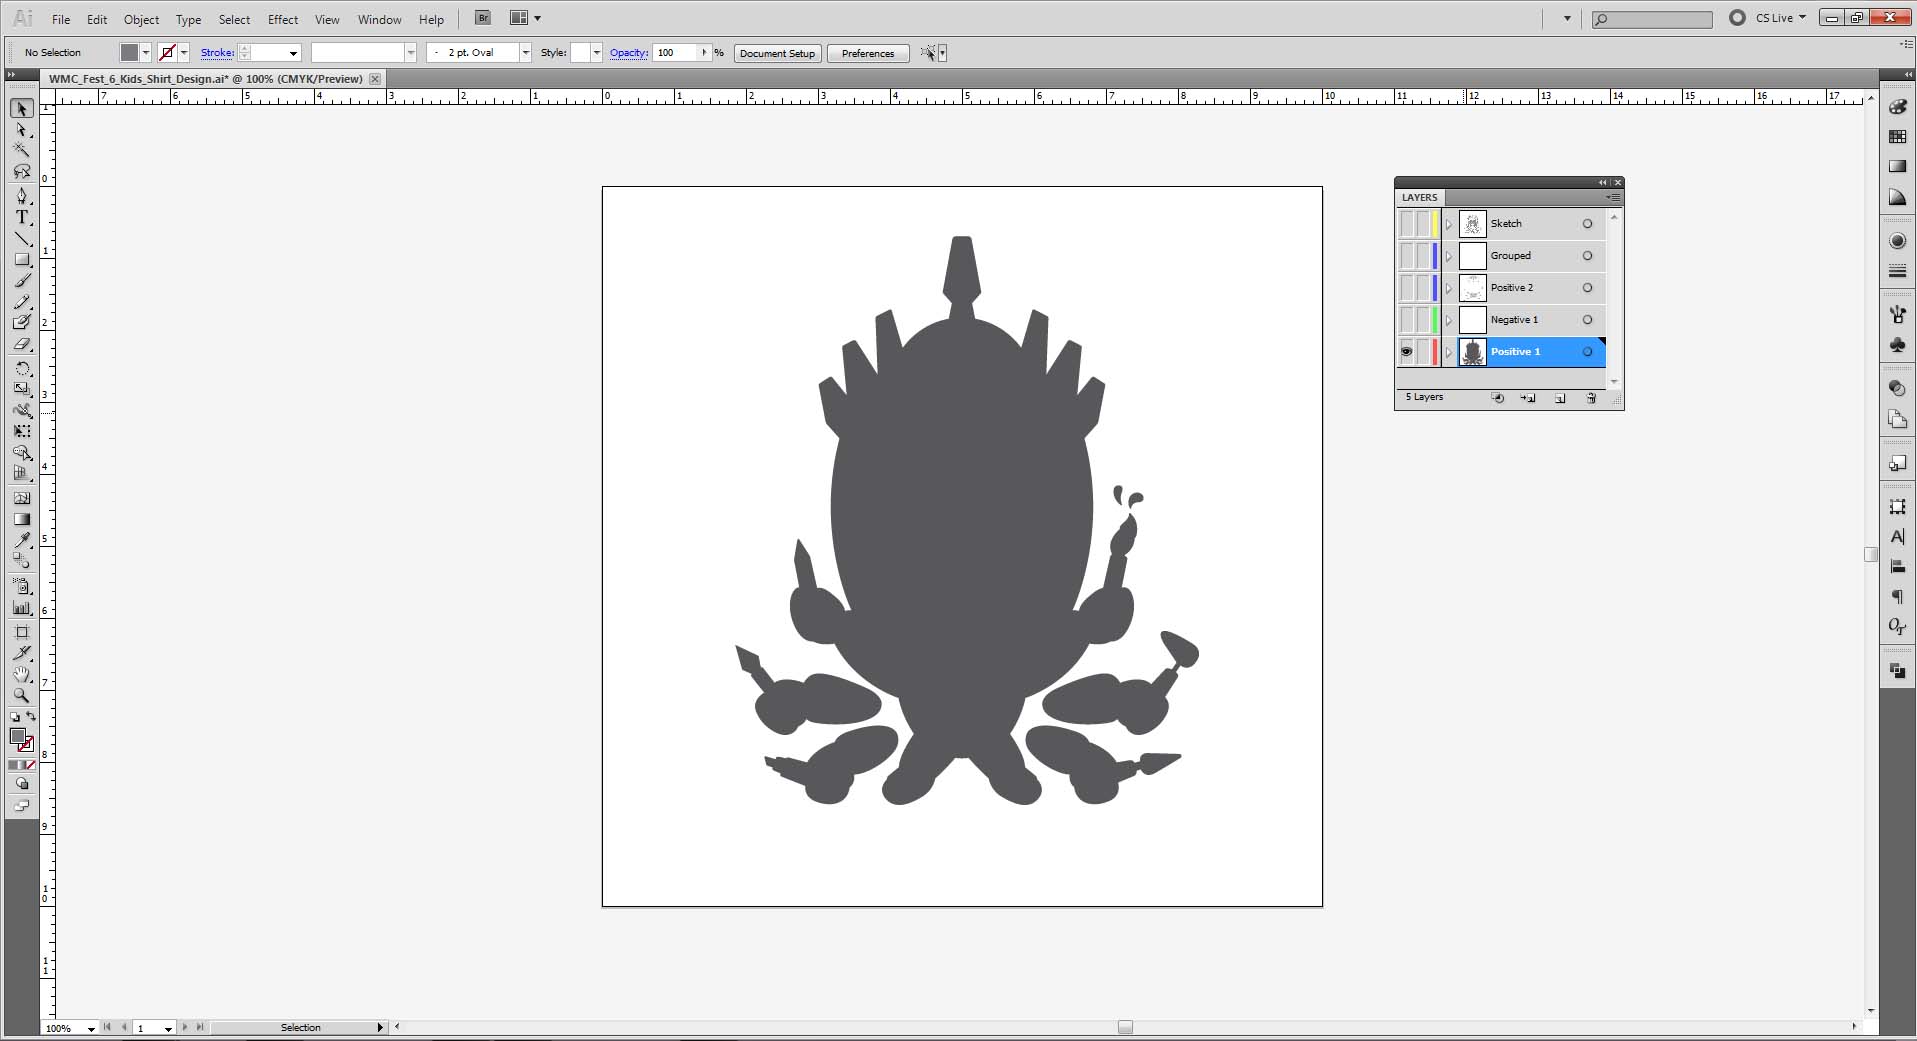
This layer is named “Positive 1” (as it says in the Layers Palette).

Next, a new layer was created (Negative 1). In this layer, I created the white (negative) shapes by using my original sketch as reference. It is at this point that the linework becomes defined.

My third layer (“Positive 2”) contains the last set of positive (black) shapes that sit on the white (in Negative 1 layer*).
*In my opinion, Negative 1 layer should actually only be named “Negative,” since there is not a “Negative 2” layer.

First making sure that my layers are unlocked and visible, I then select all my shapes, then copy and paste it all into a new layer (“Grouped”).

With everything selected, I use Pathfinder > Divide. This breaks down everything into separate shapes according to the intersecting edges.
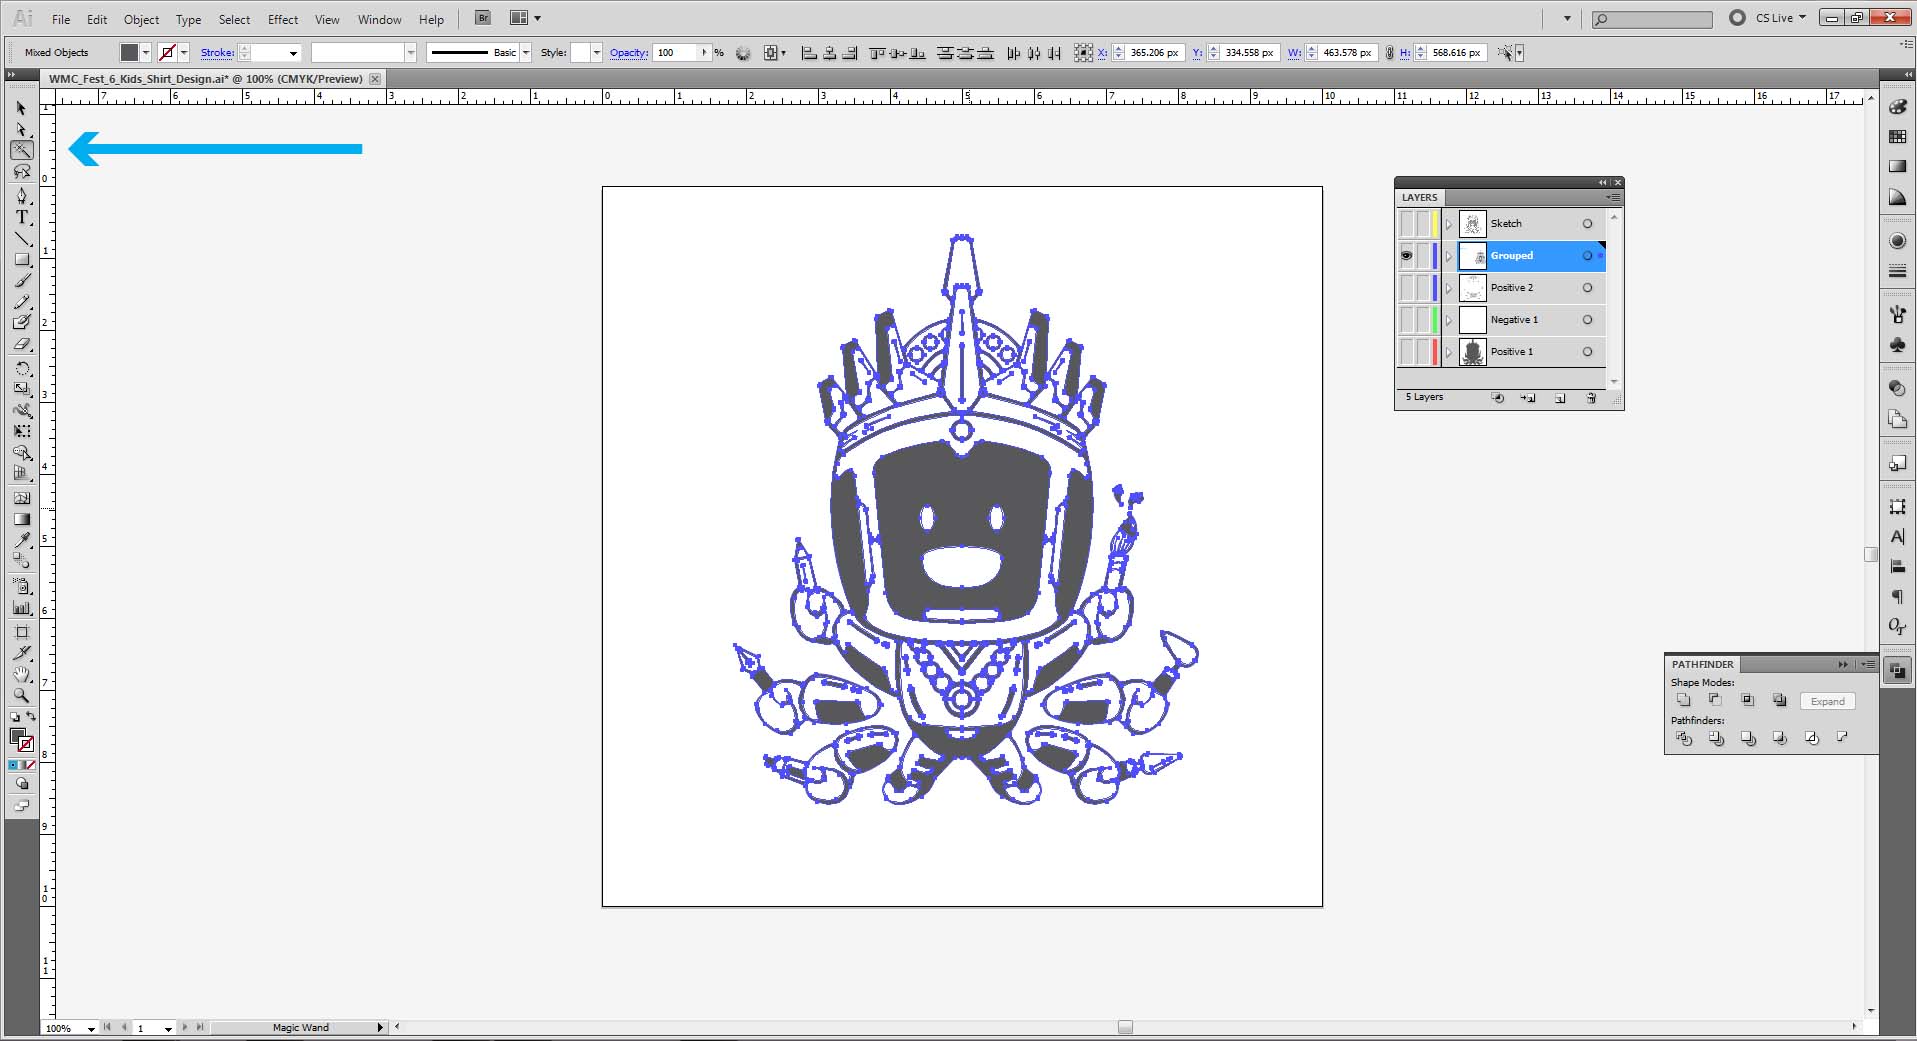
By first ungrouping my illustration, I can now use the magic wand to select all the positive (black) shapes. I copy that, delete my all of my previous work, then do a Paste in Place, leaving only the positive shapes.

Your Fill will indicate that this has been done correctly if everything that is selected has black fill. No white (negative) shapes remain.

So why bother with this approach?
Honestly, it’s just matter of preference. For some illustrations, I’d rather just do the linework, yet there are some instances where it is easier for me to break it down (and build it up) through positive and negative space. I have also found that this approach enables me to translate my original line weights. The point is there are many ways to skin a cat. (Man…that’s a horrible expression. Skin a cat? Who does that? I don’t even…) Anyways, this is just another method of creating linework in Illustrator. In fact, I used this method a lot in creating the Iconic Cleveland Vector Pack.
Well that is all for now. If you want more tips on Illustration, check out the Arsenal, which has TONS of tutorials! (I would strongly recommend the Halftone Triple Technique Tutorial.)
Thanks for reading, everyone! Now go out and draw some cool shit.
Cheers!
