Blog
How Go Media makes their amazing mockup templates, Hamster Style!
Go Media Approved
Here at Go Media, we’re custom template creating machines.
Between our mockup sites Shirt Mockup and Mockup Everything, the mockup packs on our Arsenal and custom templates for clients, we’ve got our system down to a science.
Disclaimer: Creating these nicely organized and layered files is far from easy for that matter, even for us after all these years. So sit with us and stay awhile. We want to make sure we do this the Go Media way.
Ready?
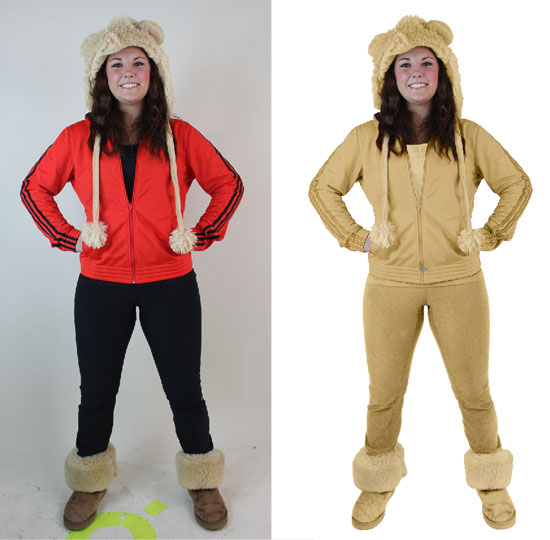
Follow along with me as I create this custom hamster jumpsuit template, from high resolution photograph, to clean and crisp PSD file.
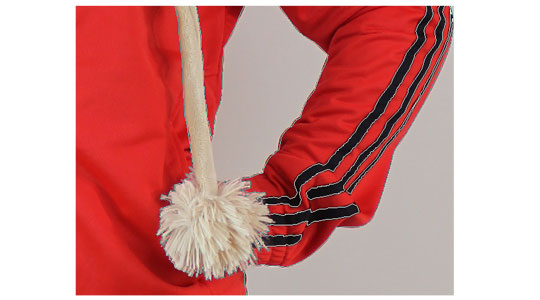
Ideal Conditions
A white/neutral background: This will make tracing the garment much easier.
Red Garments: Red is a great middle value color, which means it shows relatively equal amounts of shadows and highlights. * If you’re not shooting a red garment make sure there is enough contrast between shadows and highlights. In the end, we’ll want to be able to change the garment’s color while keeping it’s natural look.
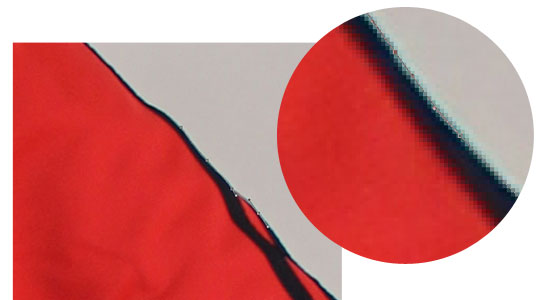
Sharpness of Image: Sharper images will contain more pixel information. This is crucial editing shadows and highlights.
Duplicate your background.
This is the layer that you’ll be working on. Right click on your background layer to duplicate it then double click to rename that new layer. Once you’ve done this, hide your original background layer.

Photo Cleanup
This will save you time later. Clone tool out any unwanted fuzz, spots, creases, or tags.
Tracing Garment/Subject
Using the pen tool “Paths”, trace just inside the edge of the garment to ensure that you’re not including part of the background. Tracing every detail/fold in fabric will keep it from looking stiff. This is one of the most important steps, and it can take some time. Be patient.
Once you have traced a garment, it will automatically be saved in your “Paths” palette as a “Work Path” – double click to rename it to something more specific. this will allow you to add more paths to the garment later.
Right click on your path and “Make Selection” (click OK on the dialog box that opens). I’m a firm believer in keeping as much of the original photo in tact as possible. To do this I use “Layer Masks”. Ultimately it will make your file size larger, but will save headaches if you need to change something later.

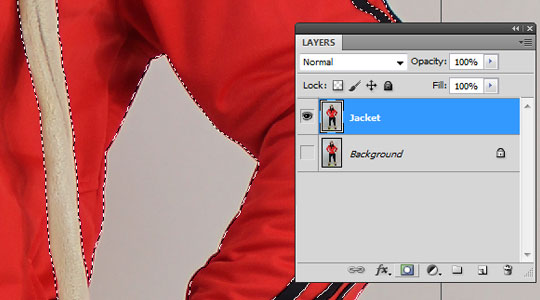
Layer Masking
Now that you have your garment selected, go back to your layers palette and click the layer mask button at the bottom of your layers palette to isolate it. If you ever need to show or hide parts of this garment you can do so in the mask layer without actually deleting any pixels. Add a solid color background to be sure you didn’t miss anything. I usually stick with a middle value gray.

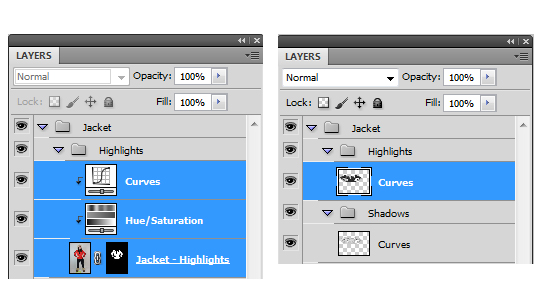
Shadows & Highlights Setup
Duplicate the garment layer twice. These will act as your shadows and highlights. Rename the layers accordingly “GarmentName – Shadows” and “GarmentName – Highlights” It’s good to get in the habit of organizing your layers. At this point I’ll create a main Garment folder, in this case “Jacket” as well as “Shadow” and “Highlights” folders.
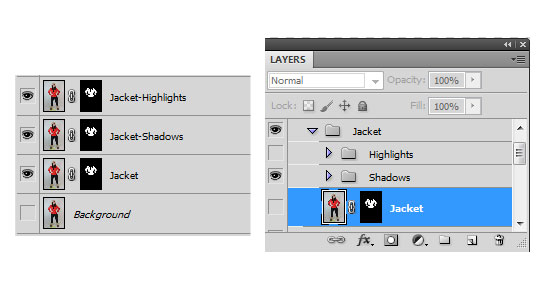
After that, move the layers into their respective folders. Select the Shadows layer and change its blending mode to Linear Burn. This will set your shadows to show a good amount of contrast and vibrancy.

Adding Hue & Curves Adjustment Layers
At the bottom of your layers palette, click on the black and white circle to add a Hue & Saturation adjustment layer. Change the Saturation to “-100”.

Add a Curves adjustment layer above that.
Currently these adjustment layers affect the entire document. We will need to make them only affect the shadow/highlight layer they’re above by creating a clipping mask. Hold shift to select both the Curves and Hue adjustment layers then right click and “Create Clipping Mask”. You’ll see two arrows appear next to the adjustment layers to indicate that they’ve been clipped into the layer below.


Next, move onto your Highlights Layer and change its blending mode to “Screen”. This will knockout the shadows of the garment and allow you to focus on the amount of highlights that are visible
Repeat steps 4-6 to create the Hue and Curves adjustments for your Highlights Layer.
Optimizing Shadows/Highlights
One of great uses a mockup template is the ability to change the color of the garment. These next steps will ensure that shadows and highlights are consistent no matter what color you apply.
Our next step is to add a White color adjustment layer and clip it into the original garment layer. (you can also apply a color overlay blending mode to get the same result)
*Photoshop automatically adds a mask to that layer – this will come in handy should you need multi-colored sections.
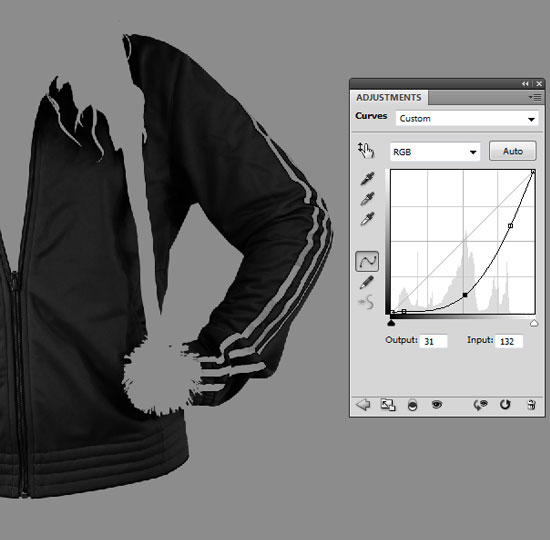
Make sure your Highlights folder is hidden then move onto the Curves adjustment layer that is clipped into the Garment-Shadows layer.
On the left side of the Curves palette, click the button with the exclamation point to get a more accurate view of the histogram. This will show you the brightness values of the image.

Plot points around the three highest values in an arch as shown. From there you can adjust each point to optimize the amount of shadows will appear. Shadows will become lighter the further away from the brightness values you are. If the points are plotted too far away, you run the risk of the shadows looking pixelated and blown out.

*Every garment’s brightness values will be different, but this arch will serve as a general guide to plotting points.
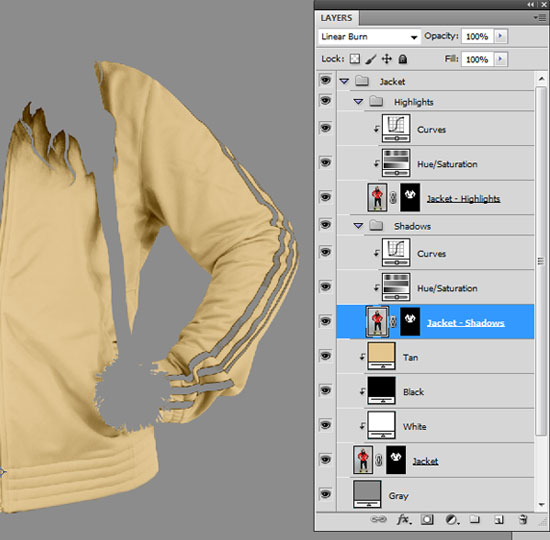
Once you have the shadows to a place that looks natural, hide your Shadows folder and add a Black color adjustment above the White layer. The same rules apply to editing the curves of the highlights only they’re opposite of the shadows.
Once your shadows and highlights are set up correctly, any color you apply to your base garment layer will look natural.
*If the amount of layers you have is overwhelming and you’re confident with the shadows/highlights you have set – you can always select the Curves, Hue, and Garment layer – right click and merge those layers.
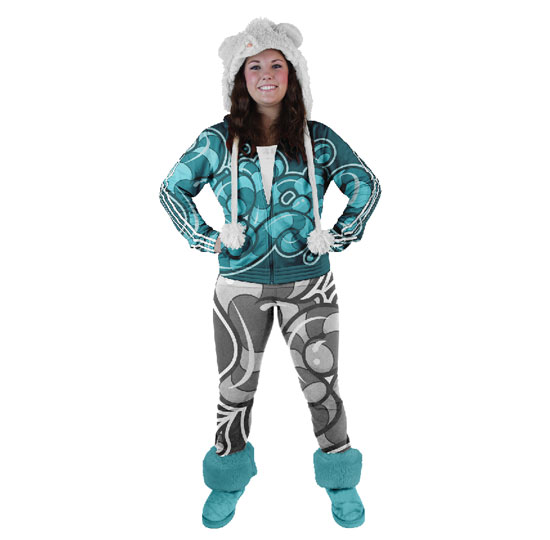
If you’re looking to customize a whole outfit just repeat all these steps for each garment and you could create your very own hamster jumpsuit.
-or clip your artwork into the base garment layer to make some wicked snowboard gear!
Great job!
Hard work, huh?
Pick your pleasure
Check out the hundreds of templates we’ve created on our sites Shirt Mockup, Mockup Everything and the Arsenal.

Shirt Mockup is a free tool used to realistically mockup your designs on tees. The Pro Version is available, offering you a larger variety of t-shirt templates. It’s super easy. Upload your art, receive a jpeg snapshot of your design. Try it free for 7 days!

Mockup Everything, similar to Shirt Mockup, provides designers with an easy-to-use platform for applying graphic designs to a growing variety of print products in multiple categories including technology, apparel, print, outdoor and food & beverage. Also like Shirt Mockup, both free and Pro versions are available. Mockup Everything is similarly super easy to use and designers receive jpeg snapshots of their designs. Try the Pro version free for 7 days!

Want the very best in Mockup Templates, wrapped up in neat and clean Photoshop files just like you saw Aaron create above? Look no further than the Arsenal. Our Mockup Template packs come in all varieties, from tees to hoodies, posters to tanks and more.