Blog
Create a Glossy RSS Feed Icon using Photoshop
![]()
In this tutorial you will learn how to create a glossy TV style RSS feed icon using the basic Photoshop functions like, Layer Styles, Layer Masks and Filters.
Take a look at the image we will be creating in this tutorial.

Step 1
Create a new document with 500px by 378px canvas. Set the background color to white. Create new layer, name it ‘frame’. Then select the rounded rectangle tool (U) from the toolbar and draw a 240px by 193px rectangle with 5px radius. Fill it with light grey (#dbdfe3).

Step 2
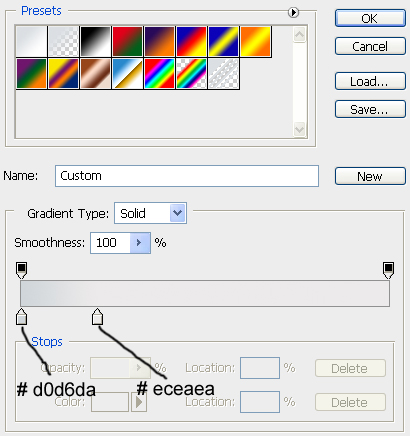
Select the ‘frame’ layer. Then go to Layer > Layer Style > Gradient Overlay. Now apply the following layer styles.

After applying the layer styles it should be look like this.

Step 3
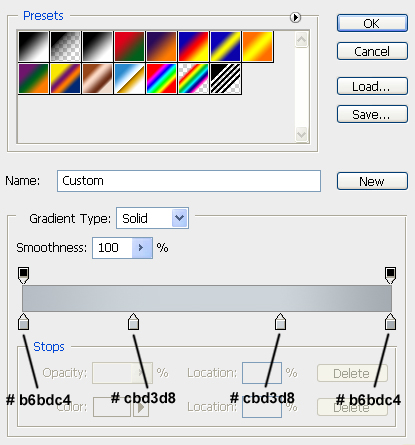
Copy the ‘frame’ layer (ctrl+J). Name it ‘gradient’. Then, go to Layer > Layer Styles > Gradient Overlay. Apply the following layer styles.


Click ‘Add Layer Mask’ at the bottom of the layers palette. Then select the gradient tool (G). Select black to white and draw a down to up gradient on the frame.

Now it should look like this.

Step 4
We have to give the frame a 3d look. So, copy the ‘frame’ layer, name it ‘frame_back’ and place it under the ‘frame’ layer. Now press the up arrow key three times.


Go to Layer > Layer Style > Inner Shadow. Give it the following layer styles.

After that, it should look like this.

Step 5
Let’s add the screen. Create a new layer, name it ‘screen’. Select the rectangular marquee tool (M) from the toolbar and draw a rectangle with 219px by 152px. Fill it with dark orange (#e9691c). Place it on the frame as in the image below.
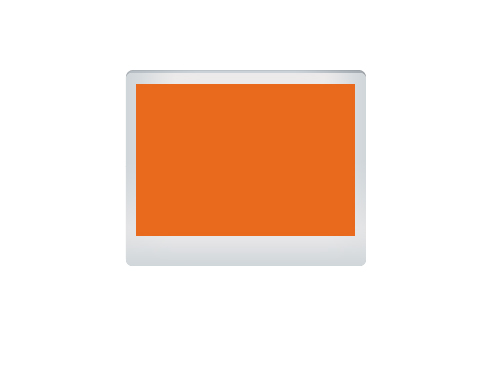
Then, Select the ‘screen’ layer and go to Layer > Layer Style > Inner Shadow. Apply the following layer styles.

Gradient Overlay

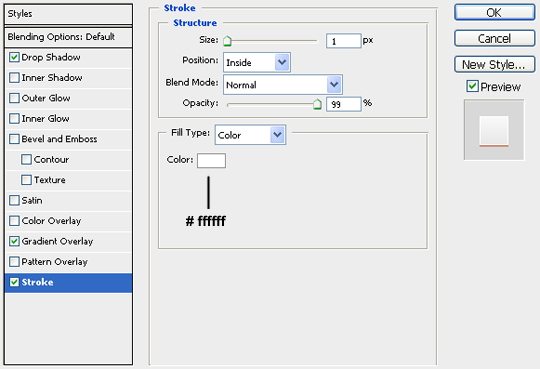
Stroke

Now it should look like this.

Step 6
To make it stylish, add a glow in the screen. Create a new layer, name it ‘glow’. Select the elliptical marquee tool (M) from the toolbar and draw a 127px by 127px circle. Fill it with light yellow (#fccd28).

Now go to Filter > Blur > Gaussian Blur. Set the radius to 38 pixels.

Now Control+click on the ‘screen’ layer thumbnail and click ‘Add layer Mask’ at the bottom of the layers palette.

Step 7
Now we have to add the RSS symbol. Create a new layer, name it ‘symbol’. Select the elliptical marquee tool from the toolbar. Draw a 24px by 24px circle. Fill it with white.

Now go to Layer > Layer Style > Drop shadow. Apply the following layer styles.

Gradient Overlay

Stroke
Step 8
We don’t have to draw the elliptical lines with pen tool, there’s an another process. Create a new layer, name it ‘s1’. Select the elliptical marquee tool. Draw a circle of 159px by 159px.

Fill it with a white.
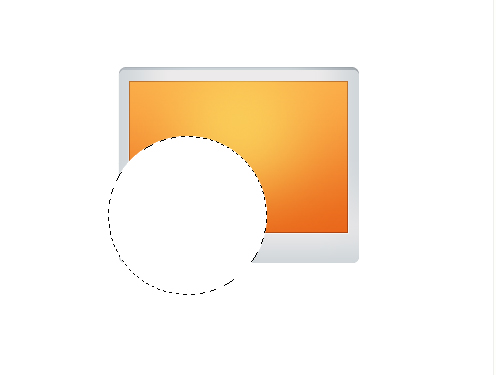
Now right-click on the circle. And select ‘Transform Selection’.

Now make it smaller.

Now press ENTER. Then press DELETE.

Select the rectangular marquee tool. Select the half of the circle and press delete.

Delete the lower half in the same process.

Now deselect the selection and go to Layer > Layer Style > Drop Shadow and apply the following layer styles.

Gradient Overlay
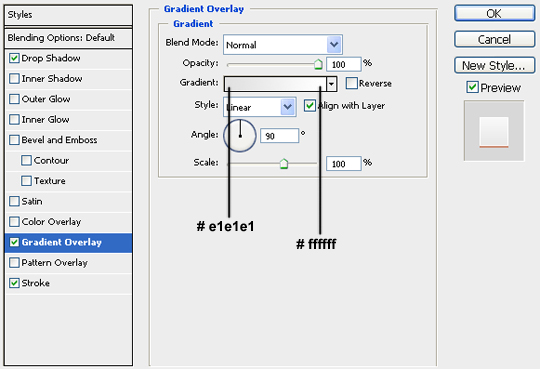
Stroke

Create another line in the same process and apply the same layer styles. Then it will look like this.

Step 9
Let’s give a reflection to the screen to make it glossy. Create a new layer, name it ‘reflection’ and select the pen tool and make a shape like this.

Fill it with white. Mask it with the ‘screen’ layer.

After that, reduce its opacity to 7%

Step 10
Now add a button on the frame. Create a new layer name it ‘button’. Select the elliptical marquee tool and draw a 13px by 13px circle. Fill it with white.

Now add the following layer styles.

Stroke

Step 11
Now we have to draw the support. Create a new layer, name it support. Select the rectangular marquee tool and draw a rectangle of 68px by 44px. Fill it with light black.

Now apply the following layer styles.


Step 12
Create a new layer, name it ‘floor’ and select the rounded rectangle tool and draw a shape with 3px radius.

Then press Control+T, select skew and make it like this.
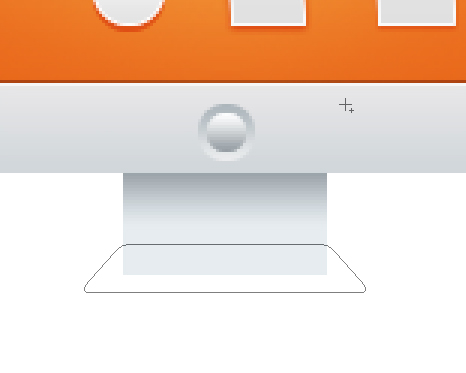
Fill it with white. And apply the following layer styles.

Stroke


Now create a new layer and select the rounded rectangle tool and draw a shape with 5px radius. Fill it with black.

Then delete the upper half of the shape. Place it under the ‘floor’ layer.

After that, apply the following layer styles.

Gradient Overlay


Now it should look like this.

Step 13
The last step is adding the shadow. Create a new layer, name it ‘shadow’. Select the elliptical marquee tool and draw a shape like this. Fill it with black.

Then go to Filter > Blur > Gaussian Blur. Set it to 30.8 pixels. Set the opacity to 70%.

Then decrease the height of this layer (Ctrl + T) to reduce its height.

This is the final image.

Download the PSD of the files used in this tutorial: [download id=”64″].