Blog
Tutorial: Rockin’ Some Radical Glitch Effects in PS (plus 4 Free TV Glitch Textures just for YOU)
TV Glitch Effects: Makin’ Em in PS (& Free TV Glitch Textures, Too!)
So guys, we’re kind of obsessed with these tv glitch textures we’ve been seeing around town lately. So, we created some for you to use and apply to your work right now.
Download: 4 Free TV Glitch Textures by Go Media’s Arsenal
We also thought you might like to learn how to apply your own glitch effect on photos in Photoshop. So stick around and we’ll create some magic together.
Ready, set…
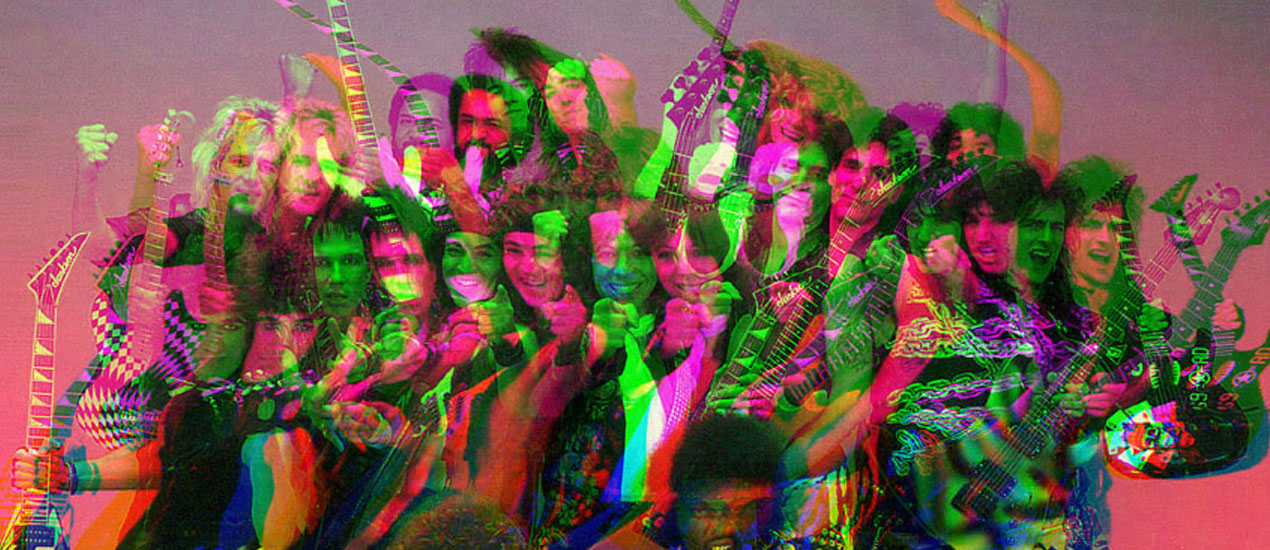
Step 1
Choose your photo and open it up in PS.
Something about this photo really called to me. Can’t put my finger on it.

Step 2
Press play.
Step 3
Open up your channels panel, then highlight your red panel.

Step 4
From your menu options, select Filter > Distort > Shear

Step 5
Using the points given, create a soft wave.
In the “Undefined Areas,” section, select “Repeat Edge Pixels,” then select “Ok” to Save.

Step 6
Look back at your channels panel. Make sure all of your colors are selected now. What do you think? Love what you see? Want more cowbell?

If you’re craving more glitch, select your green panel and repeat the process we completed in Step 5.

Step 7
And, you guessed it! Feel free to repeat with the blue color channel as well.
Play with it until you’re satisfied.

Step 8
Last, let’s go Filter > Noise > Add Noise. Crank that up as high as you’d like (Gaussian) and Ok to Save.

Step 8
Boom! You’re done! Mock that beautiful art up on a MockupEverything.com or Arsenal template and call it a day. I salute you!

Hope you guys had fun. What freebie textures, what tutorials do you want us to create next? Please let us know in the comments section below!