Blog
Texture Tutorial: using metal and rust textures to destroy a design
Texture Tutorial: using metal and rust textures to destroy a design
Hello all! Simon from Studio Ace of Spade here again, ready to show you how to use my latest textures, the metal dumpster texture pack, to destroy and weather out the crap of your designs.

What’s in the pack?
A little while ago, there was one of these huge metal dumpsters sitting in a parking lot. Since no texture library is complete without rust and metal textures, I got my camera out and shot as many images I could of the banged-up monster. The textures range from subtle speckles in the paint to massive rust damage. This makes this pack highly versatile, and will help you bring either subtle touches or nuclear damage to your pieces.
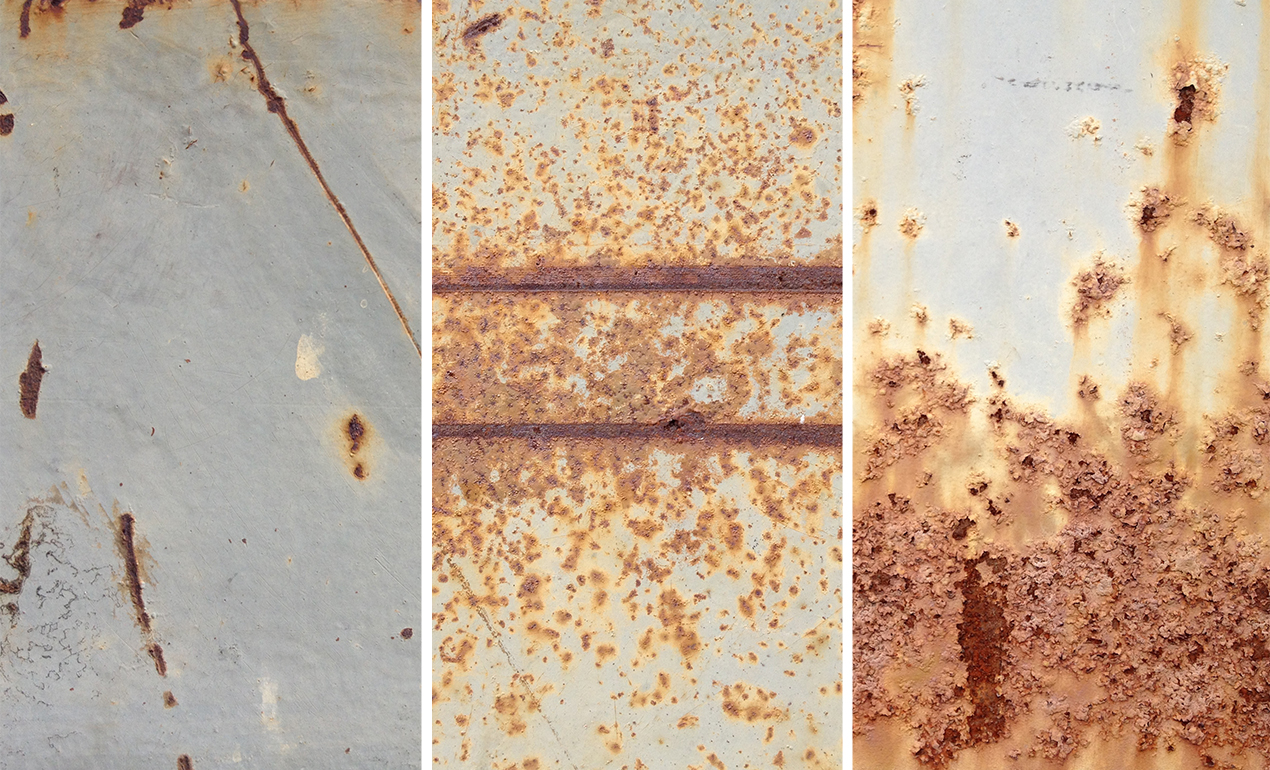
The textures can be used as overlays, or pasted in layer masks. There are 45 textures in the pack, sized at 3264 x 2448 pixels.

How can I use these textures?
Well, I’m glad you’re asking, because just like with my photocopy noise textures pack, I’ve taken the time to write a little tutorial. We’ll be using OKPants’ sweet Road Hog tee design pack as the base artwork for our experimentation. What’s the Road Hog tee design pack, you ask? The Go Media team wrote a very convenient blog post to answer the questions you could have.
This tutorial is rather short, and takes advantage of layer masks and blending modes. Count around an hour of playtime in both Illustrator (Ai) and Photoshop (Ps). Plug your headphones, press play on some nice music, and let’s go.
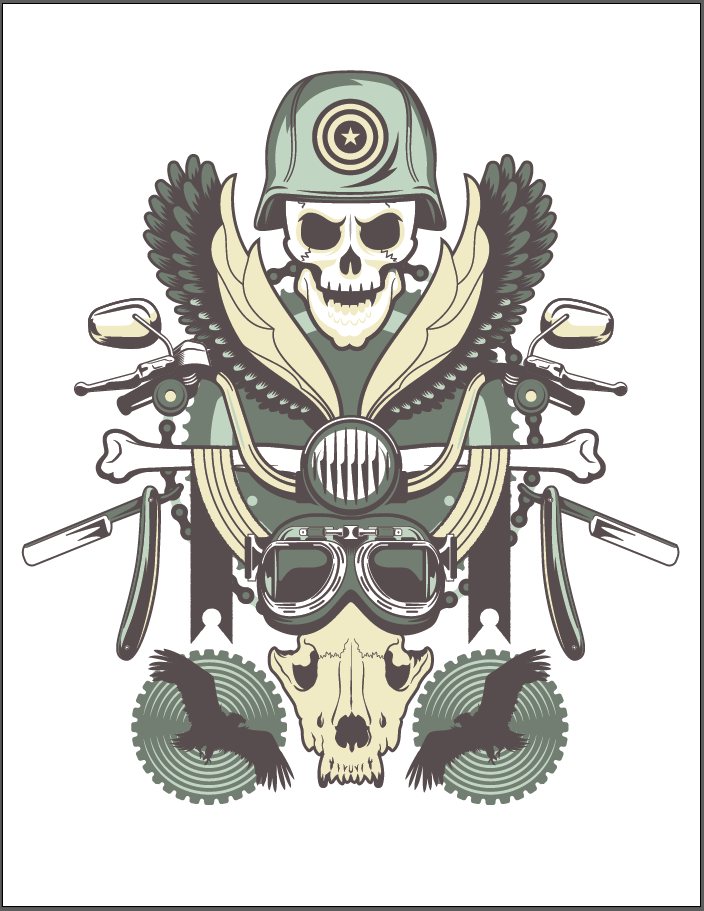
The starting point: preparing the Road Hog design to our liking
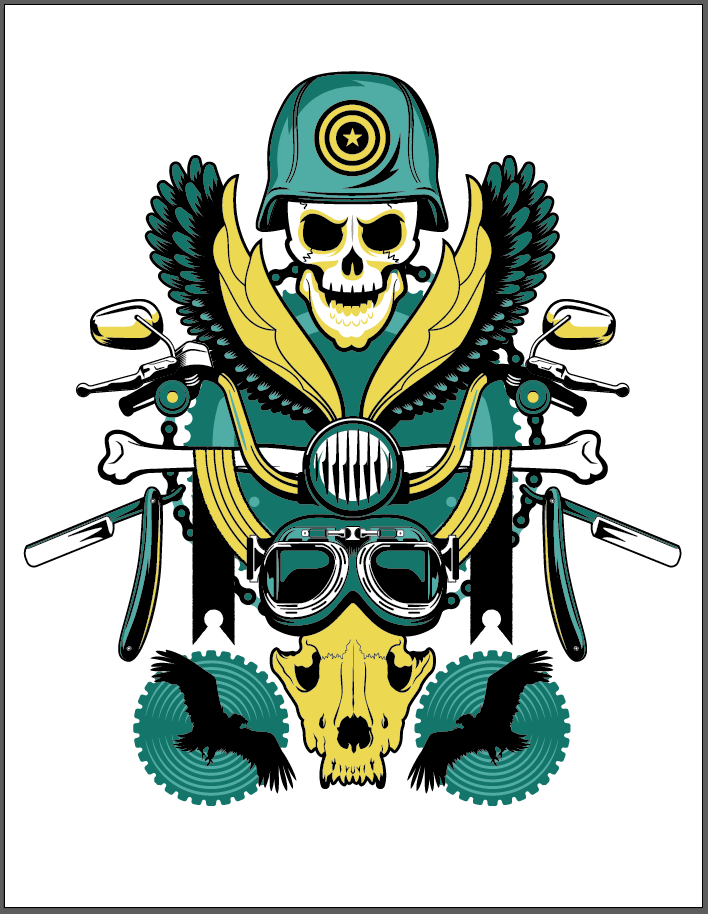
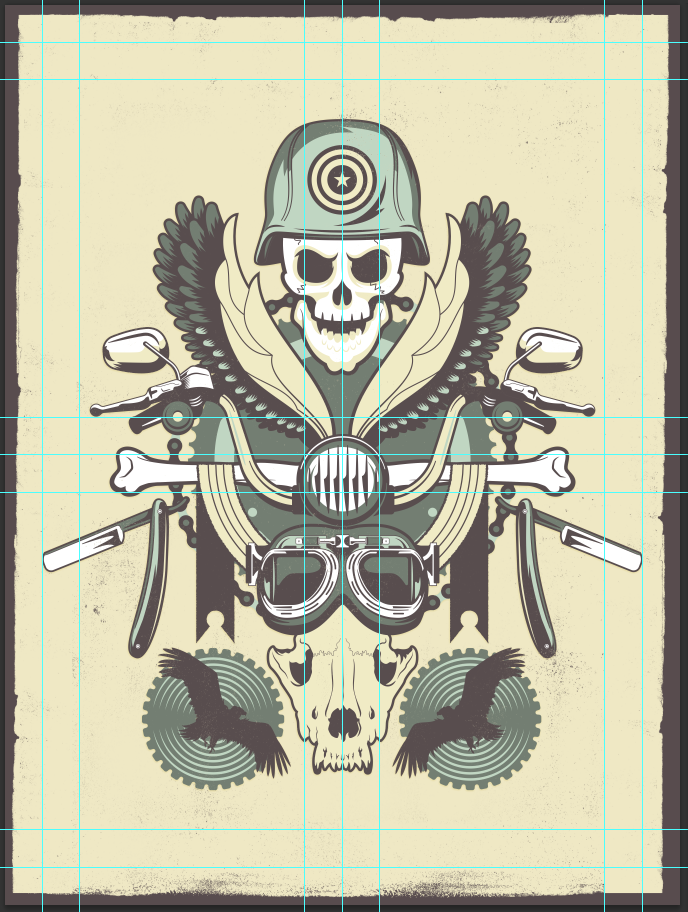
The Road Hog tee design pack includes a biker/Americana inspired design, that you could take apart and re-arrange to your liking. Or, like me, you could just leave it in one piece. Here’s a shot of the design in Ai. This is the “sea foam” color palette.
The design also comes in a black and white color palette, an “heritage” color palette (rust tones), and an “Americana” color palette. Feel free to choose the one you prefer for this tutorial.

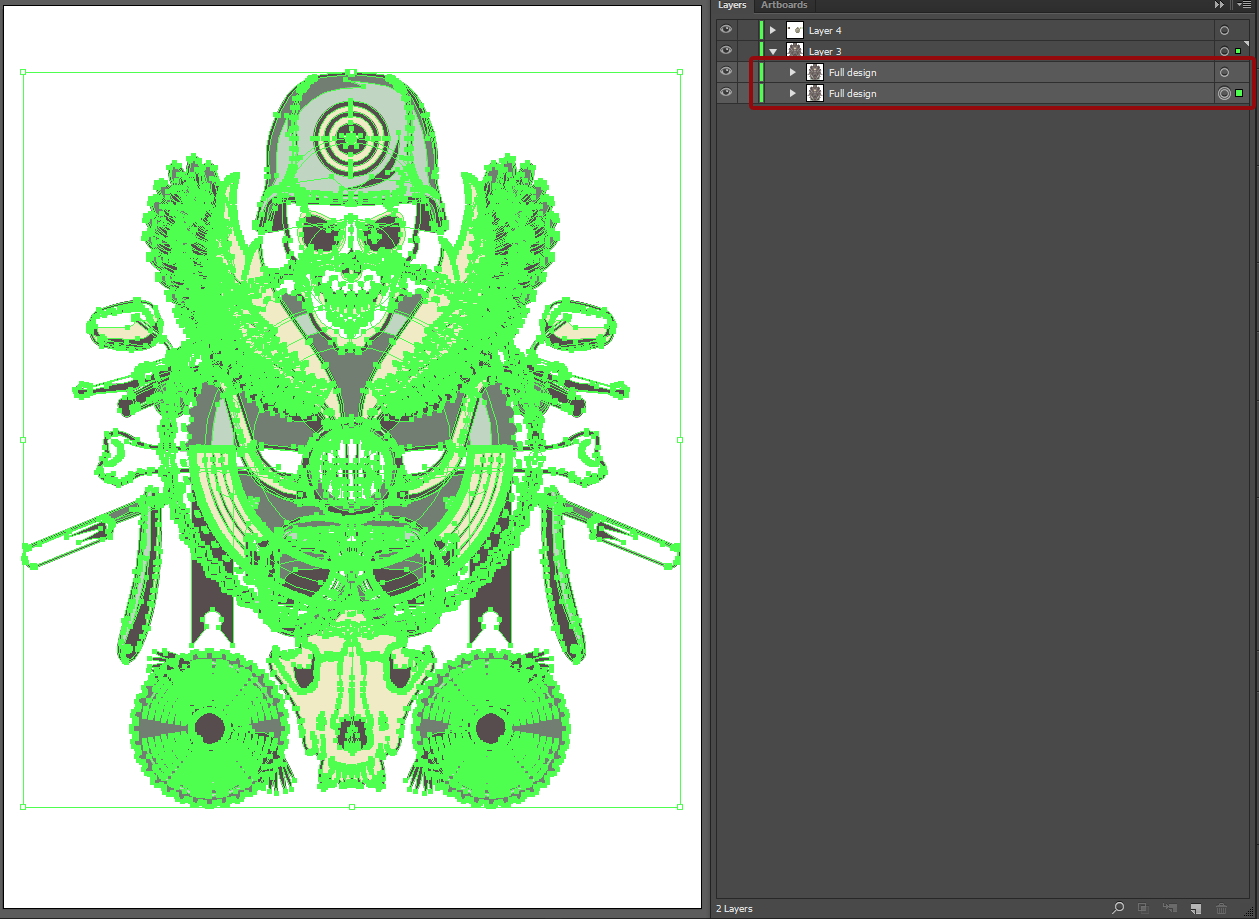
The original sea foam palette is nice, but the tones are a tad too strong and saturated for my taste. After a bit of research on Colourlovers, I managed to find a more subdued version of the color palette. After using the magic wand (Y) and the Select > Same > Fill color menu a few times, our base art was recolored.
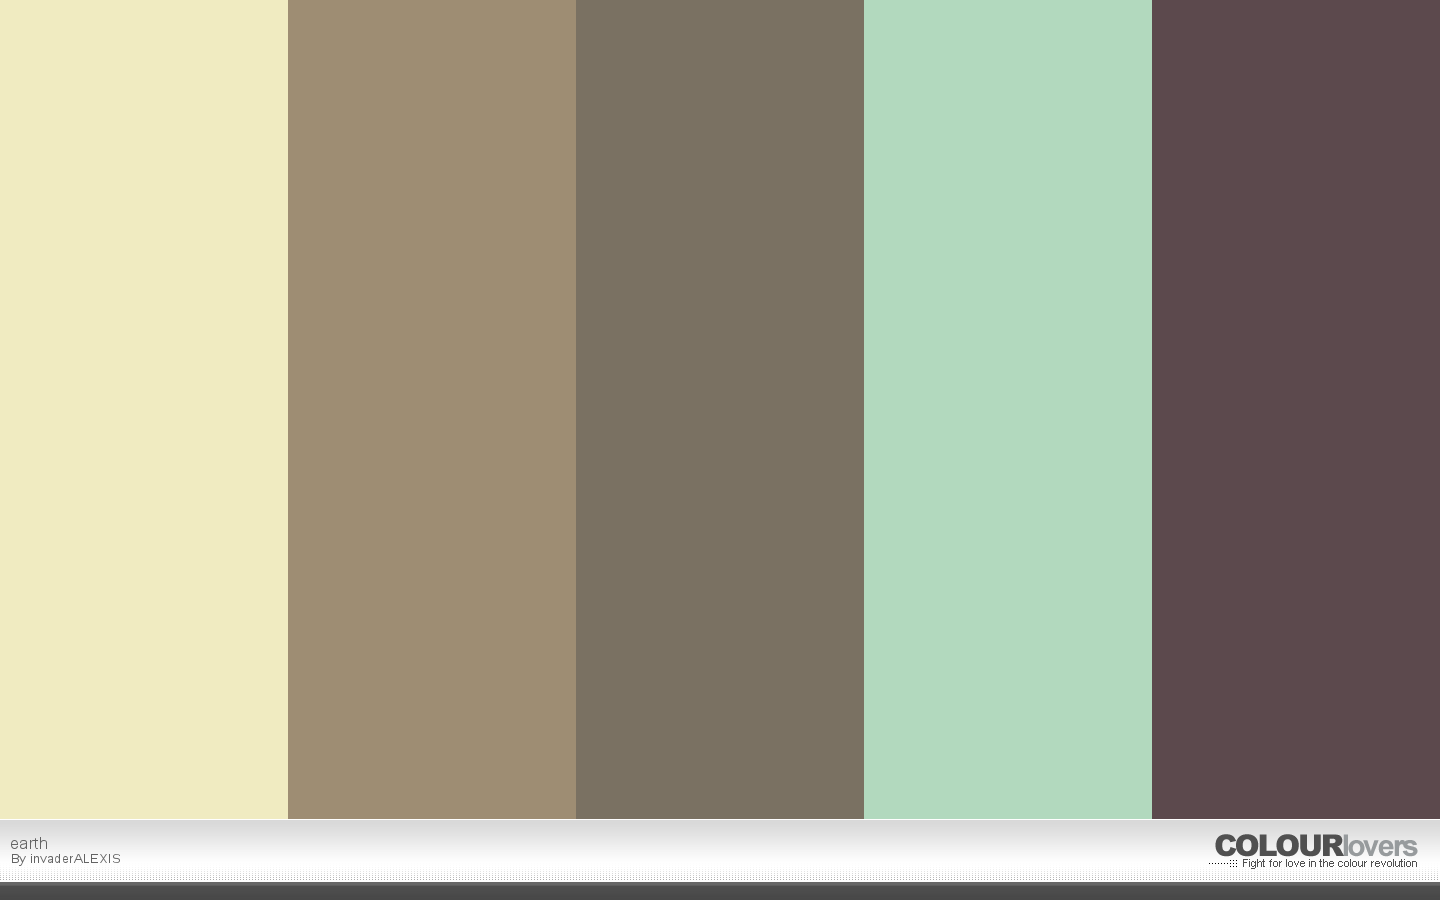
The re-coloration process is really easy since the design is simple and the vectors well constructed. Just make sure that all of your shapes are ungrouped and unlocked, and it should go smoothly. I switched the bright yellow to the faded yellow at the left of the color palette image (#f0eec1), the main blue hue to the palette’s faded blue (#b2dabf), and the black to the dark brown/purple (#5c4a4e) at the right of the palette. I created the darker blue by lowering the brightness value of the light blue, which gave me #727d71.
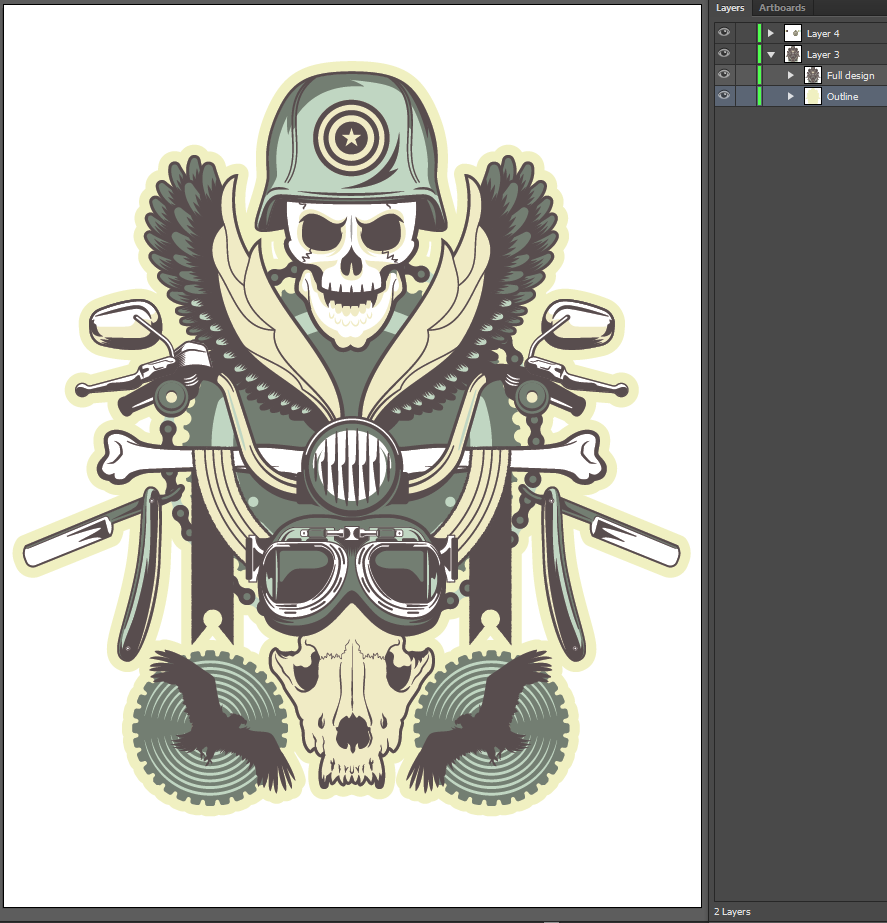
After recoloring the artwork, I added an outline to it. There are multiple ways to do so, but here’s how I do it:
- Make sure all of your elements are grouped together

- Duplicate the design
- Merge the bottom copy in one shape using the pathfinder’s Unite function

- Change the color of the merged shape to #f0eec1. I chose the light color because I thought at that stage that the background of my final piece would be dark (the design has been hidden in this shot.)

- Finally, turn the design back on, and use the Offset path function (Object > Path > Offset path) to create the outline. I use Offset path as opposed to a stroke, because the result looks more polished. The downside to that is that unlike a stroke, you can’t easily edit the width of the outline once it’s been created. A few things about the values I’ve used: the thickness of the offset is set at 1/8th of an inch, and the joins to round for a softer feel.

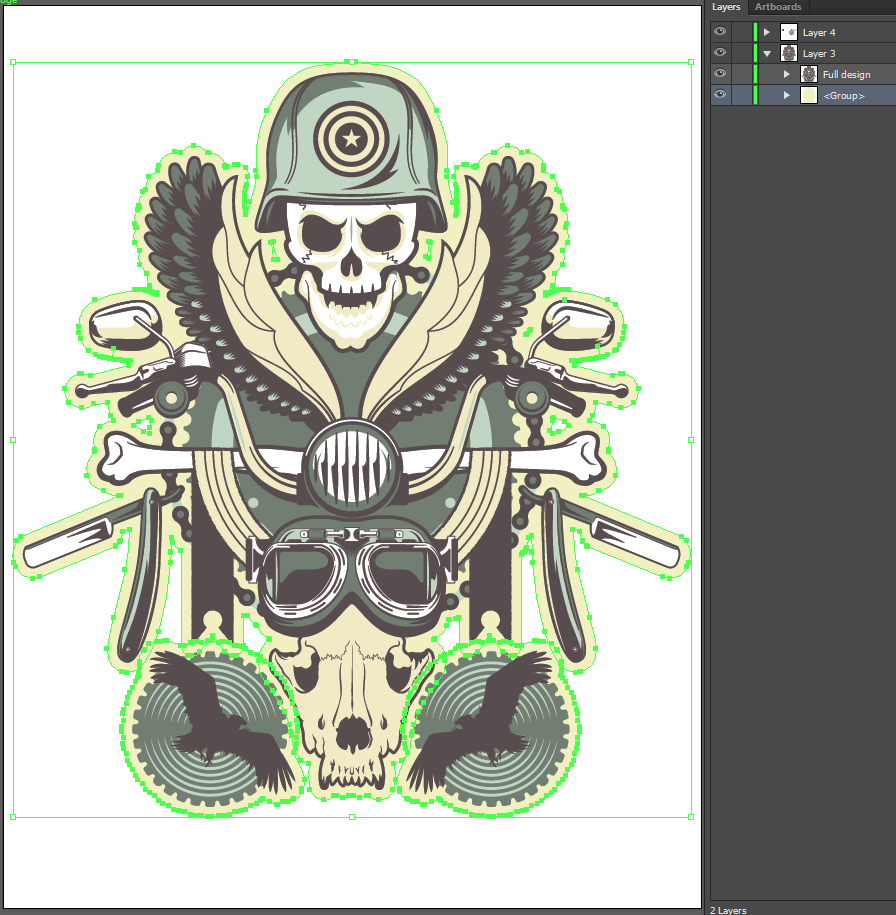
- We’ve got ourselves an outline. To make things a bit cleaner, you can run the pathfinder’s unite function on that outline group one more time. This will fuse the multiple shapes that compose it together, living us with one big, clean entity. I’ve highlighted in red the area where the most simplification will happen.


Now that we’ve got ourselves a recolored and outlined design, it’s time to move things to Photoshop.
Setting up the stage in Ps
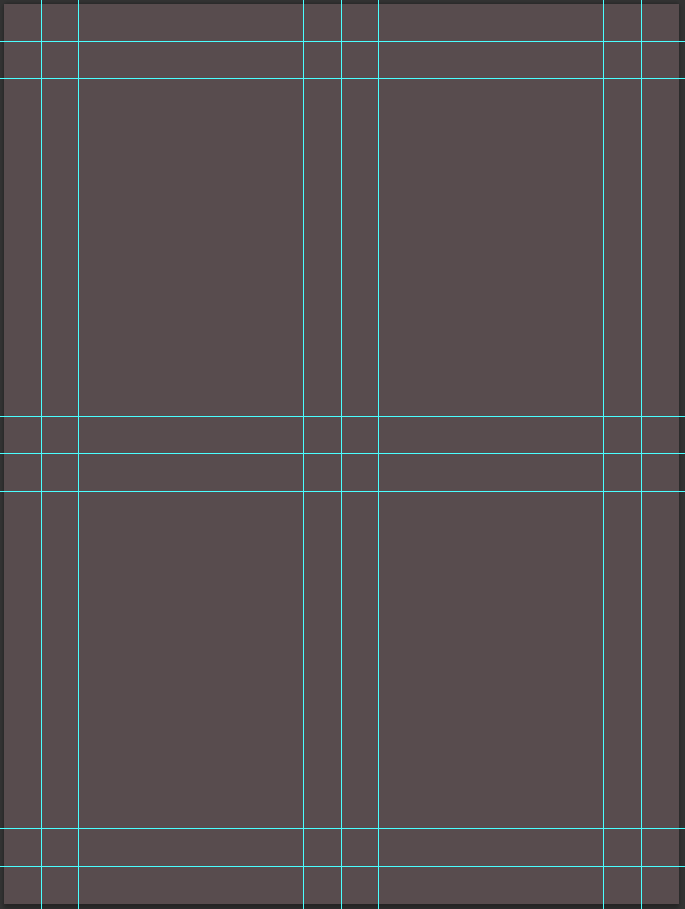
Much like when we were playing with the Awaken design, our Ps document will be an 18″x24″ @ 300 dpi canvas. This time, it’ll be setup in a portrait orientation.

I’ve completed the setup of my document with guides. I might have created a few too many, but oh well. I have guides at the 1, 2, 8, 9, 10, 16, and 17 inches marks vertically, and 1, 2, 11, 12, 13, 22, and 23 inches marks horizontally.

Background preparation
As I’ve said when we were preparing our vectors and adding an outline to them, my original intentions were to have a dark background on our piece. After progressing in my design, I realized that it wouldn’t work very well, so I went back and made sure that my background would be light instead of dark. For the sake of brevity, I’ll spare you that back and forth in this tutorial. So let’s skip directly to the correct layer order for a light background with a dark border.
Let’s fill the background layer with that faded yellow (#f0eec1) from our color palette.

On top of that layer, create a new one, filled with our dark brown this time (#584c4e).
We’re going to take advantage of the Arsenal’s vintage poster borders texture pack to reveal the underlying yellow layer to make it look like there’s a dark border around our design. The process is very simple, and consists of pasting one of these textures (I used the first one in the pack) in a layer mask. Jeff made a video with step by step instructions, and it’s visible here:
Vintage Border effects in Photoshop using Layer Masks from Go Media on Vimeo.
The result of that manipulation is the following:

Note that if you don’t own the poster border textures, you could paste any other grunge texture in the layer mask. This series of free vintage film plates textures from Lost and Taken would be an interesting alternate, although a tad too intense in this example:
Anyways. Once you’ve prepared your background, it’s time to move along and import our vector design in our Ps document.
Pasting the design from Ai
That’s probably the easiest step: simply copy your design in Ai, and paste in as a smart object in Ps. I sized mine to be around 16 inches wide.

Texturing the design itself
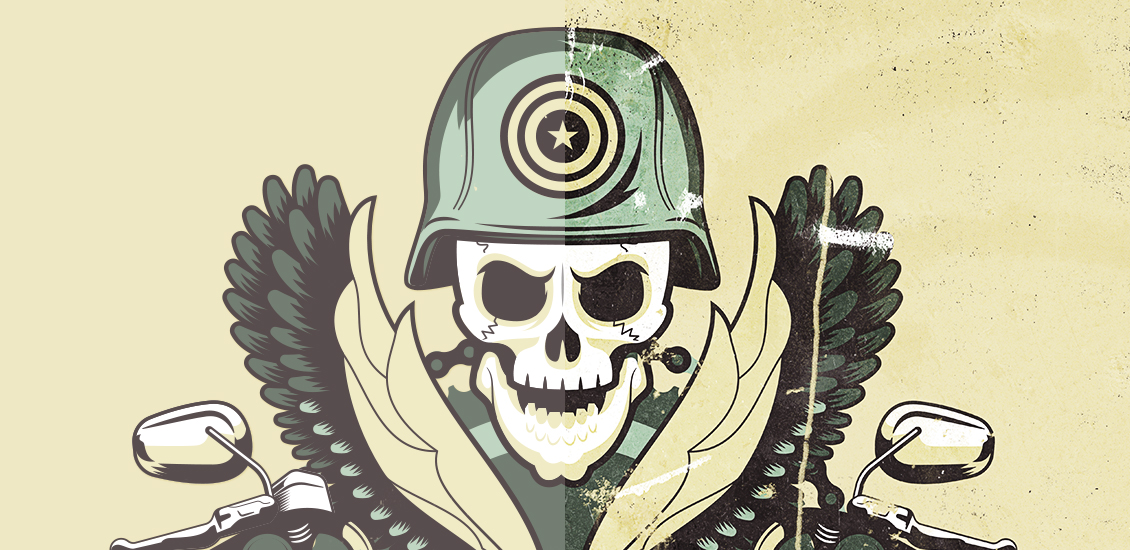
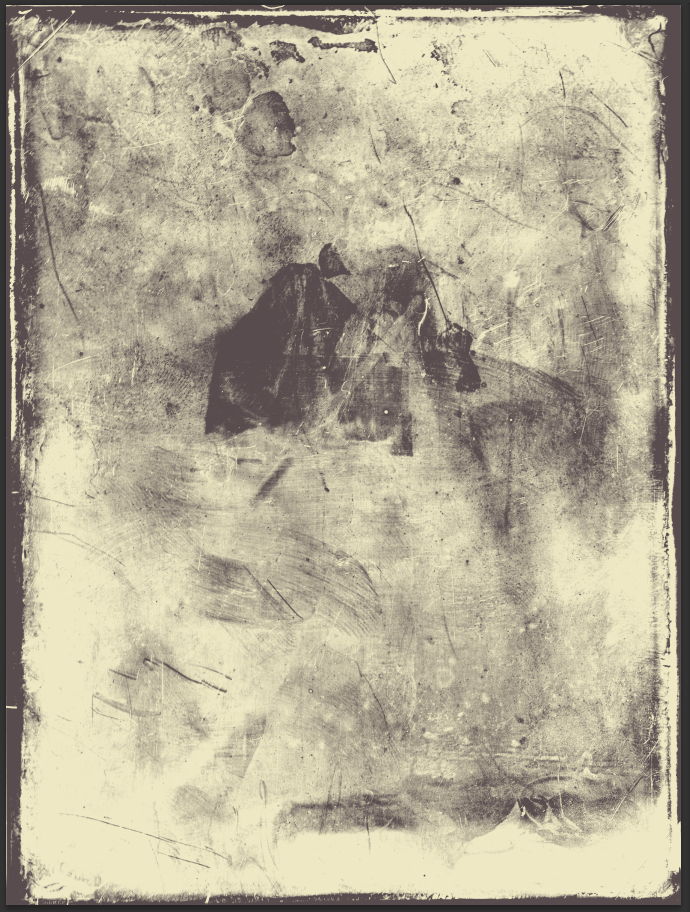
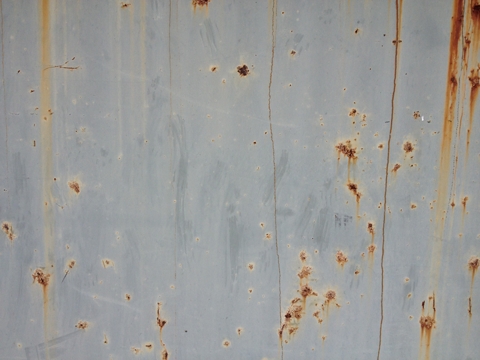
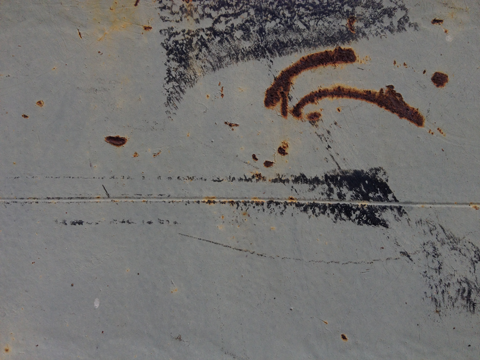
It’s finally time to use the metal dumpster textures. Place metal-dumpster-textures-018-sbh.jpg above the design.
The elements of the texture we’re interested in are these dark scratch marks. In order to extract them, we’ll need to desaturate the texture (CTRL/CMD+SHIFT+U), and to change its blending mode to Screen.

It’s not yet very exciting, I’ll give you that. Next, we’ll invert the texture (CTRL/CMD+I).

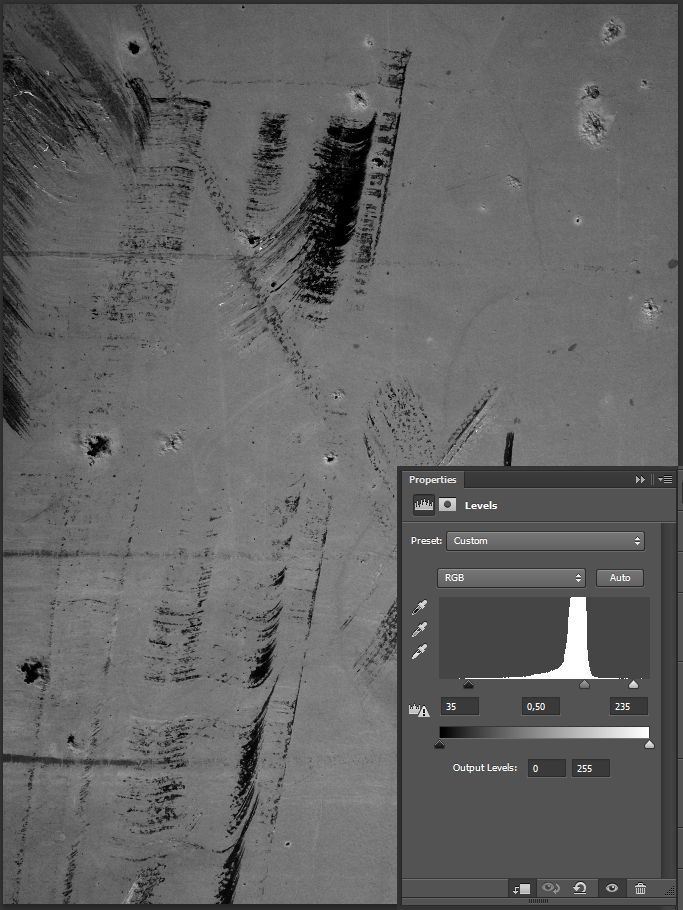
We’re already starting to see these scratches impact the design as if it was painted on metal and exposed to things scraping it off its support. To further the effect, we’ll play with the level palette (CTRL/CMD + L), in order to increase the contrast of the texture.
A few notes about my Levels values: the 100 on the left is the value for the dark tones. It means that I’ve made the dark pixels of the texture darker than what they originally were. The 0.75 is the value for the mid-tones. That slider is normally set at 1. Bringing it to 0.75 means that the mid-tones are also going to be darker. Finally, the 175 on the right is the value for the light pixels of the texture. It’s set to 255 by default. Bringing it down to 175 means that the light pixels are actually going to be lighter. Darker blacks and grays + lighter whites = high contrast texture.

Finally, I’ve leveraged a layer mask to allow the texture to show only on the design and not on the background.
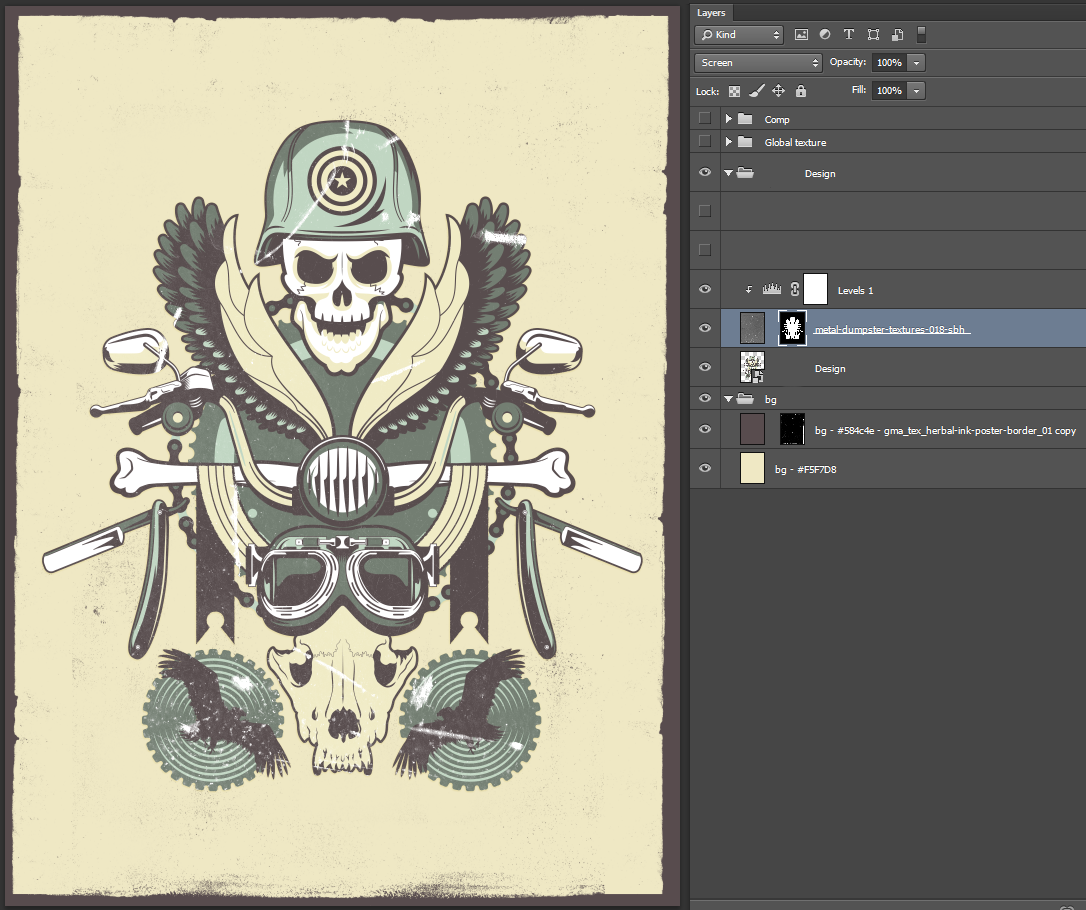
To create such a layer mask is easy. CTRL/CMD+CLICK the thumbnail of your design layer to create a precise selection of its content, then click the new layer mask button at the bottom of your layer palette.
![]()
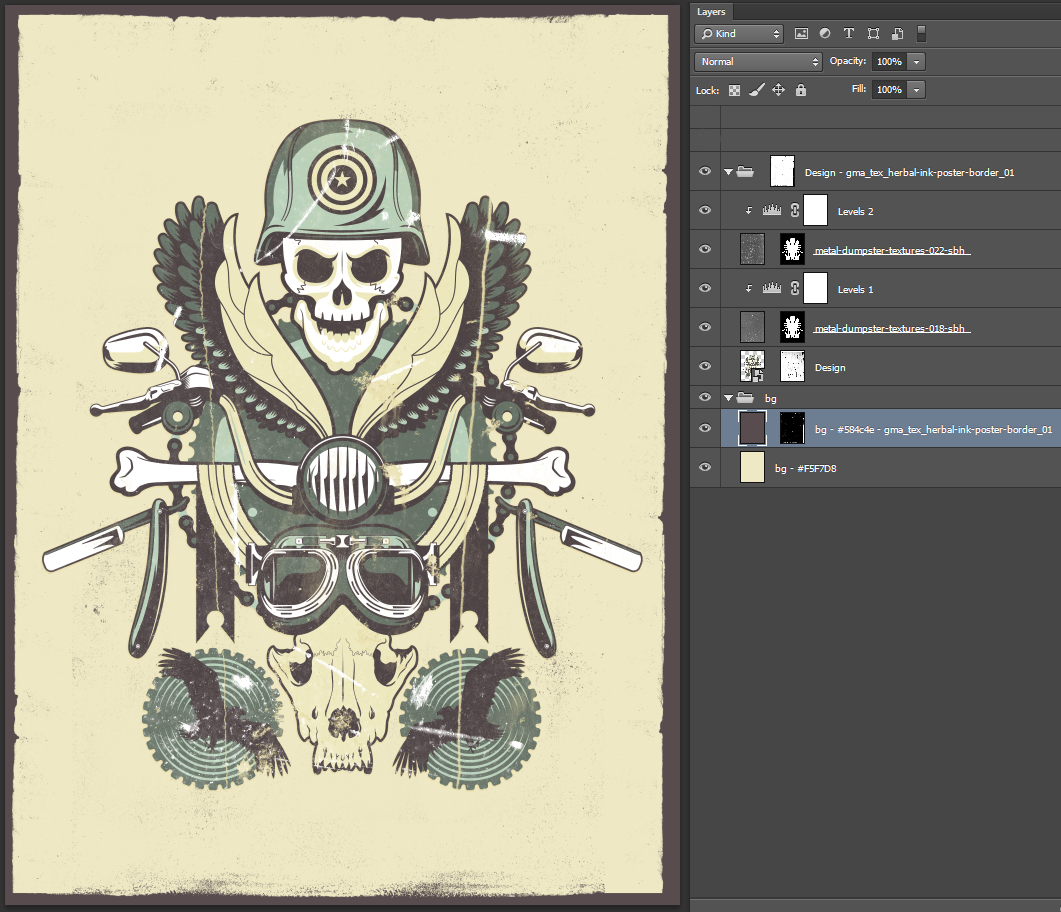
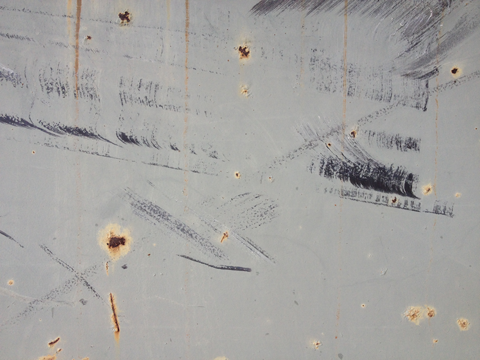
Following a similar process, I also added metal-dumpster-textures-022-sbh.jpg to the design. Its effects are much more subtle, but you can see them in the gear behind the skull/wings/bones element.

My levels values were a bit different:

It’s also to be noted that the texture was not inverted, and put on the Soft light blending mode at 25% opacity. I chose to do so because the results were less aggressive than when using Screen. I’ve also confined its effect to the design only by using the same layer mask process than before.
The next step was to impact the design layer even more than with its two textures. In order to do so, I gave it its own layer mask, and pasted metal-dumpster-textures-001-sbh.jpg into it. After sizing it to cover most of the design, and playing with levels to bring its contrast to new heights, this is the result:
The original texture
Playing with levels

The result

Impacted areas details

To increase the worn feel even further, I created a layer group containing the design’s layer and my texture. I then duplicated the background dark brown layer’s layer mask (CLICK & DRAG + ALT/OPTION+SHIFT) to it. The result isn’t very visible, but some of the mask’s grain lets the dark brown show through.
Global textures
If the textures at the previous step are important because they give their character to the design elements themselves, the ones we’ll apply now are just as important. They participate to tie the piece together, by giving their artifacts to the various design elements and the background in a continuous manner. You can choose to apply a lot of them, or just a few. I have three in my case.
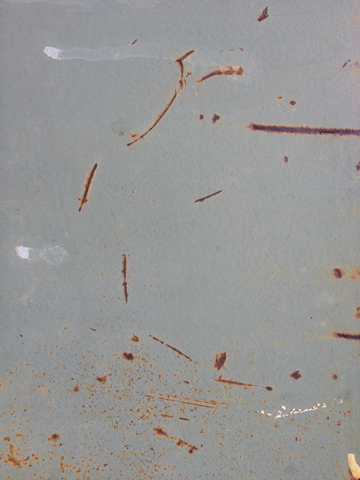
The first one is metal-dumpster-textures-012-sbh.jpg. As you can see, it’s a fairly clean texture. The main elements I’m interested to see passed on to the design are those black, dirty marks. They look like smeared paint.
After placing the texture in the design (rotated 90° counter-clockwise), desaturating it, I’ve leveraged the levels to get the dark and mid-tones much stronger.
Once the blending mode switched to Soft light, and the opacity lowered to 50%, the result brings some subtle darker areas in the top left of the piece. It’s like some liquid slightly stained the art.

The next to last texture we’ll use is metal-dumpster-textures-037-sbh.jpg. It’s a texture that I use as a grain texture. There are only a few speckles of rust here and there, and the rest are a few light dots.

After desaturating it and playing with levels, here’s what the texture looks like:

And below is the result on the piece after switching it to Soft light @ 50% opacity. It’s very subtle, but still adds a little something.
Finally, the last texture I’ve used to add more of the same dirty stain type of finish to the poster is metal-dumpster-textures-030-sbh.jpg.
Nothing special to add to the process used before, other than because this one was a bit intense, I’ve put on Soft light @ 35% opacity only.

The last touches
We could add more textures to the piece, but it wouldn’t add much to the design. It’s better to stop there. Now, you could either leave the piece here, or add just a tiny bit more of contrast and grain. Either way is fine by me, and will equally look nice. You could also add fake folds too, but we’ll get to that in an upcoming tutorial.
The first of the finishing touches is to create a layer that contains a merged copy of all the layers of our piece. There’s a keyboard shortcut for that: CTRL/CMD+SHIFT+ALT/OPTION+E. Simply select your top layer, and press the keyboard shortcut. It will generate a new layer containing that merged copy of your piece. I renamed mine to “Comp” and placed it in its own layer group.

Next, make two copies of that layer. Name the bottom one Aged 2, and turn the top one off for now.
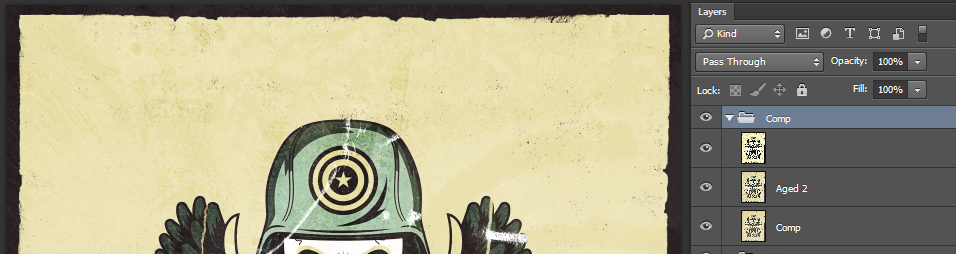
Download this Aged 2 action created by the good peeps at Go Media for an old tutorial, and run it on the Aged 2 layer. Put the layer on Soft light @ 25% opacity. The action created a photocopy type of effect, with something looking like old ink and grain. Below is a close up shot before and after switching the blending mode.

Finally, we’ll use the stamp effect action Jeff released a little while back. Run the action on that last copy of the Comp layer we have remaining. The action will create two layers, one with just the black pixels of the stamp effect, and another one (usually turned off) with some more details. Turn both of the layers on, merge them together, and call the result Stamp. Place that last layer on Soft light @ 25% opacity and you’re done!
If you want more info about the action before buying it, you can read this quick blog post written for its release.

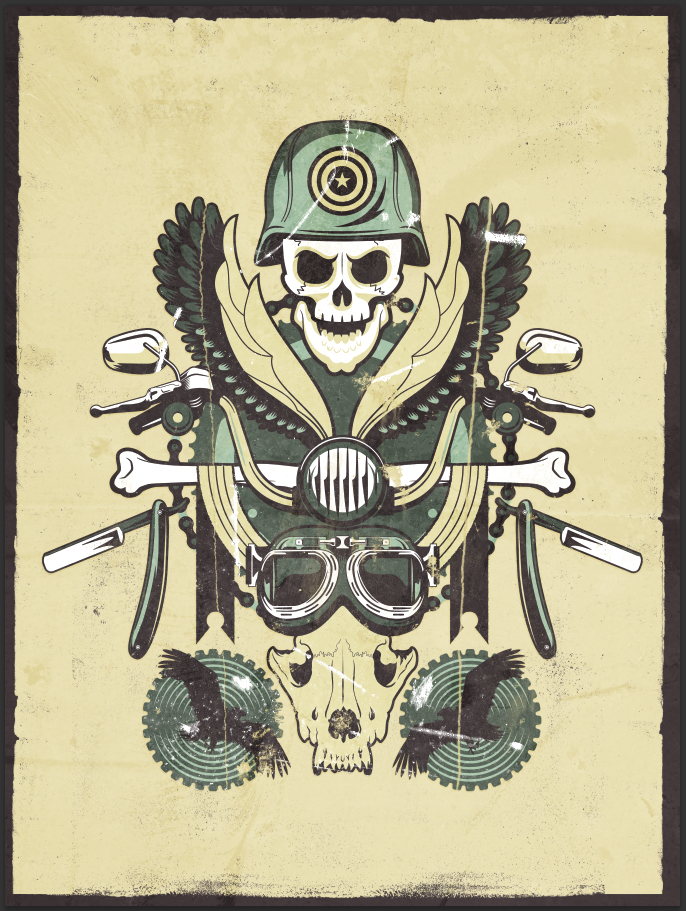
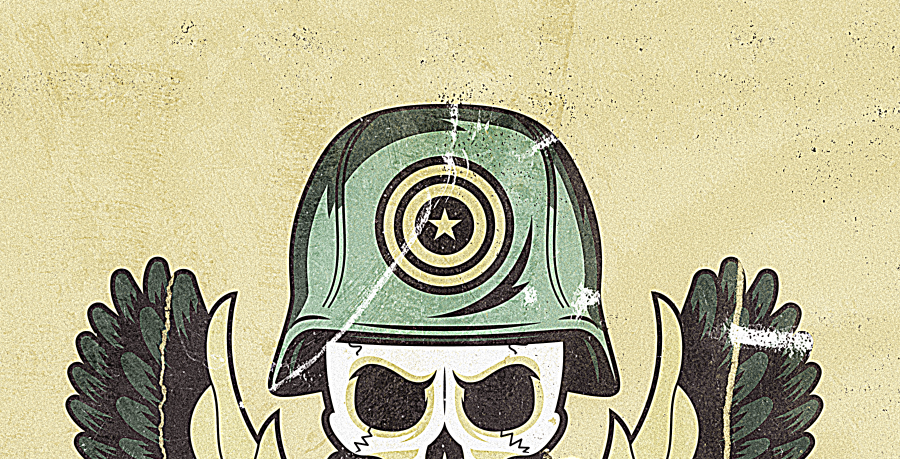
Done!
And the piece is done! Using the metal dumpster texture pack, we were successfully able to age and destroy the design. You should totally mock-up your piece to impress your clients:

That’s it for me today. If you have any questions or suggestion about the tutorial or the textures, don’t hesitate to use the comments, or to tweet at me.