Blog
Tutorial: How to Make a GIF from an Illustration
How to Make a GIF from an Illustration
Hey designers, attend our all-inclusive soul-fulfilling three-day design retreat, WMC: Off-The-Grid, this October 5 – 7th. To learn more, head to wmcfest.com.
Are you interested in creating a simple animated GIF out of your illustration/vector/artwork? You’ve come to the right place! However, before I walk you through this article, if you haven’t already created an animated GIF from a video using Photoshop, that might be a good first step!
Many of the steps in both tutorials are similar, however, this process is slightly more complex. When you’re creating a GIF out of a video, you’re taking existing frames from the video and editing them down to create a GIF. However, for an illustration, you start with 0 frames, which means you need to create your own. This can get a bit more tricky, but if you stay organized, and follow my steps, you’ll get through it in a breeze!
Step 1: Select the illustration/artwork/icon you’d like to animate
For this tutorial, I will be using a vector icon to keep things nice and simple.

Step 2: Separate your artwork into layers
Import your artwork into your PSD document! There are a lot of ways to do this (i.e. importing layers from programs like Illustrator, Procreate, etc. or copy and paste layers between programs.) It’s important, however, to make sure you keep your layers separated. This will allow you to animate specific elements.
Since this is a vector icon created in Adobe Illustrator, I’ll just copy and paste my elements in one at a time.
- Open Illustrator file containing vector artwork
- Determine which elements you want animated, and which layers you don’t
- Merge all of the layers together that you do NOT want to animate and copy them into your Photoshop document first.
- Paste them in as a Smart Object (a window will pop up asking you this)
- Then, go back and paste in the layers that you DO want to animate, one at a time
- IMPORTANT: Copy these layers in SEPARATELY. For example, I want each of the little sparks around my icon to animate on one at a time. That means I need each little spark on its own layer.
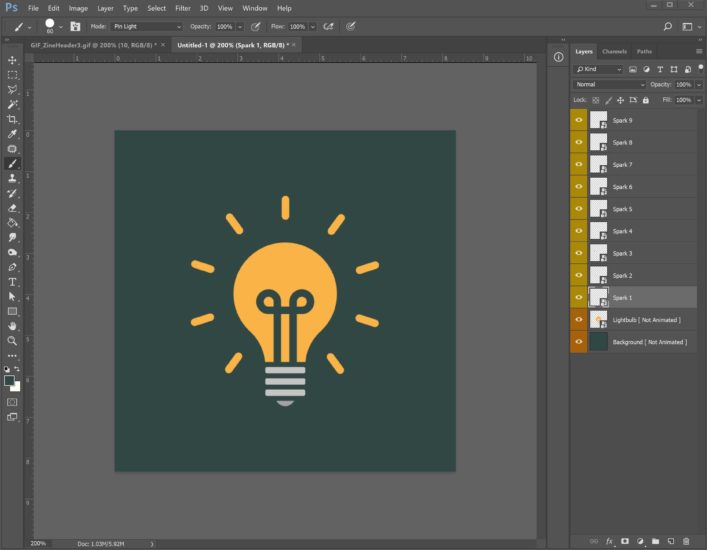
In the above image, you’ll see I have all my artwork separated into layers. I’ve highlighted the layers I want to eventually animate in yellow, and the layers I want to stay static in orange.
Step 3: Setting up your timeline
After you have all of your layers pasted in, and everything looks good, open up the “Animation” or “Timeline” window within Photoshop (the name of this changes depending on which version of Photoshop you have).
- Open it by clicking Window > Animation/Timeline
- When the window pops up, hit “Create Video Timeline”
- Then, within that same window, hit the little hamburger menu (3 horizontal lines) in the top right corner, a menu should pop out
- Mouseover “Convert Frames” and then hit “Convert to Frame Animation”
- After, you should have one frame in your Timeline/Animation window.

Your “timeline” should look like the above photo (I’ve also circled the “hamburger menu” in yellow if you weren’t able to find it)
Step 4: Begin animating frames
Now that you have your document set up, you can begin animating your artwork! For my GIF, I want the little sparks around the lightbulb to flicker on one at a time. This means that I will need 1 frame for each action. And since I have 9 sparks, I will want 10 frames total. I’ve organized it in a list below:
- Frame 1: 0 sparks visible
- Frame 2: Only Spark 1 visible
- Frame 3: Only Spark 1 & 2 visible
- Frame 4: Only Spark 1, 2 & 3 visible
- etc.
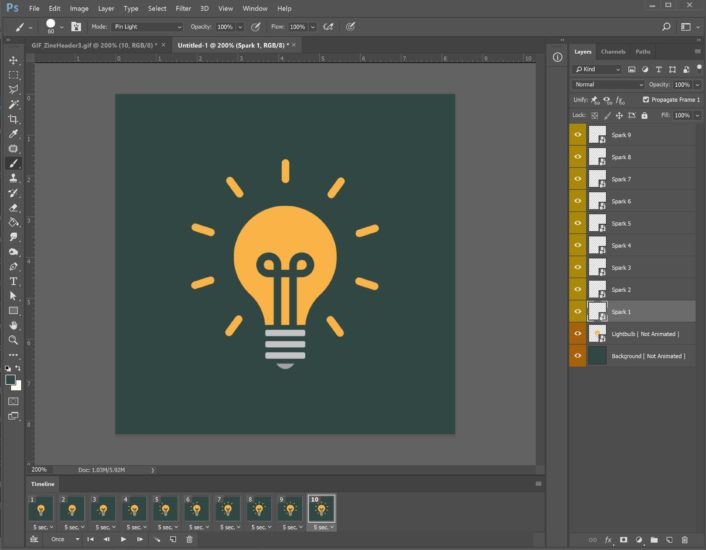

You can see from the small thumbnails in my Timeline window how the sparks are appearing one by one. You’ll also see a little “5 sec” below each thumbnail. That means each frame will be on screen for 5 seconds before moving to the next. We will fix that amount of time in the next step!
————-
ADVANCED TIP:
Although this tutorial is only showing a simple GIF animation, if you want to have actual movement across your GIF, the process works the same.
Let’s say I wanted my lightbulb to float across the screen from left to right. I would need to have my entire lightbulb on one layer, and have it visible on Frame 1.
Then I would create Frame 2 (to create a new frame, hit the icon next to the trash symbol in the Timeline/Animation window), duplicate my original lightbulb layer, nudge my new layer to the right (hold down shift, and hit the right arrow key), and hide the previous layer.
After, I would create Frame 3, duplicate my latest lightbulb layer again, nudge to the right, and once again hide my previous layers. You would repeat this process until your lightbulb makes it all the way across the screen.
————-
Step 5: Edit keyframe rates
Now that you have all your frames created, you might hit the play button and think, wow, why is it taking so long? This is where keyframe speed comes into play!
Select all of your frames within your Animation/Timeline window, hit the little arrow beside the time, and either choose one of the listed times or input your own. I typically like to use the speed .08 seconds, but that’s my own personal taste, and can change based on the project.
After you set a new keyframe rate for your animation, you’ll also want to hit the dropdown for looping options and click “Forever.” This will ensure your GIF will loop for infinity and beyond!


Above images show before and after I set my framerate/looping time
Step 6: Play and Export!
After you finish the steps above, make sure you play your GIF and like how it looks and animates! Once you’re happy, you’ll be ready for final export!
When exporting a GIF, you won’t just “Save As” like you might with a JPG. You’ll want to go to File > Export > Save for Web. Once you hit “Save for Web,” a popup should come on screen. There are a lot of different options here, but in most cases you should just be able to hit “Save” and be done!
NOTE: I go into more specifics on exporting GIFs in my tutorial on creating a GIF from a video.
And there you have it!
If your GIF didn’t turn out the way you wanted, feel free to email me with your questions at [email protected].
I should also note that there are MANY different ways to create animations in Photoshop, so I encourage you to continue exploring and learning! You can also check out another one of our GIF tutorials that shows you how to use the Tween Animation Frames button in Photoshop.
Additionally, if you are looking to do heavy animation work, I would recommend trying out Adobe AfterEffects. The best advice I can give is to experiment! Try different things, mess up, start over and see what works best for you. Good luck!!