Blog
Intricate Patterns in Illustrator
This tutorial will show you how to create intricate patterns in Illustrator super quickly. Stuff that would take you hours to draw manually with the Pen Tool takes just seconds when you use this technique. This tutorial is special because it was written by a guest author. His name is Barton Damer. I think he did a great job this time around and you can probably expect more tutorials from Barton in the future. So if you like it it, show your support and leave a comment! With that said, on with the tutorial!
You can watch the video or read the step by step tutorial below.
Intro:
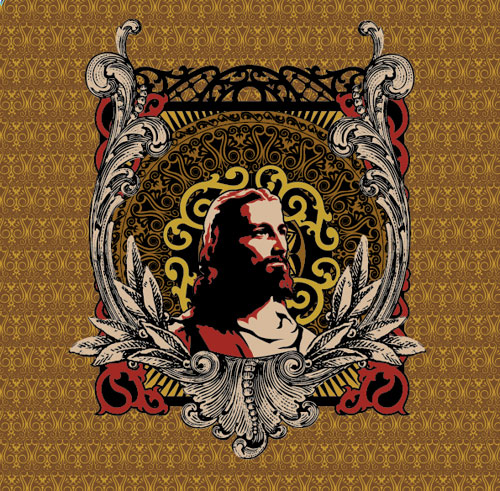
We’ll use some elements from Go Media’s Arsenal to give us a great starting point. In this particular tutorial I used Decorative 2 from Set 8 and also the Currency Ornaments from Set 4. If you do not have these elements, no problem, you can either create your own or use some stuff from our free sample pack. The principal behind this tutorial is using the Pattern Brush tool in Adobe Illustrator.
Step 1:
I chose this single Go Media swirl design from Decorative 8. Outlined it in black with a white fill. Then drew a black rectangle behind it.
Make sure all the items you want to make a pattern from are selected. From the Brushes menu button click the down arrow choose “new brush” (see image below).

Step 2:
That will prompt you to make a choice. Choose “new pattern brush.” (see image below)

Step 3:
You will then see these options (see image below).
These are your default settings and they will work just fine for what we are doing right now. Click “OK.”

Step 4:
Now make a circle and with the circle selected, choose your new brush from the brushes menu. You will see the pattern brush wraps the image around the circle seamlessly. SICK!
(see image below)

Step 5:
Next, I have drawn my own shape and repeated the steps for making a new brush – using the default settings. This shape is a little more detailed (see image below). But you can just as easily choose to use a vertical triangle or a diamond that is stretched vertically. Regardless, use a shape that is vertical in length so that you will see the way the pattern brush treats this element.

Step 6:
Draw a new circle aligned in the center of the current circle. Select your new pattern brush from the menu and peep the rad shape that would’ve hurt my brain to try to draw on my own! (see image below). Now adjust the size of your stroke and watch what happens! Adjust to your liking.

Step 7:
Now I want to get really detailed with the pattern brush. I’m going to create and intricate shape by combining elements from 3 different Gomedia swirlies. As you create your shape, keep in mind that the edges need to line up perfectly in order to repeat and create the pattern (see the example in red below). I will only use the shape inside of my guides for the pattern brush shape.

Step 8:
Once you have paid careful attention to the edges and know that they will seamlessly line up, make a new pattern brush (repeating the steps from the beginning of the tutorial). Draw another circle that is aligned with the center of the other 2 circles. Apply your new pattern brush. (see image below) Upon seeing the results, I soiled myself and had to change my undies! AMAZING!

Step 9:
(side note: we’ve been using the default settings for the brushes we’ve created. but notice the results when we “flip across.” (see image below) you can also apply these brushes to any shape vector. not just circles.)

Step 10:
I want to make 2 more brushes to complete my overall pattern. One of them is another swirly from Gomedia, the other is simply a black box with a white triangle. (see image below) Again, repeat the steps for making a pattern brush. Default settings are fine.

Step 11:
My pattern now looks like this. You can see that all of this detail contains only 5 vector circles! (see image below)

Step 12:
This pattern is going to be part of a larger design. So I’m going to mask it by drawing a square around it and making a clipping mask. (see image below)

Step 13:
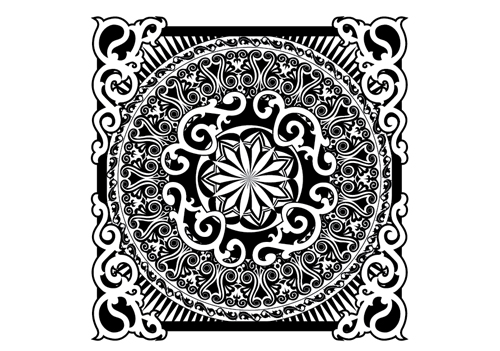
And now I’ve added some more Gomedia swirls to the corners and a nice thick black stroke around the mask. (see image below)
Step 14:
Check this out… Go to Object > Expand Appearance. Now you have vector points for each piece of your pattern. (see image below)

Step 15:
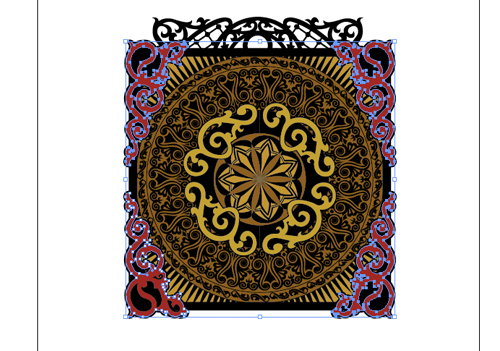
Now I can choose colors for individual elements or groups. (see image below). I’ve also continued my design by adding another design from Gomedia to the top.
Step 16:
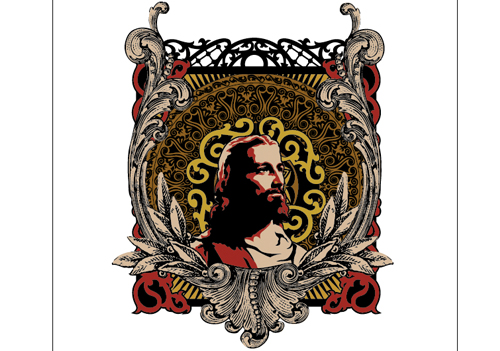
Continuing to add to my design, I’ve chosen 3 elements from the Gomedia Currency set to create the detailed framing in tan/black outlines. (see image below) I have also taken the time to draw Jesus. See Gomedia’s tutorial on “Beautiful Vector Illustrations” to complete this step.
Step 17:
Last, I really want to utilize the use of patterns with this piece so I made the background from straight lines and applied one of the brushes I had already made earlier in the tutorial. (see image below)

Conclusion:
The power of the pattern brush is amazing! Experiment with some of the settings for different effects. You can even select this entire piece of artwork now that it is “finished” and make that into a pattern brush. Super rad!