Blog
How to Draw a Classic Hand using a Graphics Tablet
Introduction
Hey! I’m Whyball and I’m a graphic designer. Since I was a little kid, I loved to draw; at first I started drawing all kind of things that I saw in the books – usually animals were my favorite subjects! After a while I started to create original drawings.
A few years ago I discovered the digital drawing and was excited to see the simplicity of using the graphic tablet. Once again I was combining those 2 ways of drawing: copying and using the imagination.
I recommend to use this technique of copying something when it helps you to save some time while you’re working, or to achieve better quality. For example, if you need to draw a hand in a specific position, and you’re not so sure you can draw it from imagination, my advice is to take a camera and capture the position & form of a hand. It’s useful to have a timer function so you can take picture of your own hand easily.
Here is an example of some wings I drew using this technique. These wings are yours to use in your designs royalty free and can be purchased from the Go Media Arsenal.

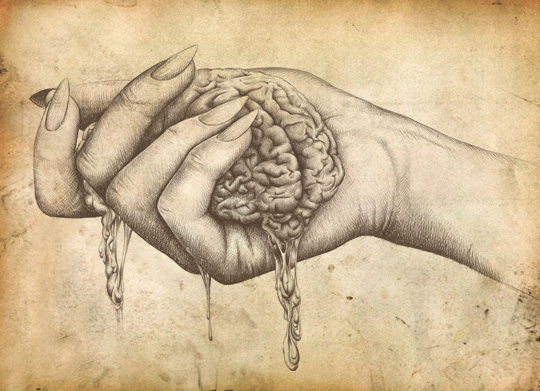
In this tutorial I want to show you how I draw a hand using a picture plus some imagination, and make it all look like a classic pencil drawing!
I use this kind of drawing to give to the design an artistic look. In my opinion the hand drawing effect looks great applied on anything from animals to gothic ornaments. Another advantage of this style is that you can make great artwork using only one color.
Let’s get Drawing!
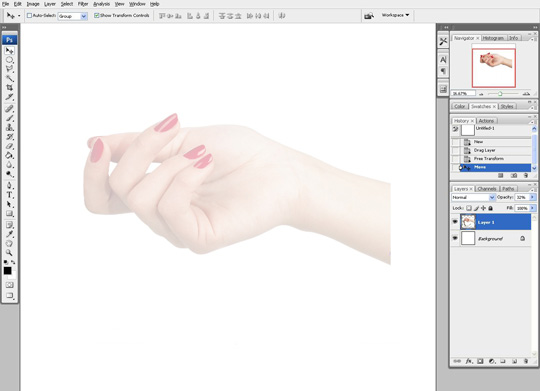
Step 1: Find a Reference
The first step is to take a picture of a hand, you can use the same picture that I used in this tutorial, see the download link below; it already has the opacity reduced to 30 % so it is exactly like the one i started here with .
Step 2: Sketch Guidelines
After that, you should sketch out how you will adjust on the picture. In this case I’ve increased the size of the fingernails, and made a a white area in the middle of the hand where I want to put a small brain. Just make a place holder for now, but make it a little smaller than the actual brain will be so you can draw the hand tightly around the brain without gaps. You can draw some drips too. You can put them between the fingers, and on one side of the hand, like i did. You will sketch all this on a separate layer.

All that being set up, you should start drawing the hand.
Step 3: Build the Outline
The file size that I us is somewhere between 50/ 50 cm and 70/70 cm at 300 DPI. Get your graphics tablet set up & operating properly. Take a look at the settings that I usually use for the brush. These settings work well for the file size we’re using; I recommend that you try them.
For drawing, use a dark brown or gray color (something like 3f311d ), not black. Black has a too strong of a contrast with the white background which gives your linework an overly sharp appearance. So my advice is to use those colors for the brush, but if you want to use black for the brush you can change the background color to a light cream or gray and everything will look OK.

Start by making a new layer where you will draw the outline, it should look like this. You will also draw the lines that you consider will help you in the next step; (the first level of shades), so look for thicker and darker lines from the picture and draw them too.

After the outline is done you can start making the shades, but first I made those red dashed lines which follow the shapes of the hand. You should always have lines like this in your mind when you start hachuring, so you can represent the volume in the right way.

Another thing that I recommend you to do before you start is to adjust the contrast of the picture until it will look like this. This will help you to see where to put the darker and most important shades. You will see that after this first level of shades are made, the subject will start to look good.

Step 4: Begin Hachuring
Now, when you start the hachure, don’t forget to make a new layer. I recommend that you always make a new layer when you do something new or different on your design and you’re not sure how it will going to look.
We all know how bad is to work on a wrong layer…. :)
Now your drawing should look like this. The hatchring it’s made from overlapping lines in different directions and different lengths, so where you want to make a darker area you will draw thicker lines. In lighter areas you will leave only a few lines and you can make them thinner for an even lighter tone.

The hachure should look something like this, here you can see how on the left/down side is darker then the rest. That’s because of the multiple overlapped lines. If you will make it smaller you will see the effect that I want to achieve; and that’s to look like a textured gradient.

Step 5: Add Details
After you have finished with the darker tones, make another layer, and start working on the details. You should not make too many details, or at least not small ones because you will not be able to see them when the drawing will be printed.
To assure that you have enough details you have have to look at the drawing at approximately the size that it will be printed and see how it looks. Or better yet you can print it on a paper at the real size so you can have a preview of the final work.
Drawing the Brain
Now in case you are not used to draw brains, find a picture of one and try to imitate the texture that you see on it. The most important thing when you will draw it is to respect the light source when you make all the ‘’wrinkles’’. This will actually make it to look like a brain.
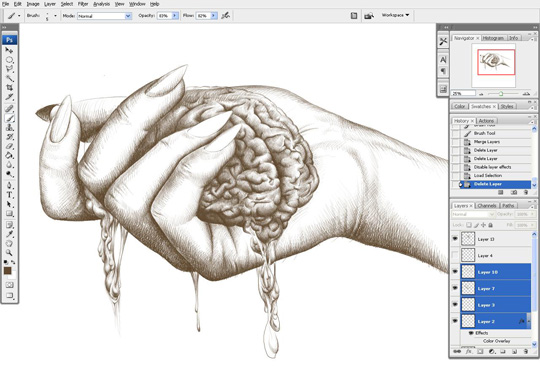
Now it’s time to merge the layers you created while drawing the hand. Once merged, apply a color overlay effect to give it a red color. Now you can see the parts from the hand that you will have to erase, parts where the brain and the hand are overlapping.
Now you will understand better why I told you earlier to make the placeholder for the brain smaller than the brain will be. It’s easier to erase what’s behind the brain.

Now you can delete the color overlay effect and get rid of the unwanted layers, if you have some. If you think that you may want to color the drawing later, you can keep separate layers for the hand and for the brain.

Final Touches
Step 6: Add Extra Shading
Finally let’s put some shades around the brain as you think it would reflect on the hand. And you should remember to keep the same light source whenever you put new shading.
And now you can merge all the layers together, and you’re done!
You can use this technique for making t-shirt designs, illustrations, posters, you name it. From my experience I can tell you that it will be appreciated very well.

Step 7: Add Texture to the Final Presentation
If you want the drawing to have more impact when showed to a client, I recommend you to change the white background to one more ’’artistic’’. Usually I use a combination of different textures and old papers pictures, and it should look like this.
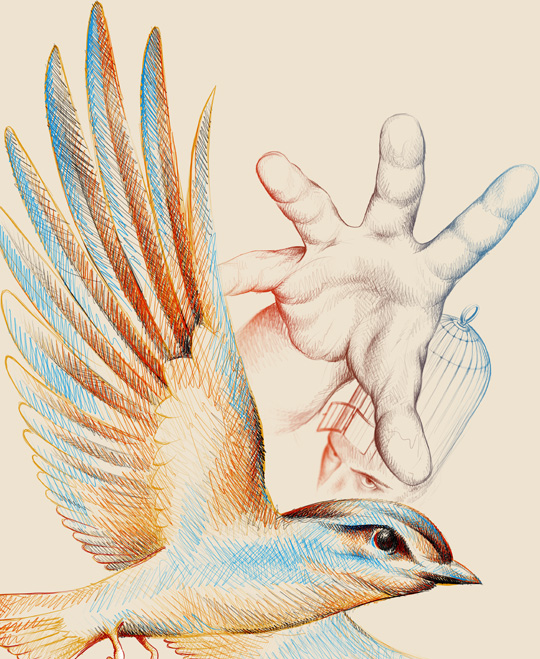
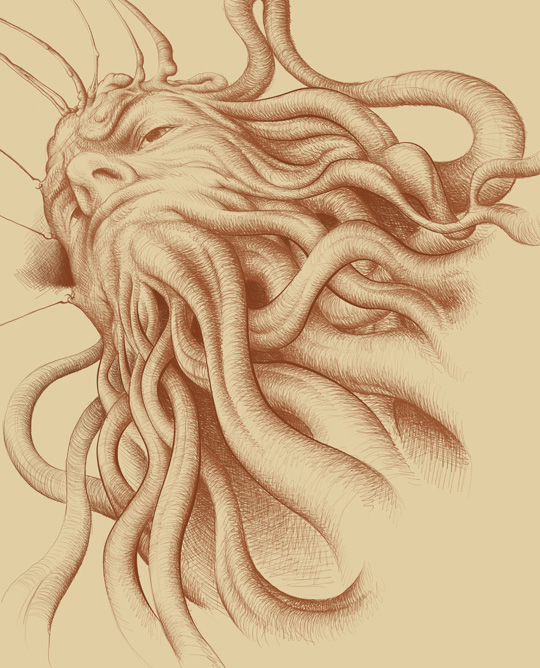
Here are some details from the drawing, and some designs that i created using this technique.


More Examples of this Technique


I hope you liked my tutorial and find it useful, for any other question, don’t hesitate to write here or contact me at [email protected]. Thanks for reading!