Blog
Fudgegraphics’s June 2011 Wallpaper: A case study

Hi, I’m Franz — a London-based freelance graphic designer and founder of the design blog Fudgegraphics. As a personal project, I create a new desktop wallpaper each month featuring the current calendar month. It’s a pleasure to share some insights into the creation of “Rise – June 2011 Calendar Wallpaper”.
Something that I want to make clear from the start is that this is not a step-by-step tutorial, but rather a case study showcasing some of the techniques used. It wasn’t easy writing this article, mostly because all of my personal designs are what I like to call “happy accidents”. Hopefully you’ll learn some new tricks and techniques in Photoshop. Most of all, I hope to inspire you to experiment with your own ideas.
I’ve used some of my personal photographs to create the design which is why I won’t be able to make them available. The first two photographs were taken at PS1 in New York when I visited in 2009. Browsing through my photo library I thought that these images would make a great starting point to experiment with different blending modes and see what I can come up. So, let’s get started.
Part 1: The Base Photos

We’ll start with the yellow corridor photo. Open it in Photoshop and duplicate the layer by pressing Cmd (Ctrl) + J. If you take anything from this article, let it be this keyboard shortcut. It’s such a timesaver! Next, we import the green corridor photo. The idea was to blend the two photos together, in order to do so I duplicated the layers and changed the blending modes as well as opacities. In the screenshot below you can see the actual layer order with their respective values. Soft Light, Screen & Multiply are my go-to blending modes and this design was no different. This stage of the process is very experimental and you should try out which combinations of blending modes and opacities work for you.

Not entirely happy with the overall feel of the design, I decided to add one more photo to the mix. This one was taken in Central Park during the same trip to NY. A simple Soft Light blending mode at 20% was all it needed to give it some more organic randomness.

That’s more like it. Now select the whole canvas using Cmd (Ctrl) + A and hit Cmd (Ctrl) + J. This handy shortcut combo copies a merged version of the visible design and pastes it into a new layer. Using a black & white adjustment layer I created a desaturated version of the design on a new layer. Move the colour layer on top and drop it’s opacity to about 50%. This wraps up the first part.

Part 2: Desktop Wallpaper Design
Next we create a new document at 2560×1440 (this is the largest the wallpaper will be and allows us to crop it down to smaller screen resolutions). As a seasoned wallpaper designer I have a Photoshop template file at hand with all the guides for different resolutions in place. This is available to download at the end.
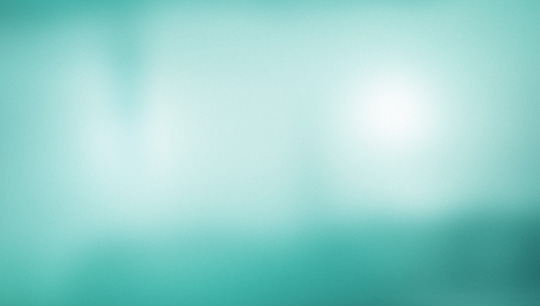
We’ll start with a blurry blue/green background. There’s many ways to achieve this effect, I opted to use a yellow scenery photograph as the base file. Working with photos always add a more realistic randomness to your design. The screenshot below shows how a Gaussian Blur combined with a Hue Adjustment Layer (set to colorize) turns a landscape photograph into a nice background. Note that the photo and adjustment layer are linked, but not merged into one layer. This allows for subtle colour tweaks as we built up the layers. It’s always best to work in the least destructive way so that you can go back and easily make changes.

The image below shows the colour that I liked the most.
Part 3: Combine the files
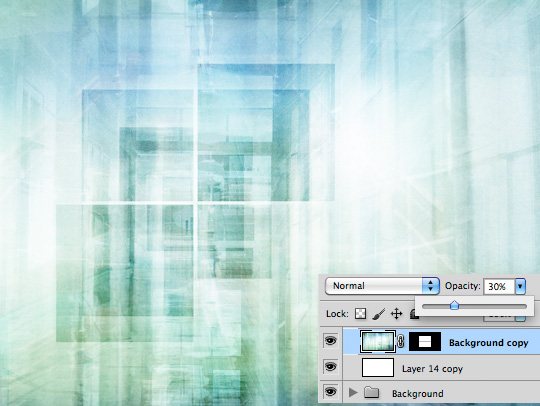
It’s time to import the previous image of the “corridors mashup” as I like to call it. The easiest way to do this is to select all with Cmd (Ctrl) + A and copy (merged) using Cmd (Ctrl) + Shift + C. In the wallpaper file hit Cmd (Ctrl) + V to paste it into a new layer. Convert the new layer into a smart layer which ensures that we never lose any detail! Align the layer so that you can see the bottom half and change its blending mode to Soft Light at 50%. Duplicate. Now move the top half into frame. Duplicate once again and this time use the Free Transform tool (Cmd/Ctrl + T) to scale the image up.


Another technique I use is to invert the image using and adjustment layer combined with a mid-opacity Soft Light blending mode. As said before, this is all very much experimental and each photo will require different opacity levels and blending modes. Don’t be afraid to overdo some of the effects, you can always go back and reduce the opacity of layers as you build up.

Below you can see a breakdown of the layers order. Once I had the overall feel I was going for I inspected each layer individually, changing the opacity and trying out different blending modes. That’s a thing I always do, just making sure that I got the best possible result. Sometimes a 5% opacity change makes a huge difference.

It’s always a good idea to keep your Photoshop file tidy(ish) as you work. So take all your current layers and put them in a group called “Background”.
Part 4: Adding Shapes
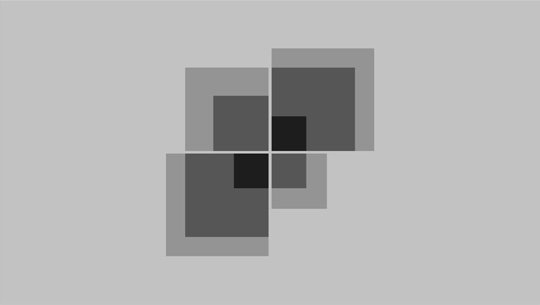
Next up we’ll add some squares to the design. Use the shape tool draw a black rectangle. Set the layer’s opacity to 20%. Duplicate and scale down. Repeat until you have 4 squares. Select these layers and align them at the bottom right. That’s your upper left quadrant. Group the layers and duplicate. Rotate by 90 degrees. Use the move tool (V) to place this in the top right quadrant. Holding Shift while moving will ensure that you only change the horizontal position, not the vertical one. Repeat these steps until you have the four quadrants. Go back into your layers and hide (don’t delete) some of the squares. The image below shows my selection.
Put all the different quadrants layers into a new group and set its blending mode to Soft Light at about 60%. This will add some more contrast to the centre of the design.
I made a few more tweaks to the background such as reducing the opacity of a few layers. The key, as always, is to experiment. I can’t stress this enough. The resulting background design is shown below.

Part 5: Mountain Tops
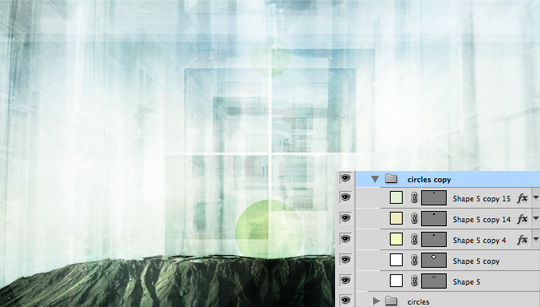
While I was happy with the overall feel of the design, there was still something missing. A quick search on a stock photography site yielded a nice photo of a mountain top. In order to keep with the symmetric theme of the design I took the mountain top photo, duplicated it and flipped it along the vertical axis. Using a Hue/Saturation as well as Curves Adjustment layer the background (sky) was brightened until it was white. Now all that was left to do was to set the blending mode to Multiply to knock out the white parts and blend the rest of the mountain nicely into the background.

The last graphical element to be added are the circles. Just like with the squares, these are simple shape layers with different colours and set to different blending modes at a low opacity.
With the design pretty much done I realised that the squares were a bit too prominent for my taste. That’s an easy fix though. Simply select the squares layer group and reduce its opacity. The preview below shows a few extra layers which I won’t go into. These are very subtle additions and don’t use any new techniques.

Final Wallpaper:

There you have it. This is the final wallpaper design featuring the June 2011 calendar. It’s available without the calendar in most common screen resolutions (including for the iPhone and iPad). If you like it you can download it here.
I really hope that you enjoyed this case study and maybe learned a new trick or two. Feel free to ask questions in the comments. I’ll check back often and will do my best to answer them.
Bonus: Wallpaper Photoshop Source File
If you’ve been inspired by this case study and want to design your own desktop wallpaper then I got a present for you. Exclusively on GoMediaZine you can download the psd file with all the guides for different screen sizes. The following resolutions are included: 2560×1440, 1920×1200 (suitable for 1440×900), 1600×1200, 1280×1024, iPad and iPhone 4 (retina display).