Blog

Vector Textures Tutorial: How to add character to your designs with our new Clouds Vector Textures Pack!
Hey Gang,
If you follow me, know me, used or seen my work you probably think of high detail illustration. Well, every once in a while you gotta change things up. From time to time I’ll do something quite opposite just to keep things fresh.
Last summer, I had the idea to do something quite different and photograph my own images. I have been a fan of all the Go Media texture packs and I have used them in my work and figured out ways to manipulate them through Photoshop and Illustrator.
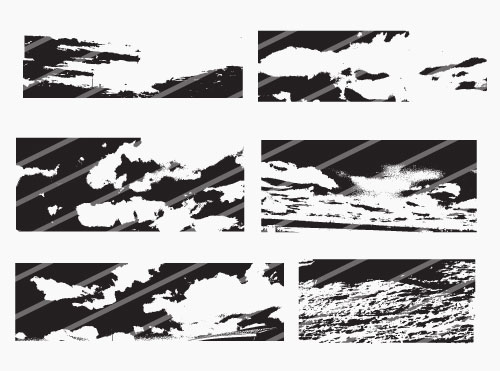
I started taking high resolution photos and thought about what I would buy and how I would use the textures. The set is divided into 6 categories, the first release is my Clouds Vector Texture Pack.

Soon to be released are my Ground, Plants, Rocks, Trees and Water Packs. Keep an eye out!
Now, let’s chat about some of the tricks and ideas that I’ve used with these textures. Clouds, you’re up!
Ready to follow along?
First, grab the cloud textures here, only $9!
Now, let’s go!
First I’ll start with an effect using the clouds. This effect is based on simple placement using a clipping mask and creativity. I’ll start with the personal monogram I’ve been designing. I’ll open the CLOUDS.eps file in Photoshop.


I’m going to just grab some of the cloud textures and bring them onto the monogram file and start placing them over the design.

Off the bat I know this is gonna be too much texture and won’t show enough of the design. I’m going to start over and change the color of the design and bring in another texture.


From here I’ll place the texture over the design and select a clipping mask (click on the layer for PC and right click and select Clipping Mask selection)

From here, I want to add a bit more to it with a simple drop shadow.

Now, I’ll make a duplicate image of the design and set a complementary color stroke.

Next, I’ll adjust the colors of the design that go better with the blue.

Now I’ll select the colors of the cloud textures and change those colors.

I’m thinking I want to take advantage of this pack and add a little more texture and grit from the upper left cloud.

I’m just going to cut the middle out, paste it and duplicate the selection and just take a pre made eraser tool and get rid of certain areas.


I’ll place it under the first cloud texture, adjust colors and then move the texture around a bit to get it where I want it.


From here we created a simple texture using clipping masks duplicate layers and color strokes. Simple all from a cloud, creativity and knowledge.
Try this on your own and see what you come up with!
Grab the cloud textures here, only $9!
For more of Steve’s work, check him out his site or chat with him on Twitter.