Blog
How to Create a Rainbow Effect in Photoshop (Freebie Included)
How to Create a Rainbow Effect in Photoshop
Hello Everybody!
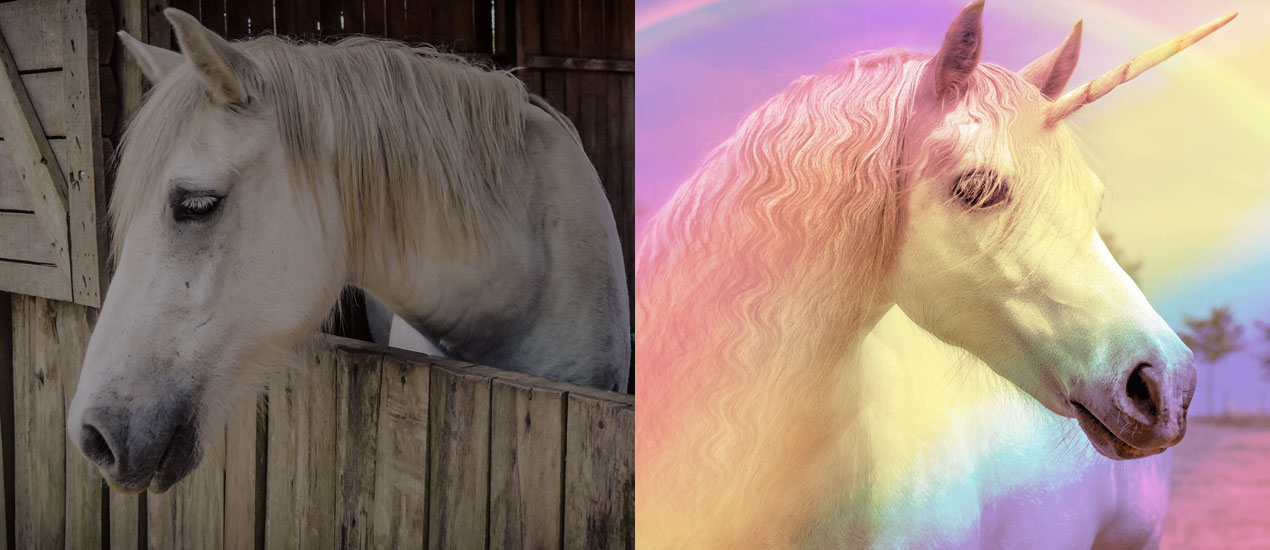
It’s 2017 and this year, I don’t know about you, but I’m resolving to settle into my skin more than ever. This means saying “yes” to life more often, saying “no” when I’m really not feeling it and letting my true self come forward, even when I feel like I don’t fit in. I’m going to be myself fully. Unless I have the opportunity to be a unicorn. Then, I’m going to do that.
I’m really excited to announce that we’ve just released a very special texture pack called Glow. It gives you the opportunity to add very special rainbow effects to photos and designs, primarily colorful light leak and vintage effects that will breathe new life into or enhance what is already pretty darn cool. We’re providing you with 45 effects that we handcrafted here in house. We know you’ll love them.
Curious to know how we created these ombre effects?
Well today is your lucky today, because we are going to create a special one just for this mini-tutorial. You can download it here >> Magical Rainbow Overlay
Now, onto how we made it.
STEP ONE: Start a new document with a transparent background, sized 4235 x 2927. Select your color picker and choose your first color. Since we’re making a rainbow effect for this tutorial, we’re going to select a red tone #b62528. Using a large brush, simply paint your canvas to your liking. Try something a little different than ours! Don’t worry too much about perfection here.

STEP TWO: Next, head to FILTER > BLUR > GAUSSIAN BLUR. Choose a radius of 250 pixels. Press OK.

STEP THREE: Shift + Ctrl + N to create a new layer. Drag this layer beneath your first layer. Use your color picker and select for our next layer (orange). Paint with the orange, then repeat the blurring process found in step two. You’ll want to make sure that you paint some orange beneath the red so that they overlap a bit.

STEP FOUR: Repeat this entire process with yellow (#FFFF00), green (#008000), blue (#0000FF), indigo (#4b0082) and whichever colors that tickle your fancy, remembering to use a new layer for each color. (New layers should be added beneath older layers.)

STEP FOUR: Select all of our layers, then right click on your mouse > Select > Merge Layers. If you plan on using this as a background in addition to an overlay, I would suggest adding a solid color background to your image as I’ve done below. (Layer > New Fill Layer > Solid Color)

To finish up, merge those layers together and name your file.
STEP FIVE: Next, File > Place your image into your document. Drag your image beneath your overlay.

STEP SIX: Now comes the fun part! Choose Layer > Layer Style > Blending Options (or the drop-down shortcut in your layers panel) and play with the options to get the effect you’re after. To get this effect, I chose the Color Burn blending mode. You can also stack the textures atop one another to really get a unique look. Have fun with it!
