Blog
FOUNDFONT™ and the Art of Typographic Archaeology

FOUNDFONT™ tutorial
Andy Hayes here from Hucklebuck Design Studio. The subject for this tutorial will revolve around a pet project of mine called FOUNDFONT™. Foundfont™ is dedicated to typographic archaeology as well as the use of found typography within design. It’s about extracting unique type for specific design needs or creating complete type sets based on found examples. FOUNDFONT™ offers typefaces but also hopes to inspire designers to do their own digging. It is a bit similar to a form of land work, before performing the process, it needs a specific criterion for it to proceed as planned. Read more information about Archaeologists and find one near you.
In this tutorial we’ll talk about what makes a good FOUNDFONT™ source and the steps to creating your own usable vector characters from found samples.
Type is where you find it
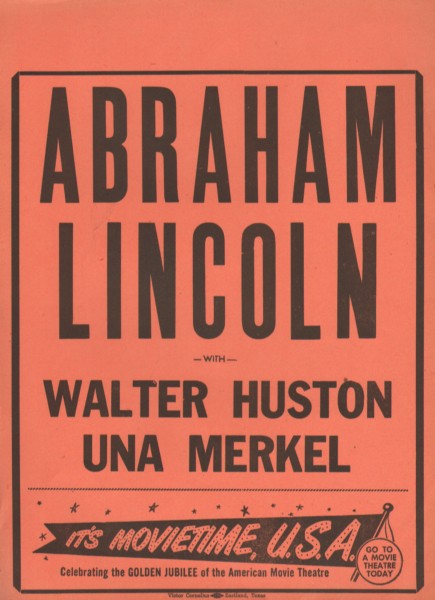
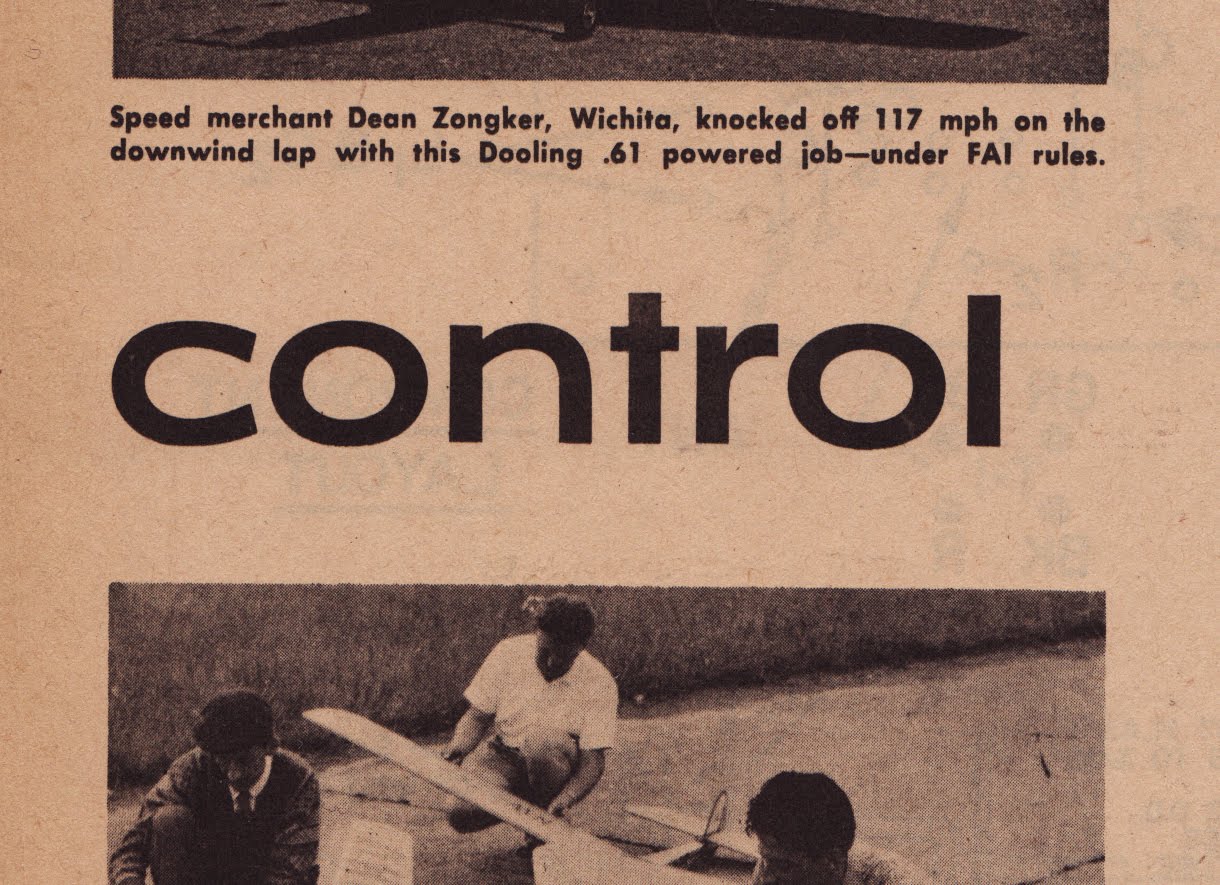
Useful typography is not only found within the bounds of one of today’s successful foundries. It’s all around us. In the bad signs you may see while walking down the street, on old packaging you might have picked up from a thrift store, even in random images you might stumble upon while trolling google image. These artifacts are often one-off, hand lettered little pieces of magic just waiting to be pulled into the 21st century. In many things that I create, whether it be a tee graphic or a poster design, I often look for opportunities to use these found examples in my layout instead of going back to my favorite type families. I find it can often yield interesting and ultimately unique results.
Here are a few great samples that are ripe for repurposing.


What makes a good FOUNDFONT™ source?
There are a few questions to ask when scouting good FOUNDFONT™ resources that will help you get the best result. Here they are:
- Are you starting with a quality image?
The source image that you start with should be high res if pulled from online, or in good condition if found more traditionally. If the detail in the characters you have to start with is poor, it’s hard to overcome. It will leave you guessing at details. - Is the type sample in a photo skewed?
If it is a photograph be sure that it is shot without a skewed perspective. If you start with something that is distorted you’ll find yourself putting a lot of work in to fix it. - Am I just recreating a font that exists and is possibly copywritten?
When I do the FOUNDFONT™ thing I am always looking for type that was either hand done or old and out of distribution. Why recreate a font if you can just buy it online? Keep an eye out for interesting and unique sources to make sure you’re not just duping. - Does the sample I found contain the key character DNA that you need?
When retroactively building type from a found sample there is a set of characters that you should try to aim for. These characters will contain the DNA for all 26 letters in the alphabet enabling you to create letters that you don’t have.
The set of key characters for capitals is: A, B, D, E, J, M, O, S.
A: From A you can create V, W, Y
B: From B you can create a P, R
E: From E you can create F, H, I, L, T, X,Z
J: From J you can create U
M: From M you can create N
O: From O you can create C, G, Q
D and S are unique. Especially the S. If you have nothing to go on for the letter S you’re playing that familiar guessing game we’ve mentioned a few times already. D could be created using the O, but it does often have slight quirks.
The set of key characters for lowercase is: a, b, f, g, k, m, o, s, v
b: From b you can get d, h, l, p, q
f: From f you can get t,
m: From m you can get n, u
o: From o you can get c, e
v: From v you can get w
g, k and s are unique. s, again, will be the toughest recreation if you have little to go by. Look at the curves of your c and a for cues. Letters like x and z should be fairly easy to recreate with little information. Remember to pay attention to stroke weight and other foundational elements of your character’s structure.
Cleaning up and extracting your type
Once you have a good source it’s time to start cleaning it up and start the process that will eventually lead to a set of vector characters for use in layout. I’ve pulled a good source and and will go through the process step by step in a series of screencasts.
Step 1. Identifying your type source
To reiterate, be sure your found sample is of decent resolution, not skewed, fairly original, and contains the key letters for your character DNA. My sample is from a motorcycle jacket that I ran across online. I’d guess the typography was hand embroidered or chenille embroidery. Not a proper font but a great piece of typography worth extracting.

2. Killing the color
Open your image in Photoshop and take its image mode to grayscale as the first step in amplifying its contrast.

3. Amplifying contrast
Once you’ve gone grayscale, you’ll need to increase the contrast of your image. Levels are an easy way to build this contrast. The goal is to eliminate all gray leaving you with only black and white in your image.

4. Delete anything that isn’t the type you’re after
Now that your contrast is amplified select the rest of the image and delete it. It may prove easier to select your type and invert the selection. All we need is the type.

5. Adding pixels to smooth out the edges
After eliminating everything else but your type you might notice that the edges are a bit rough. The easiest cure for this is you just bump the resolution up to add pixels. This will take a bit of the roughness away.
6. Finalizing your smoothed type
Now that your resolution has been increased you can completely smooth the edges by simply using the gaussian blur filter and your levels to harden the edges. When you are done with that, save the type as a grayscale tiff and close the file.
7. Going vector
Create a new document in Adobe Illustrator and place your final tiff into the new document. Go into your tracing options (object/live trace/tracing options), turn on the ignore white option and turn on the preview. This should give you a good idea of how good your trace will be. Apply the trace and click expand to make the trace editable.
8. Editing your type
After you click to expand the live trace you’ll need to ungroup the type and begin the process of lining the type up on a baseline, tweaking the trace results and creating the letters you need out of the letters you have.
Once you identify the characters that you need to modify to create the characters you are missing, use your knife tool to cut letters apart. The knife tool allows you to cut through the vector shape without losing any of it like you would with the eraser tool. Once you break up the core strokes of the characters you can easily begin to rearrange and create your missing characters. For example a trimmed down, and rearranged letter “A” easily becomes a “V” and a “W” as seen in the short video accompanying this section.
You’ll find that as you cut your letters apart and so on that there will inevitably be a few edges that need smoothing or refinement. Instead of somehow using the pen tool to pull the points of your type, use the pencil tool. The pencil tool allows you to modify the contours of your character in a more natural way. If you have a wacom tablet or any other brand that allows you to draw with a stylus you will find this technique very natural. Zoom in as much as you can to see the details of your characters as you modify them.
Final Result
Whether you’re trying to create an entire alphabet or just the letters you need for a logo your final result could look something like this.

The big takeaway is that you should explore typography that is outside of where you might typically look. Creating unique typographic solutions using found typography will always be interesting and one of a kind. Good luck on your hunt.
Enjoy this free download of MC GOTHIC and go to http://foundfont.tumblr.com/ to purchase more FOUNDFONT™ sets. We’re adding new type all the time!
Note from the editor: if you have some issues with the videos, you can find them all on Andy’s Screenr profile.