Blog
Andre Meca’s MSCED 183: A Case Study
Hello Go Media readers!
André Meca is a Portuguese graphic designer and illustrator. He currently studies at the ESAD. During 2011, he’s having his own take on the Make Something Cool Everyday Project.
We’ve been following his work for quiet a while, and this seemed like the perfect opportunity to show you his work and some of the behind the scene stuff of his process. Enjoy!
This specific piece is the 183rd he made. You can view it better on Flickr. André has been kind enough to include the PSD of his experiment (see at the end of the post), so you can understand better his way of constructing the piece and the various ways he uses the elements composing the final image.
— Simon H.
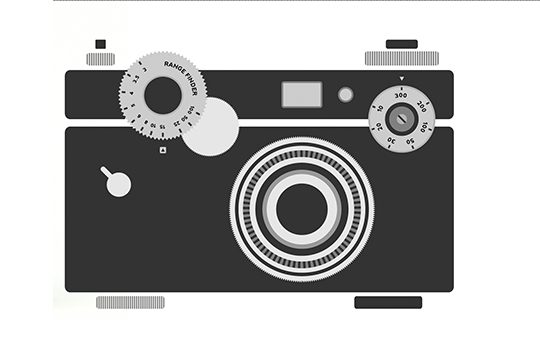
Today, I’m demonstrating how to make a cool, vintage Argus camera come to life!
So, lets get to it.
STEP 1: Draw basic shapes
First, grab an image of the Argus C3 here. Open a vector software, in this case Adobe Illustrator, and create a new document file and place your camera image. Now, using the Shape Tool, start drawing the basic shapes and elements of the camera.
Now to make the needed ‘Zig Zag’ effect, draw a circle, and go to Filters>Distort>Zig Zag and play around with value to develop the desired look. You can see my settings below.
Now, draw a nice circle again, and with the Line Tool, draw a small line in the up center of the circle. With the Rotate Tool, point to the middle of the circle and while pressing ALT move the line as much as you want. Now, the secret is to use the “CMD/CTRL + D” shortcut to repeat the same step as before, duplicating and rotating the line in equal distances.
When you have all the lines in place, it’s time to expand them, becoming shapes, not simply line strokes. Select the lines and go to Object>Expand, and click OK.
Now that they’re all shapes, select all shapes(lines and cirlce) then on Pathfinder it the “Intersect shape areas” button to achieve that effect. Simple.
At this point, continue to draw and arrange the various shapes over the image. Soon, it will start to look like an Argus camera.
For the numbers, repeat the same steps as above. Select the number, and while using the Rotate Tool, point to the middle of the circle to and move and rotate them.
STEP 2: Add some color
With all of the shapes looking cool and in place, it’s time to add some nice colors to our camera. I decided to give it brown, earthy colors; but, feel free and add as much color as you want.
STEP 3: Textures
The coolest part &emdash; texturing &emdash; is always great to experiment with. You can grab some textures similar to these or these to play around with. You can also find awesome texture made by yours truly at www.PSDFAN.com. Feel free to have a look at those, too.
STEP 4: Finishing touches
Now with all shapes, colors and textures in place, open Photoshop and copy the entire vector file from Illustrator, and then paste it into Photoshop as a “Smart Object File.” At this point, we have the whole illustration in a single layer. Since we inserted it as a Smart Object, it is still in vector mode meaning that you can so you can scale it up or down losslessly without rasterizing it. So, start by adding a little bit of shapeliness to the illustration by playing around with Levels, Curves and Color balance in Photoshop!
I encourage downloading the entire .psd file of this tutorial, provided below, and give it a look. Edit the layers and settings to achieve almost any desired result.
That’s it, folks! Thank you all for reading and for your time!
If you have more available time you should take a look at my work at www.heymeca.com, check out my Flickr, fav this image on Flickr, or follow my Dribbble page!
[download#75#nohits]
Additional pieces from MSCED
Simon here again. I wanted to share with you more pieces from the project, as they’re really sweet and inspirational.


