Blog
Sexy Holiday Vector Pin-Up Girl Tutorial

A month or so ago I did this sweet tutorial of a pin-up girl on a motorcycle. It had been a project from on of our better clients. Since they liked and bought the design I thought that they wouldn’t mind if I posted a tutorial about how I made it. I was wrong. Threat of legal action later and that killer tutorial was taken down. I am truly sorry to our client. I should have asked.
BUT… …the tutorial was very good with lots of details. And I didn’t want to deprive you of all the time I put into it. There was only one thing to do: remake it. So, that’s what I’ve done. I found a different motorcycle, different girl, re-illustrated (vectorized) the entire thing, added a Christmas theme AND even added some more detailed instructions! 16 hours later, it’s better than ever and here for your tutorial pleasures.
Without further ado…
Holiday Vector Pin-Up girl on a motorcycle T-shirt Design (Phew! That’s a mouth full.)
It’s time for another sweet vector tutorial. And what would make a better subject than a pin-up girl on a motorcycle wearing a sexy Christmas outfit? Well, not much. At least, not much in my book. So, let’s get right to it. Oh – quick warning; there will be a few gratuitous plugs for Arsenal products at the end, but it’s just a little bit right at the end. This tutorial can be completed at no expense to you. ;)
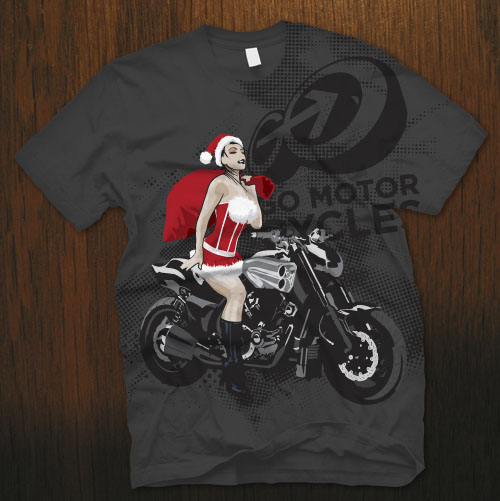
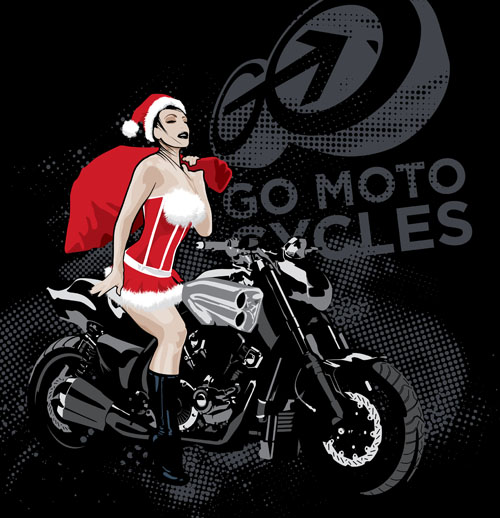
Here is what our final design is going to look like:
This design took me eight twenty-four and a half hours to complete from beginning to end. The first time I did it in about eight hours. Then it took me 16 more hours to rewrite this tutorial and redo all the artwork.
What you’ll need to complete this tutorial:
A computer
Adobe Illustrator
Adobe Photoshop (just a little bit)
Access to stock images (or stolen ones will work too.)
Client logo (if you have a client)
This tutorial will cover:
• The Technique
• Finding Photos
• Proper perspective
• “Frankensteining”
• Vectorizing the girl
• Making vector fur
• Vectorizing the motorcycle
• Grabbing some stock vectors
• Putting it all together
• Mocking it up
Project Synopsis:
Originally this project was to design a series of new t-shirts for an American motorcycle company. Some of the direction we were given was: “comic book style drawings” and “an old school style pin-up girl.” I thought I could combine those motifs into a modern vector style pin-up on one of their newer more contemporary motorcycles.
The Technique
The technique I used for this design is vector illustrating off of photographs. I could hand draw something then create my vector art off of that, but that would take about twice as long. Working off of photographs is like having a model. Unfortunately you can’t tell your photo to change positions, so you’re forced to do an extensive search until you find the pose you’re after. Once you assemble the images you need you’ll place them into Illustrator and draw vector shapes over the photo to create an illustrated look/feel to the design.
Finding Photos
Finding the photos that you’re going to use can sometimes be a real lengthy process. I have spent as much as 2-3 hours looking for the “right” photos. When I am working on paying projects I like to find my images on royalty-free image websites like istock.com. This way I can avoid any legal entanglements that might get me or my client in trouble. BUT – as you are creating vector art out of these images and not using the photos themselves it does open up the opportunity to “steal” some images. If you’re going to use unlicensed images as a resource for vectorizing just make sure your final art is not recognizable (in any way) as that original photo. When in doubt I say just pay for your images. Certainly for a client as big as this one was and the possible huge exposure it will get, it’s best to play it safe. And please – always protect yourself. If you’re dragged into court because you stole an image – the defense: “But Bill told me I could do it.” won’t stand up.
Proper perspective
I know the final piece of art I’m after is a girl sitting on a motorcycle. It would be great if I could find a picture of a girl in the pose I want on the exact model of motorcycle that I like. But that’s not going to happen. Even better would be if I HAD the motorcycle of my choosing and a hot model to shoot photographs of. But that’s DEFINITELY not happening. So, I’m going to have to find the images of each separately, make sure the fit together (have the same perspective) then draw them together. In this case I think it will be easier to pick the motorcycle picture first then find an image of a girl to fit onto it.

For this design I chosen this slick contemporary motorcycle (all logos have been airbrushed off to protect the innocent.) What else can I say? It’s a fairly sweet looking motorcycle. I think it looks a bit more modern than a normal “hog”. I chose this particular photo because it shows off the bike itself. It was originally a shirt design for the manufacturer and I thought they would appreciate seeing the details of the motorcycle. Artistically I would have preferred to use something that had a fish-eye lens type of effect with the rear tire as the focal point. But the bike would be hard to recognize and trying to find a picture of a girl at that same perspective would be nearly impossible. This photo is a straight-on perspective shot with a typical 35mm lens. It shouldn’t be hard to find a picture of a girl that fits.
“Frankensteining”
For the pin-up girl here is the first photo that I found that I really liked.

She looks hot and has a sexy dramatic pose. Also, her upper body seems to be angled as though she is sitting on my motorcycle. Unfortunately her hips and leg don’t quite look to be in the correct position. If she were sitting on a motorcycle her hips would be turned more toward the camera and her leg would extend out almost straight. No problem, I just need to pull a “Frankenstein.” To “Frankenstein” a photo is to take several different photos, cut different body parts and put them together. In this case I need a beautiful leg to attach to this torso. Here is the image I found.

Also, I’m not a huge fan of the face on my girl in the photo. I could find yet another image, but I happen to recall a great vector face I’ve got in one of our vector packs. It’s a beautiful face that’s in the sexy vector pack which is part of Vector Set 2.
Here is that face: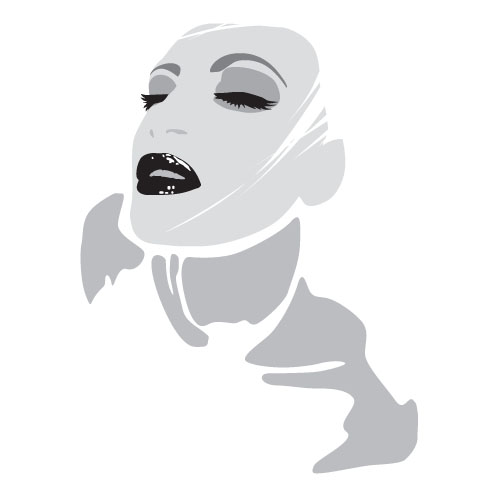
Now – you don’t need to use a stock vector face, You can use the face in your original photo or just find a different face to vectorize. Here is a sample of a face that I vectorized… just to give you an idea of how the vector lines look.

When you’re piecing together a bunch of photos like this (three parts of a woman and a motorcycle) it’s helpful to bring your photos into Photoshop and do a quick mock-up to make sure all the different parts will fit together when you’re done doing the vector illustration. To do this I will make a rough cut-out of each body part and layer them on top of my motorcycle. This will require some rotating, reflecting and scaling to get them into place. This allows me to get a sense of where the pieces overlap and fit together. Here is the Frankensteined body parts and motorcycle for this pin-up put together. I think it looks pretty good.
Here is what this design looks like now that I’ve mocked up the photos together. These all seem to fit together so now I can take these over to Illustrator and start illustrating them. It’s smart to use the free “comps” (preview images) from royalty free stock image sites to make sure the pictures will fit together before you pay for high resolution ones.
Vectorizing the motorcycle
I decided to start illustrating the motorcycle first. Before I begin making my vector shapes I’ll try to decide how many different colors I’m going to use. This makes my decision making process easier while I’m drawing. I can look at each area and ask myself: “Can this be defined with one of my colors?

Here is a little diagram showing the colors I selected and some samples of each color on the motorcycle. You can see that the four colors I selected are a real light grey to represent the chrome, black for the, uh, black, dark grey for the dark grey and a medium grey for the middle greys on the bike. It’s important to LIMIT THE NUMBER OF COLORS you select. There are a couple of reasons for this. First and foremost is the fact that it SHOULD look like a drawing. If you have too many colors it starts to look like a photo. If it’s going to look like a photo, then why not skip the labor of vectorizing and just USE the photo? Secondly the more colors, the more work! And nobody likes that. I try to limit myself to 3-6 colors per object. You can see that for this motorcycle I’ve selected 4 colors; black, dark grey, medium grey and off-white. This shouldn’t be too hard.
The first step I take whenever I’m doing a vector illustration off of a photograph is to outline the entire object I’m working on. This will allow me to draw vectors right up to and past the outline of the shape, then quickly chop off the excess. Let me show you this process.
Step 1. Outline your object (in this case it’s a motorcycle.)

Step 2. Draw an interior shape that butts up against the edge. Since we already have the outline of the object drawn you don’t need to worry about the portion of your shape that is part of the outline. We will use the pathfinder tool to chop off the excess.

Step 3. Make a duplicate of your outline and paste it directly on top of the current outline. You can accomplish this by clicking Edit/Copy then Edit/Paste in Front. Or, you can simply use the quick key combo of Control-C then Control-F. Now you will have two exact copies of your outline with the new one on top and still selected.

Step 4. Hold down the shift key while you select the new interior shape that you drew. So, now you should have two shapes selected – the interior and one of the outlines.

Step 5. Use the Pathfinder tool: Intersect. This will preserve the shape where the two shapes overlap, or, intersect. Essentially, this will chop off the excess shape outside the outline.

This may seem like a lot of steps, but once you’ve learned it you’ll be able to do this in a split second. And that’s certainly faster than having to draw the edge of everything that butts up against the outline.
Now that you’ve got that little trick under your belt… you still need to endure the slow laborious process of drawing each individual vector shape. This is where you earn the big bucks.
One other thing to keep in mind is the stacking order of your shapes. The first shape you draw will be on the bottom. The last one you draw will be on top. So, if you can clearly see that one shape is on top of another… …start on the furthest back shape first, then build your way up. If you do make your shapes out of order; no problem. You can always reorder them. It’s just faster easier if you work in order the first time through.
Here is my final vectorizing of this motorcycle (Just the shapes with no colors put in.)

And here is what the final motorcycle looks like with no outline and each shape filled with the appropriate color.


Vectorizing the pin-up girl
Now that I have found the pictures on I-stock that work for this composition, I will buy the high resolution versions. You may wonder if it’s possible to just use the low resolution comps for doing the vector illustrating on. In my experience; no. When you zoom in to see the details they’re all pixels. It becomes very difficult to decide where to draw your lines. The higher the resolution the image is the easier it will be to illustrate (vectorize) it.
As my girl is in two pieces and as I’m fairly confident that I can put those pieces together – I will illustrate them separately. Also, I have a little skirt to cover the joint between the leg and the torso. As with the motorcycle, I always start with an outline of the entire object. Then I will build up lights and darks on top of that shape. Here is the leg with the first few sets of shapes defined.
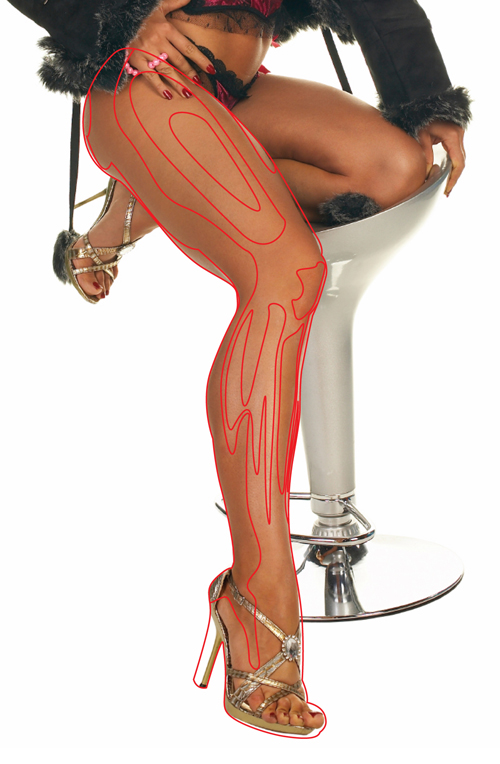
You’ll notice I didn’t get too detailed near the foot. In fact, I thickened up the part around her foot and thickened the heel. I know that this will turn into a sexy boot later, so, no need to worry about the details around her toes.
Here is the leg complete and filled with the five colors I’ve chosen for her skin. Also I went ahead and did the outline for the boot. You’ll notice that the boot follows the shape of her body fairly close. All you really need to do is add a few wrinkles where the boot flexes at the Achilles and also add a little flair out at the top where the boot meets the leg. This creates the illusion that the leg goes into the boot.

We will illustrate the upper body the same way as the lower body and the motorcycle. We start with an outline then draw shapes to define areas that are lighter or darker. You’ll notice that most of the shapes have soft round corners. The gradients that make up these shapes have smooth transitions, so you want to avoid sharp corners.
I tend to put more shades of color and more details into the face. That is where all the beauty and emotion is shown. So, there are a lot more details in the face. Also, for women I will exaggerate the fullness and color of the lips. I will also exaggerate the length of the eye lashes and even increase the size of the eyes slightly. After all, this IS an illustration. Why not take advantage of your ability to “play” with the proportions and details. You can shrink the waist, increase the bust, lengthen the hair – whatever. It’s your illustration! And just to be clear that I’m not being sexist; I use the same technique on illustrating men. I make them more muscular, strengthen their jaw line, broaden their shoulders, etc.
I’ll usually put the hair on last. It’s easy to layer it on top of the head once everything else is in place.
One very challenging (code word for annoying) part of the girl is the fur on the edges of her outfit. In order to speed up the fur-mailing process I will follow these steps.
First I outline the shape with large clumps of hair (fur).

Second I just draw lots of simple vector lines.

Third I create an art brush in the shape of a simple triangle. When it is applied to these curving lines it will look just like more hairs.

Fourth I will use the: Object/Expand Appearance to convert these brushes into solid vector shapes, then I will use the Pathfinder/Merge option to combine these hairs with the original shape.

So here is our complete girl with boots and sexy Santa Claus outfit.
You’ll notice that I added a sack of Christmas gifts over her shoulder. I noticed that her arm and hand were in just about the right place. All I had to do was add some fingers grabbing the sack.
One last little detail to help make this look like an illustration; a black outline. To make the black outline I will select the entire girl, Copy/Paste then Pathfinder/Merge to create one single shape. I’ll add a black outline to that shape and drop it right behind my pin-up.

Now here she is placed on top of her motorcycle! Wa-Hoo! She looks hot! Sometimes I put a smile on my own face. This is working out better than I had anticipated.
Almost done. Now, for some fun stuff.
Grabbing some stock vectors and Putting it all together
Ok, we’re almost done, but we need to add some artistic elements into it and add the Go Moto Cycles Logo. Fortunately for us we’ve been provided with vector logos by our client. And for additional vector shapes to finish off the design, it’s off to the Arsenal!
Remember that gratuitous plug for our products that I warned you about earlier? Well.. here it is: Go Media’s Vector Packs are an EXCELLENT resource for design elements. I will frequently use them to either make a complete design or use them to polish off a near-complete design.
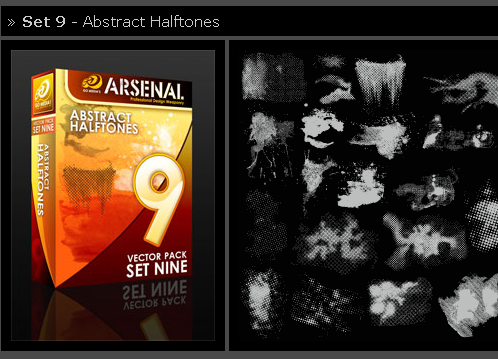 I scroll through our store and found this pack of halftone patterns I thought would look slick on the design.

At this point I am just taking my halftone vectors and brand logo and arranging them behind my girl and motorcycle until it looks good. Here is the final composition:
Mocking it up
Now that I have the design done I need to make sure the client likes how it looks. I believe that it helps to mock up your design on a shirt. The cooler you can make the design look (by mocking it up) the better chance you have that your client is going to like it. Are you ready for some more product plugs?? Why sure! First, I drop my design onto a Go Media Apparel Template. The nice thing about using a Go Media templates is that it only takes you a split-second! The masking is done, the shadows are already in place. All you have to do is drop your art onto a layer in photoshop, resize it and pull the mask down!
Here is a little diagram of how the template is set-up:

Also, I want to put a slick texture in behind my shirt. NO PROBLEM! Let’s revisit the Arsenal and grab a texture from our wood pack.

Now we put it all together and Voila, masterpiece design!