Blog
Top 5 Time Saving Short Cuts in After Effects
The following 5 short cuts will save you in expensive pain medication from staring at your screen for far too many hours. I know they’ve saved me in the past. Here’s a little video I did for this article to grab screenshots and such. We won’t be learning how to do this today, but maybe in a later tutorial I’ll show you how to do something neat.
5: The Null Object
If you’re using a camera, you should probably be using a null object. Period. To create one just go to Layer>New>Null Object.
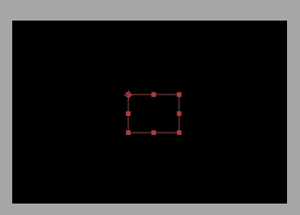
This will create a layer that is basically, well, a null, a nothing. It’s essentially a point in space that is far easier to animate than moving a camera around by itself. It’s also incredibly useful for using a particle system like CC Particle World, or Trapcode Particular which I will cover in a moment. Make sure to remember to turn on your 3D layer switch making it look like this. See it now has the 3D gizmo handles.
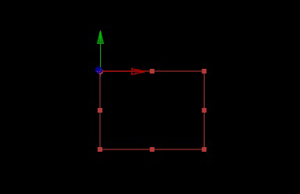
To set it up as a controller, or a dolly for your camera movements, alt+click the position of the Camera layer, and pick-whip the position of the null object. That will create an expression to tie the positions together, which we will go over in a minute. Another excellent use of the Null Object is to twirl down your camera options, and select the Point of Interest, Alt+Click the stopwatch and pick-whip the position, this will ensure that your camera keeps it’s “eye” on your effect that is also tied to the Null, you can then move the camera freely around your 3D environment.
To re-cap, Null Objects are useful because:
- They provide an object to tie tracking data for motion tracking your film.
- They act as a “controller” or “dolly” for your 3D camera movements.
- Useful for controlling the movement of all sorts of particle systems.
4: Pre-Comps
Pre-Compose, Pre-Compose, Pre-Compose! If you can get away with it. Most of the time you’ll end up with a composition that looks like this, which albeit is a simple example.

When in fact, you could have a composition that looks like this example, which would be a nightmare to wrangle without nested compositions.
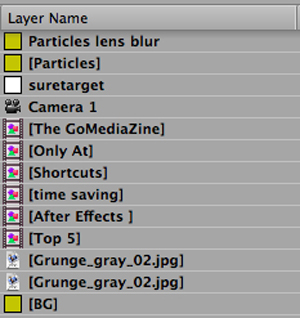
The pro’s of using Pre-comps are as such:
- Smaller list of layers
- Some effects just won’t work right as an adjustment layer applied to the top of the layers, you’ll have to pre-compose them and then apply the effect directly to the pre-comp layer.
- You can easily Alt+double click on the pre-comp layer and make any adjustments you need to and it will automatically update in your main comp.
Using the “continuous rasterization” button will allow you to use a composition as a 3D layer as long as all of the layers inside the composition are 3D, your camera can then move around that composition in 3D space.
3: Expressions
Yes, they’re terrifying, much like clowns, but they are useful, unlike clowns. I am not a coder, at all. I run shrieking in terror at the very thought of using HTML or JavaScript, look at my website, [shameless plug alert!] if it weren’t for WordPress I wouldn’t have one. These tiny snippets of code can save you tons of time and headache. Usually they come packaged with presets that are widely available. I am by no means a master of expressions at all, I’ll admit, but if you’re serious about using After Effects, you should at least learn a few.
Here are two you will probably be using the most:
wiggle(x,y) :: this is often referred to as the “wiggler”, what it’s going to do, is change the value of the property by the yevery x seconds.
So If it’s attached to the position of say, the emitter of a particle system, it will move that point in 3D space in a random direction at the given interval. Remember that this is in seconds, not frames. This expression can be used for not just the position, but for just about any parameter in your composition.
The next one is the other one I find myself using in almost every composition.
temp = thisComp.layer(“null”).transform.position; [temp[0], temp[1], temp[2]]
You’ll be using this and not knowing it if you follow my advice on null objects and is automatically generated when you pickwhip the position of one layer to another.. This is telling the layer to copy the coordinates of the x y and z axis. In After Effects’ bizarre 3D coding system, X=0, Y=1, Z=2. Some things can get kind of tricky when dealing with these coordinates and sometimes will have to do two separate expressions, one for xy and a second for z, like in this screen shot.
For more help with expressions check out the Adobe Livedocs Site.
2: Project Folders/Simple Organization
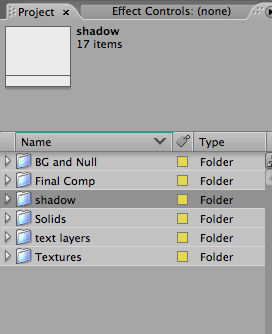
I am probably NOT the best person to be telling people to do this, since I’m horrible at it, but organization is pretty helpful. Especially on larger projects. I do tend to keep all of my source files, video, images, sounds and that sort of thing in separate folders for easy navigation. Compositions sadly don’t usually get that kind of treatment though, and sometimes they are lucky if they get named something other than Comp1 and Comp2 before I do the final render. Organize your projects, it will save you precious time when you accidentally delete a piece of footage from a comp and then wonder what happened to it, remember, it still stays in your project window!
Also, Color Coding your layers will help you stay organized and only takes a second.
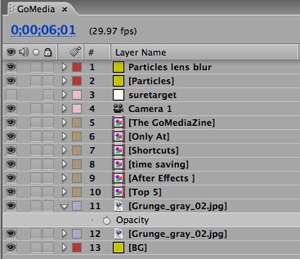
As you can see, I have all of my text layers pre-composed in that “sandstone” color, the background elements have been coded yellow, etc etc. Simple, yet effective!
1: Keyboard Shortcuts
If you’ve worked on just a few AE projects, you’ve realized that they take a very, very, very long time. You might not think about it, but a few keyboard shortcuts will cut that time down a few seconds at a time, and could possibly shave an hour or two off of your project time, if you consider how much time it takes to navigate through some of the horrendous, maze like drop down menus.
A few handy ones:
- Set beginning or end of work area to current time: B[beginning] N[end]
- To preview your current composition just tap the spacebar to start it, tap it again to pause it.
- To start a RAM preview, hit 0 on your numeric keypad.
- Cycle through your Camera controls with the C button, surprising, I know.
- Cmd/Ctrl+U will bring up your keyframes of a layer or at least that’s what the documentation says, and that’s what people say, but I found that on my Mac, that just tapping U will do it, like this.
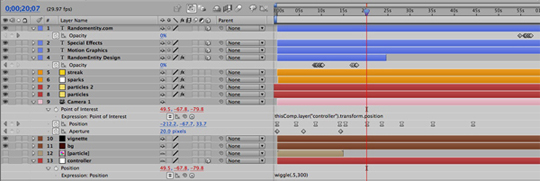
- Cmd/Ctrl+Y will create a new solid layer, Ctrl+Alt+Shift+Y[Command+Option+Shift+Y for Mac] will create a glorious new Null layer.
- Cmd/Ctrl+Shift+C will Precompose your selected layers.
- To see the effects control panel of the selected layer tap Cmd/Ctrl+Shift+T
Don’t forget about your Effects and Presets Palette hiding right over there:
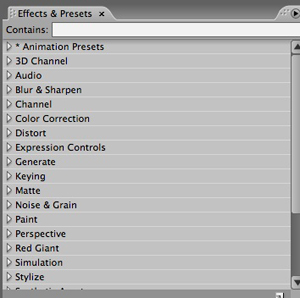
After you search for your effect, just double click it to apply it to your selected layer[s].
The standard Adobe shortcuts for Selection[V] and hand tool [H] still apply.
For more shorcuts just check out the Adobe livedocs here.
Well I hope this helps you save valuable time and expensive pain medication from slamming your head into your desk. Part 2 will be dealing with Filters and Presets, both built into AE CS3 and 3rd Party.