Blog
Full Color Rollovers in Flash
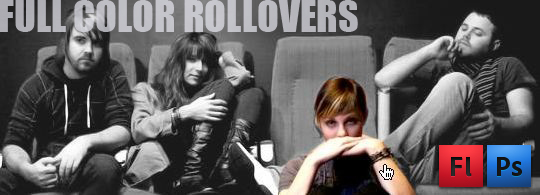
In this tutorial, we will create a Flash file with a simple, yet eye-catching effect — a black & white photo with full-color rollovers. We will initially edit the photo in Photoshop, then import and complete the file in Flash. I wanna send a shout-out, and special thank you to the band Today the Moon, Tomorrow the Sun for the use of their photo.
Download the sample file [download id=”43″] and open in Photoshop.

Save this document as band_photo.psd
Isolate The Figures
Using the pen tool, create a path around one of the band members
I’m making a selection just around the person, not the chair. The goal here is to create a selection of a band member. I’m using the pen tool, however you may use whatever selection tools you prefer.
Right-click or control-click on the path, and choose “Make Selection…”
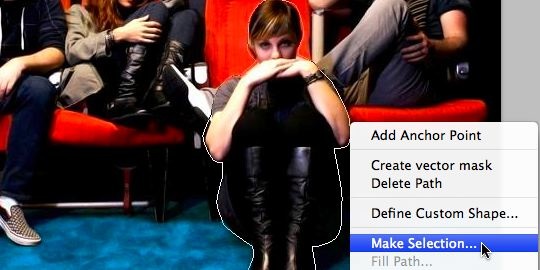
Click OK on the Make Selection dialog box that follows

Create a layer via copy, CONTROL+J/COMMAND+J. This creates a layer from the
selection
Select the background layer, and then repeat this for each band member
Be sure to name each layer.
For simplicity, I named them band-1, band-2, etc, going from left to right

Create The Grayscale Background
Select the background layer, press CONTROL+D/COMMAND+D to deselect everything.
Duplicate this layer via copy, CONTROL+J/COMMAND+J
Name this duplicate layer “black & white”

Next, create a new layer, CONTROL-SHIFT+N/COMMAND-SHIFT+N, Set this layer Mode to “Color“, click OK
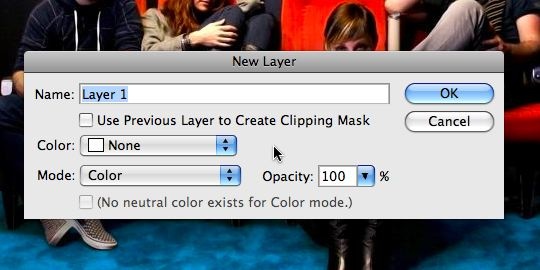
On the keyboard, press D to set default colors (black foreground/white
background).
Fill this layer with the foreground color, ALT+BACKSPACE/OPTION+DELETE
Merge this layer with the black & white layer, CONTROL+E/COMMAND+E
As an option, you can push this effect further by lightening the output levels on the black & white layer CONTROL+L/COMMAND+L
Set the Shadow output level anywhere from 25 to 50.

At this point, it will be visually obvious if you have selected extra space around the band members. You may see color spots around them that should be black & white. Correct this via selecting the band member’s layer that needs fixing, and use the eraser tool to get rid of any overlap.

Toggle the visibility of the Background layer to off.

Save this document, CONTROL+S/COMMAND+S, and close it.
Import The .psd File Into Flash
You will need at least Flash CS to import a PSD
Open Flash. Create a new document, either AS2 or AS3 will work as this effect is not dependent on Actionscript.
Import the band_photo.psd, CONTROL+R/COMMAND+R

Because we turned off the visibility of the background layer in Photoshop,
this layer is unchecked when importing into Flash.
Hold down the SHIFT key, then select each band member layer, as well as the
black & white layer.
Check the box “Create movie clips for these layers”

For Publish Settings, set the Compression to Lossless.
Follow these settings, Convert Layers to: Flash Layers, check the boxes Place layers at original position, and Set stage size to same…
Click OK.

Deselect All, CONTROL-SHIFT+A/COMMAND-SHIFT+A
Create The Buttons
Click once on one of the band members to select.
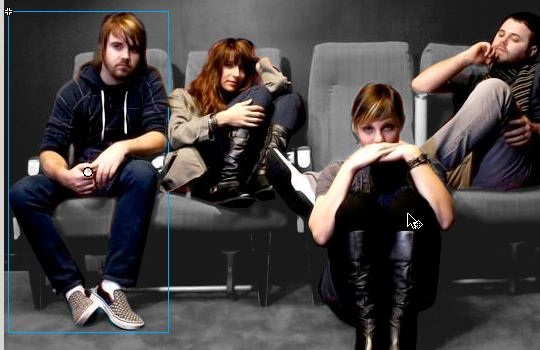
Convert this selection to a symbol, F8, follow these settings:
Name: band #+_btn
Type: Button
Click OK

Repeat the BUTTON SYMBOLS steps for each band member.
Edit The Buttons
Once you have converted each band member to a button, DOUBLE-CLICK on one of them, this will take you into edit mode, in the buttons timeline:

Click-and-drag the Up frame to the Over frame

Select the Hit frame, and insert a blank keyframe, F7
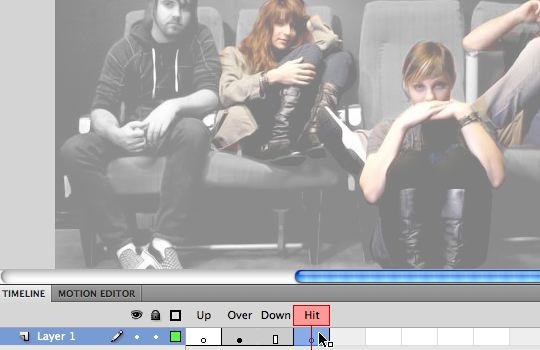
Select the brush tool and using the photo as a guide, paint a rough silhouette of the band member. The paint color does not matter, as the hit frame is not seen by the audience/end user, you are simply painting the active area of the button.

On the timeline, click the Scene 1 button, and you will see a aqua-colored overlay of the silhouette you just painted.

Repeat the BUTTON EDITING steps for each band member.
Here is a snapshot of the file with all 4 band member buttons edited. Though you can be as detailed or loose as you like when creating the silhouettes, do not overlap, as this can cause flickering between buttons.

Save, and test your movie CONTROL+ENTER/COMMAND+RETURN
And here is the final result: