Blog
Ink Bleeding Effect in After Effects (Like Gnarls)
Ink Bleeding Effect from Go Media on Vimeo.
ANIMATING WITH INK EFFECTS
(software required: Photoshop, Illustrator, After Effects with Trapcode’s Particular)
In this tutorial I’ll recreate a similar look from an older Gnarls Barkley video. The principles I’ll cover are foundational and can be used for some incredible animations other than simply imitating a great music video. Some of what I covered in the Photoshop Bling tutorial is being used here directly in AE. So for those who were wondering why you’d use the Bling effect unless you were designing a hip hop album… remember it’s the principles that that are most valuable… the end result for these tutorials is just to get you excited to go out and create your own. Specifically I will focus on the following in this tutorial:
– Using Alpha and Luma Mattes in After Effects
– Frame by Frame animation using CS3’s Illustrator, Photoshop, and After Effects
A basic to intermediate knowledge of After Effects and Trapcode Particular is needed to follow along.
STEP ONE: Setting up your ink file for creating a matte
Import your video footage of ink. Create a new Comp called “ink blots.” For this shot I actually placed a wet paper towel in the base of a square fish tank and filmed from below the glass fish tank as i dropped food coloring onto the wet paper towel. You don’t need to worry about professional lighting or the deep amount of texture that you see here. That will all be taken care of post as we make some adjustments. If you dont’ have the time or equipment to shoot your own ink bleeding, you can simply download a clip from revostock.com to use for the matte. Here’s what my original footage placed into a Comp in AE looks like:

Desaturate your video footage. [Effect/Color Correction/Hue&Saturation]

Adjust your levels until you blow out your background to be completely white but keep as much detail in your ink bleed as possible. [Effect/Color Correction/Levels]
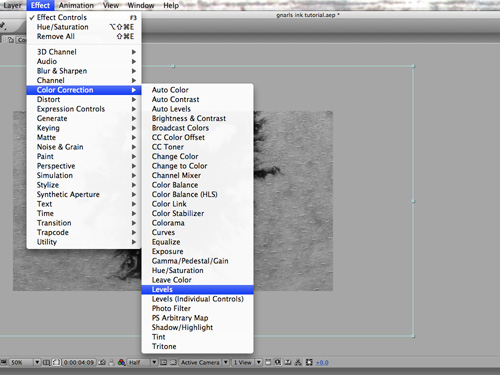
The result for my footage looks like this

STEP TWO: Creating a Luma Matte
Drag one of these free water color textures from Gomedia into your “ink blots” composition – or buy the whole pack of textures here. This is being used simply to add some texture and an organic feel to our ink bleeding.

Desaturate it repeating the very first step. I scaled the texture to fill the screen as well. Now apply a layer style to it of “Gradient Overlay”


So now I’ve got 2 layers inside of “ink blots” composition. The top layer is the ink I desaturated and adjusted the levels. This layer is going to be used as a Luma Matte for the layer below it. The layer below it is the gradient textured watercolor from Gomedia that we just created. The top layer is the layer that will matte (or mask for Photoshop users) the layer below it.
So by setting the Track Matte to Luma Matte Inverted, we reveal the gradient textured gomedia watercolor in the shape of our ink video footage above it. Luma matte reveals whatever is white and masks whatever is black (and any shades between). We set it to Luma Matte Inverted because our ink is in black and we want that to be revealed, not the white space around it.

The results of a Luma Matte Inverted applied to our gradient textured gomedia watercolor layer:

STEP THREE: Applying an Alpha Matte
The Luma Matte looks great! However, I’m not satisfied with the amount of texture being revealed. I suppose I could adjust the levels of my original ink footage to control that, but here is another way to add more texture to this and cover the usage of Alpha Mattes.
Create a new composition called “new ink blots”. Drag the composition “ink blots” from your project window into the “new ink blots” composition. Then drag a different water color texture from Gomedia into the same comp. You should have 2 layers in the comp “new ink blots” – layer 1 is “ink blots” and layer 2 should be your Gomedia water color texture. Remember the layer on top will be used as your matte (mask). So you will be revealing the water color texture and using the “ink blots” as your matte.
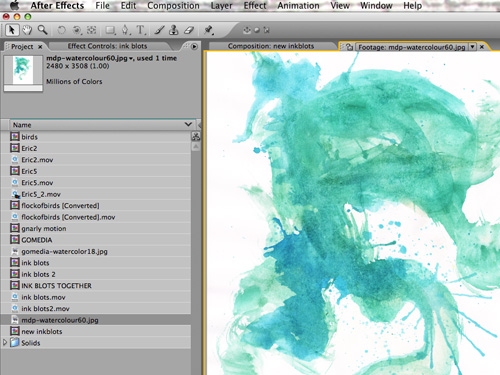
This time you will be using an Alpha Matte. The difference is that an Alpha Matte will only matte the non transparent areas of the layer. So now that we’ve already created a Luma Matte in the “ink blots” comp, all the white space you see is actually transparency. You could change the background color of your “ink blots” comp from white to another color to understand the transparency if needed. Set the Track Matte of the water color textured layer to Alpha Matte.

Each time you choose a track matte the layer being used as the matte is automatically turned off so that you don’t see it. You will only see the layer being matted (masked). This time turn on Layer 1 “ink blots” and set the layer mode to Overlay.

The results:

I decided there is a little too much green in there so I desaturated the water color layer 2. Now we want to make this ink blot symmetrical. Set up a new composition and call it “Gomedia.” Drag “new ink blots” into that composition and apply the Mirror effect. [Effect/Distort/Mirror]

And… I’ve got a symmetrical ink blot! Raaad!

STEP FOUR: Create another ink blot and apply it as a Luma Matte and an Alpha Matte
I set up my 2nd ink blot in a new comp called “ink blots 2” – repeating the steps from earlier. (Desaturate it, adjust the levels, and apply a mirror effect to it.) My second ink blot looks like this [see pic below] after doing that. (do not apply a gradient overlay layer style to this one):
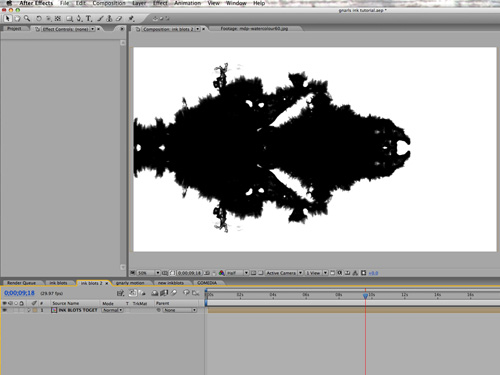
I added a white solid below ink blots 2 layer. [Layer/Solid…]

Set the white solid Track Matte to Luma Inverted Matted.

I now have my inkblot in solid white and I’ve changed the background of the comp to a dark gray. The gray actually transparent.

I dragged my “ink blot 2” from my project window into my “Gomedia” comp i created earlier. It now looks like this… the white ink is what we just created and the gray background is transparent.

The white inside the middle of the ink looks good. And the background will be white as well. The only problem is that if i want to put any layer behind white ink bleed in the middle, I will not be able to fly my camera thru that layer because the white is solid rather than transparent. So, that’s easily solved…. we have 2 layers in our “Gomedia” comp so far – layer 1 “ink blots 2” and layer 2 “new inkblots.” I want to use “ink blots 2” as an Alpha Matte for the layer “new ink blots.” I set it to Alpha Matte Inverted because I want the area where the white is to be transparent.

Now the white ink is transparent and i can put a layer in back of it or i can fly my camera right thru the center and keep going. Eventually I will set my background to white. But for now it is gray just so that i know which areas are transparent.

STEP FIVE: Working your video footage into the scene
Here is the footage of my singer on a green screen.

There all sorts of tricks and tips to green screening footage. I will not cover those here because with the effects we will be using, we do not need a perfect key. I am using Keylight that comes with AE. [Effect/Keying/Keylight 1.2]
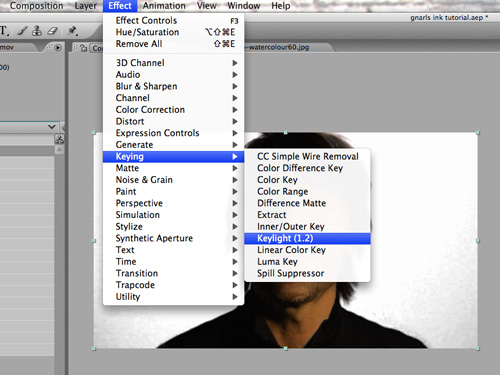
I placed my singer with the background keyed out into my “Gomedia” composition. Made a copy of it and flipped it. Using the steps from earlier, I desaturated and adjusted the levels of the singer until I had results that were solid black & white.

Then I set my layers to screen mode so that only the whites will show.
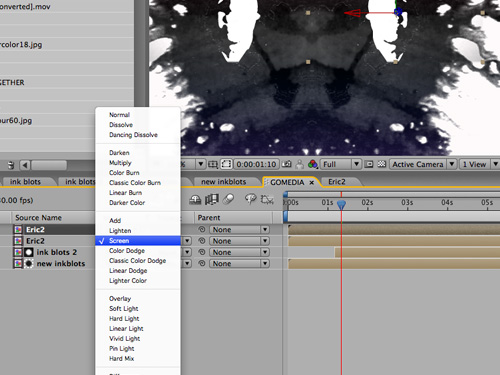
Now I have repeated those steps (key, desaturate, levels, and place into Gomedia comp) with another shot of my singer that used a different camera angle. Notice my layer order. Because we took the time to Alpha Matte “ink blots 2” earlier, I can place the footage below the layer “new inkblots” and have it show. If we had left it solid white as it is in our comp “ink blots 2” we would not have been able to do this.

STEP SIX: Animate birds using Illustrator and Photoshop.
Using Gomedia’s Flock of Birds from the Arsenal, I want to choose one flock to animate.

I chose several individual birds out of the flock and layered them directly on top of each other. Make sure each one is on a separate layer in Illustrator. Choose File/Export/Photoshop.
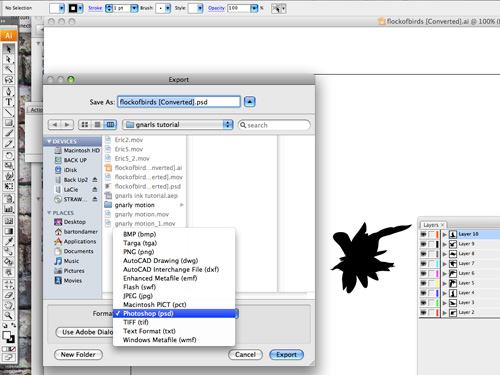
Make sure “Write Layers” is chosen underneath Options. I don’t need Maximum Editability checked. Name it and the open Photoshop.

In photoshop, I opened the .psd I just exported. Then I need to open the Animation window. [Window/Animation]

In the top right corner of the Animation window I clicked the arrow and chose “Make Frames From Layers”

Now I have separate frames that have been created from each layer in my .psd. I can control the amount of time each frame is displayed by selecting the frame(s) and clicking on the black arrown in the bottom right corner of a frame that is selected. I chose .1 seconds. I can preview the animation by clicking the play button inside of the animation window.

I am ready to make a video clip out of this animation by choosing file/export/render to video. By default, the settings are set up to render the frames on a transparent background. Keep that setting. Now I’m ready to use my new bird flying movie in After Effects.

STEP SEVEN: Add birds into my final composition
I made new comp with my animated bird. I will be using this comp as a custom particle in using Trapcode Particular.

create a new solid (the color does not matter).

With the solid layer selected I then apply Particular

By default, there are white spheres animating out over time from a center point. I’m going to change a lot of the setting for Particular. Each one of those white spheres will be replaced by my movie of the bird flying. so as i adjust the setting for particular and watch the white spheres change direction/quantity/etc. I need to keep in mind that these spheres will be my flock of birds. I’m going to keyframe the amount of particles per second. this will keep my Emitter from continuously creating new particles. I only want a flock of them. Not an endless cycle of birds emitting. I have chosen 100 particles/second and will skip down in my timeline about 1 second and keyframe 0 for the amount. this will cause a slight trail of birds at the tail of the flock rather than an abrupt absence of birds.

I want to change my Emitter shape from a Point to a Box. This will allow me to emit from a larger area and look more natural for my flock of birds.

Now I have the option of changing the size of my Emitter. I can also come back and adjust these after I’ve turned the white spheres into my movie of birds.

Choose “Custom” from the tab under “Particle Type.”

An option to choose my custom particle is now available. When I click the tab it shows the list of my current layers. I chose “birds” from the list.
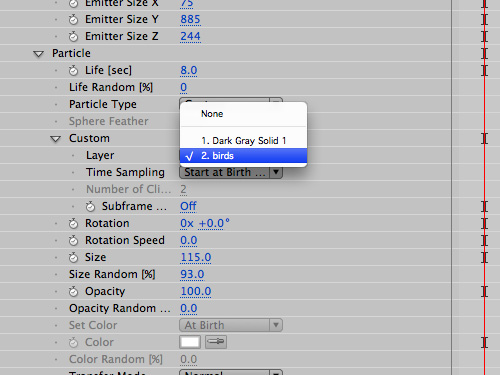
I need to tell the Time Sampling to Loop my movie of the birds.

And now I need to adjust the size of my particle (birds).
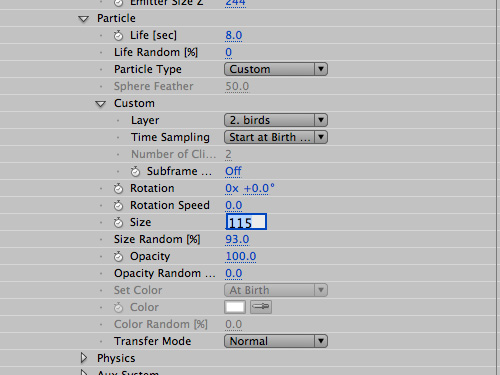
The results of my custom particle. I can go back to my Emitter settings and control the velocity & rotation of the particles being emitted. Each instance is different depending on what I’m trying to emit and the results I want.

I dragged the comp of my birds from my project window into my “Gomedia” comp. Created a copy and flipped it.
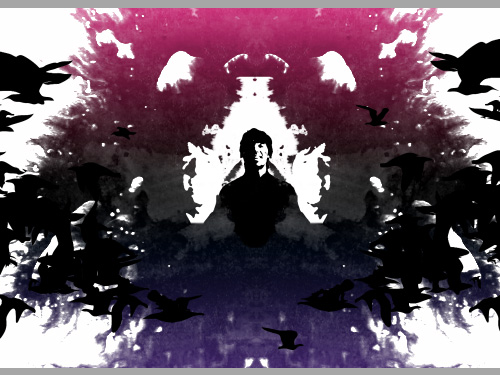
The final steps are to create a new camera. Select all of your layers inside of “Gomedia” comp and make them 3d layers. By default the Z position will be 0. I left them at zero and animated my camera towards all of the animated artwork. For additional interest, I could space out the layers in Z space and get a feeling of depth as the camera animates towards the artwork.
Conclusion
I’ve covered Luma Mattes & Alpha Mattes. I also covered frame by frame animation using Illustrator, Photoshop, and AE. Hopefully you’ve picked up on some techniques that can be used in many other creative ways. I also used the same technique of desaturating a layer and then applying a Color Overlay Layer Style to it for a great look. This was originally covered in depth in the Bling Tutorial. Have a great day and feel free to post links to some creative ways you are using this tutorial. Peace.
Ink Bleeding Effect from Go Media on Vimeo.