Blog
Our New Storefront & Window Graphics – From Concept to Creation!
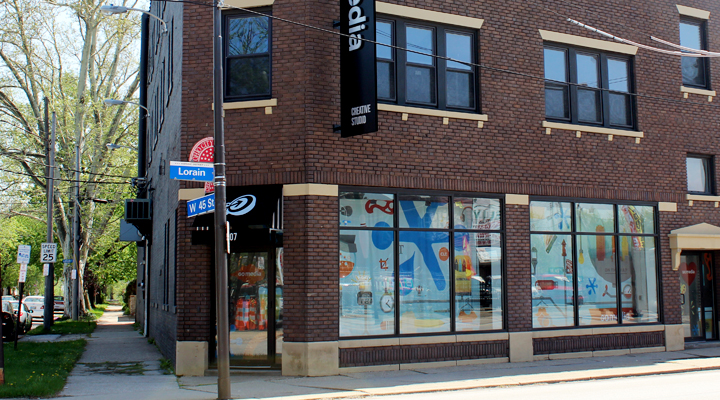
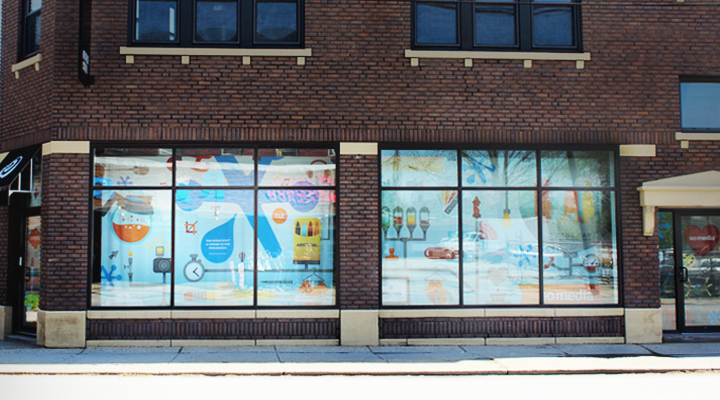
Custom Storefront Window Graphics
We teamed up with Jakprints to show off our brand new store front as well as their awesome large format printing capabilities. Here you’ll get to see the full process from conception to installation.
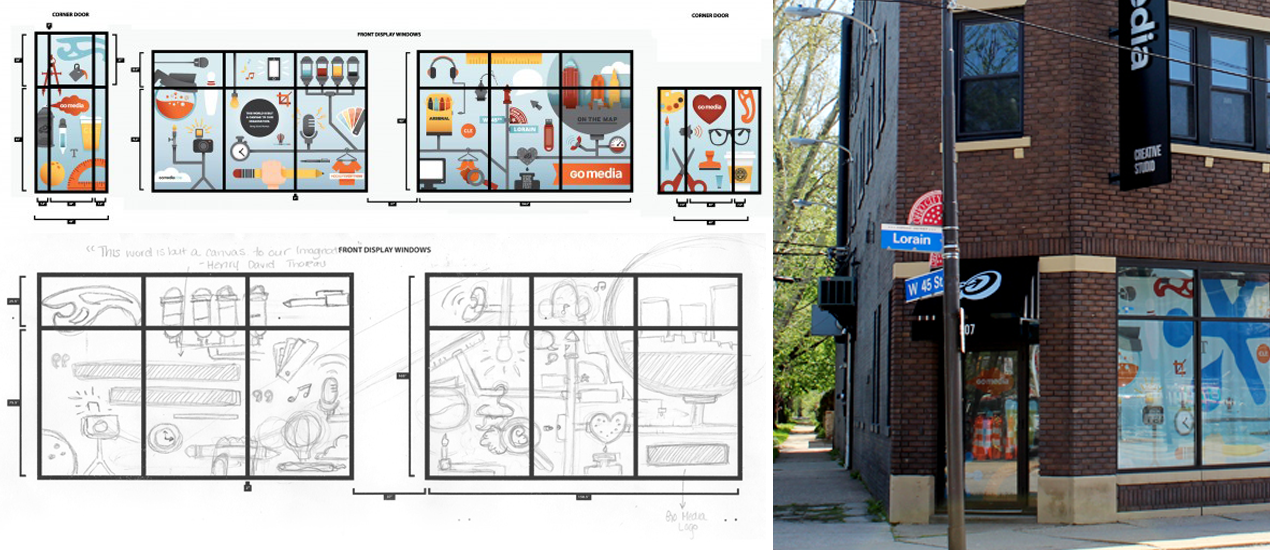
Step 1 : The Concept
We ran through a few different ideas before finally landing on a concept for our first set of window banners. We wanted to create a large collage of icons which all, in one way or another represented the life of an artist and more specifically the crew here at Cleveland graphic, logo and web design studio Go Media. This included a good mix of the tools we use, the things we like and Cleveland, Ohio!
We thought it would be most helpful to start by creating a list of all of the individual items that needed to be created – then we asked our entire staff to add items that they felt represented Go Media and being an artist to them. We made sure to include a piece of everyone.

Step 2 : Sketches & Measurements
Now we had the concept down, and the first step in the production phase was to measure and quickly sketch the general layout of the icons.

![]()
Step 3 : Graphic Proofs
Now we had the concept down, and the first step in the production phase was to measure and quickly sketch the general layout of the icons. Once we had our rough blueprint sketch, it was a process of knocking out each item on the list one by one and working them together with some Jakprints logos to really fill the space.

Once all the icons were in place, a texture was applied using an opacity mask.
Step 4 : Applying an Opacity Mask (Texture)
An opacity mask is essentially a combination of a layer mask and a clipping mask. It allows you to control the transparency of a shape based off of a black and white gradient or in this case texture. You can use an opacity mask in place of a vector texture to cut back on your file size.
How it works:
- Group all of the elements you wish to apply the opacity mask to and make sure they are set to 100% opacity.

- With your group selected, click the drop down menu in the transparency palette and select ‘Make Opacity Mask’.

- A mask is applied to the image like you see here, click into the mask.

- With the mask selected, you can now file > place your texture.

You’re Done! Depending on the texture you selected the result might be very subtle or rather extreme. Because the one we are using here is primarily light the outcome was very subtle. You can also check the ‘Invert Mask’ box to get a different effect, but for our purpose this subtle texture was just right.

Step 5 : Teaming Up with Jakprints
Now we had a graphic proof and were ready to sit down with Jakprints and go over our options. We knew we wanted to do banners for the windows but weren’t quite sure how we were going to tackle the doors. JakPrints was able to provide us with a list of options to consider. Some of which included:
- Vinyl Banners
- Vinyl Mesh Banners
- Poly-Banners with Stitched Hems
- Window Clings
- Vinyl Decals
We ended up up selecting a lightweight stretch banner for the main windows. This material is wrinkle resistant, and because we know we will be swapping out banners over the years this works out best in terms of storage. JakPrints also offers a wide variety of substrates (eco-friendly, economic, or synthetic for maximum durability).
For the windows we decided to go with a clear vinyl application. This was adhered backwards to the inside of the windows, a non-permanent short term option that prevents weathering of the graphics. JakPrints also has long term outdoor durability options as well as many more solutions for just about any application. Some others include: Wall, floor, posters, trade show displays, indoor/outdoor signs, back-lit material, yard signage, even vehicle wrap.
Step 6 : The Printing Process
After rounds of revisions, swapping icons in and out the design was done it was ready for the printers at Jakprints to work their magic.
Step 7 : Installation
Before we were ready to physically install the banners we needed to think through the logistics of the space. We created a mockup of our hanging system and had Jakprints sew in hems to match.

When the banners finally arrived we were all anxious to get them up. So we gathered our team and got to work.
The window vinyl for the doors was a slightly more complicated installation, not one we were willing to attempt. But we need not worry because Jakprints has access to a nationwide network of certified 3M installers, so they set out one of their guys to finish the job.
Step 6 : Conclusion
So there you have it, after all that hard work we are proud to reveal our beautiful new store front and our very first set of window graphics!
A big thank you to JakPrints for working with us on this project!
Want to work with us to create something beautiful? Contact us here.