Blog
Screen-Printed Movie Poster Tutorial by Pale Horse

Before we get started
Hey everyone,
Chris Parks (AKA Pale Horse) here for Go Media. Today, I’ll be outlining my recent experience working with The Indomina Group, a global entertainment company who produce and distribute movies, television, music and interactive games. Their latest project was a Hong Kong, wire-fu, murder mystery release called “Detective Dee & the Mystery of the Phantom Flame”. Indomina contacted me to create a limited edition poster design to promote the release of the film here in the U.S.
I absolutely love screen-printed, movie posters, as they give artists the chance to create a piece that is far more interesting and collectable than the standard, glossy, big budget designs released to the masses.
Below is a shot of the final, approved artwork that was printed for the release.

Client correspondence
To give you full insight into the project from start to finish, I’ve included the interaction emails with the client and progress shots along the way so you can follow along.
Lauren Fisher – Client
We’ve started a project at Indomina where we release an art/teaser poster for every theatrical release we do.
We just finished one for Griff The Invisible that will premiere this week at Comic Con and I need to get started on the next one, which is for Detective Dee and the Mystery of the Phantom Flame. It’s an AMAZING film, full of kung-fu awesomeness, high-production values and a stellar cast.
I love your work so much and I think you could come up with something awesome based on the imagery from Dee.
I’m thinking since it’s teaser art we don’t have to cram a bunch of type on there…the title is a mouthful on its own: “Detective Dee and the Mystery of the Phantom Flame”
I’m attaching the official key art here and I’ll send you a link to the trailer after it premieres, which should be in a couple of days! I was hoping to have it finished a month from now to release before the film comes out. What do you think?

I thought it was really cool that even though I didn’t have any previous movie poster pieces in my portfolio, the client saw the potential in my illustrations for this type of work. I didn’t hesitate to jump all over this one!
Along with working out the budget, I responded with some initial questions to get things rolling. When working out project budgets, there are usually several factors I take into consideration. Some of the factors I considered here were: the number of hours I plan to spend on the piece, where the artwork will be used, timeline for completion, getting public credit for the work / adding my logo to the piece, how much I would enjoy working on it and so on. Since my work is pretty detailed and there are 5 characters, dragons, typography and background imagery, I estimated about 26-30 hours of illustration time on this one. I always attempt to at least get paid for the actual hours put into the piece. There is of course, also, time involved for back and forth emails, phone calls, changes, etc. that are hard to estimate. With smaller projects, like limited edition posters, a lot of these extras often get thrown in for free, as the price could potentially become too expensive to make sense for this type of project. To cover your ass, you definitely want to establish early-on in your estimate, what you are providing (eg. concept sketches, number of revisions, final file formats ex.) so that if things get hairy with a needy client, you don’t go broke trying to finish the project.
Note: As a rule, I also take a 50% down payment (wherever possible) to make the project official and add it to my schedule.
Chris Parks – Artist
Count me in! The budget sounds good and will allow me the necessary time to put some of love into the piece and make sure it’s really badass! The month timeline should work fine as well. See below for some initial questions and I’ll send over my official pricing .PDF and 1/2 down payment info to lock you into the schedule to get rockin’ as soon as possible.
- Will the poster be screen-printed or full color?
- If screen-printed, should I stick to a certain # of ink colors
- Can I create custom typography for the title or should we just use the current logotype?
- Will it be a standard 18×24 in. size?
- Do you have a folder of images / characters that I can use for reference? (I found a few on dee.indomina.com, just wondered if there are others to utilize)
- Is it possible to watch the movie before getting started?
Soon after, I received my answers, down payment, still images and a screener DVD to watch the film. The piece was to be an 18×24, 3-4 color screen print and custom typography was a plus.
Starting the design process
I was now ready to start selecting useful reference stills and work up my initial layout. Below are some of the reference images that I decided to work with for the piece.
Reference images

I started in Photoshop to quickly cut and move reference elements around until I liked the overall feel of the layout and got all of the main characters into the design.

Next, I decided to work with the typography and incorporate that into the piece early on. I think a big mistake a lot of illustrators make, is to try and force the type in at the end, rather than planning for it from the beginning.
Typographic considerations
Since the title of the movie was really long, I knew I had to solve the issue right away, so I opened up Illustrator and typed up the title in several different fonts that could provide the base for my custom type. These fonts are a selection from Letterhead Fonts and a site I run called Golden/Black.
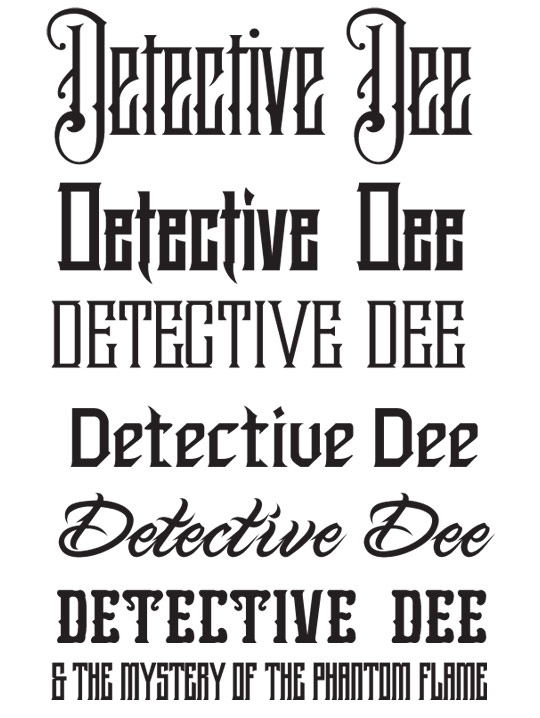
I often choose a few fonts with similar attributes, select parts and pieces that I like from each and combine them for a custom design. I really liked the tall, ornate feel of the first font shown here, but it needed the bold, more legible look of the second one. I also thought the lightning bolt-looking element from the “t” was pretty cool and decided to incorporate wherever possible. Adding the little flame to dot the “I” seemed to make sense, so I played with that as well.
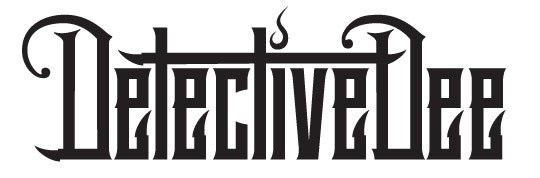
These font styles proved to be a good choice because I could easily grab the points and pull them to make the type very tall and condensed to fit the space I allotted on the poster. As you can see, I placed a lightened screenshot of my reference image into Illustrator so I could view the space available. To make even more room for my artwork, I gave the type an “Arc Upper” warp effect in illustrator. The effect worked pretty well, but I didn’t like how it distorted some areas.

To fix these areas, I “Expanded” the effect on the type, copied the elements from the original (non-warped) design, pasted them back on top and erased the areas as needed to bring it back to how I wanted it to look. After a few other tweaks here and there, I was happy with the type design and went back to the illustration in Photoshop.

Time to draw
A lot of people think that I create all of my illustrations in Illustrator, but my preferred method these days is Photoshop CS5 and a Wacom Cintiq tablet. I used to create a ton of vector work, but I find it much more liberating to just draw straight onto the tablet with the brush tool. I do however, aim to retain a lot of the clean lines and shapes that I like about vector art and incorporate that look into my Photoshop work.
To get started, I always set up my files using a 600-800dpi document size to make sure the lines are crisp and clean. (In this case 600dpi works fine since the piece is 18x24in.) Next, I set up my layers to get started on the illustration. As you can see below, I’ve got my reference image and type placement layers below a Hue/Saturation layer to lighten and colorize the image so I can draw on top of it. The top layer is where I’ll start drawing with the brush tool in black ink.

I set up my brush for drawing with my Wacom tablet using the settings below. Nothing too fancy here. Just turn on Shape Dynamics, Smoothing and Spacing. Set hardness to 100% and Spacing to 1%.

Next, click I clicked Shape Dynamics and configured the settings as shown below.
(Note I also use these same brush settings for my eraser tool)

First bits of client feedback
Before getting too far into rendering the illustration, I decided to send the client an in-progress shot to make sure everything was working well and no big changes were need. A lot of times I’ll send over a rough sketch of the entire piece, but In this case, since I was working from a photo montage, I thought it best to email a snapshot blueprint where the client could see the layout quickly and get a sense of how the line art and typography would look.

After sending over the initial screenshot, I got the following client response:
Lauren Fisher – Client
This is looking really cool! Definitely into the layout and the type treatment.
My only note is that Dee is looking a little…off. Not sure if there is another pose that might be more badass since he’s the star?
Since I’m always fine with making things “more badass”, this was fine feedback in my book!
Now that the layout and overall look was approved, I could really dive into the line art at this point, so I went through the characters, one-by-one, filling in all the black areas and tiny details.

Here’s a close-up where you can see some of the details of the folds and shadows drawn over the reference image. I like to use a lot of black in my drawings to give them a very bold look, so I outline all of the elements and then fill in the shadows as I go along. It’s very important to look carefully at the reference image and decided what you want to be in shadow and what should be lit. I find when drawing faces, it’s best to leave most of the details to the shading phase, especially when drawing women. Too much black line work can make your female portraits look harsh and unnatural.
(Note I’ll often sketch in red on a separate layer below the line art layer to give myself a guide for changes to the reference image and to sketch in areas that are too dark to see)

Once I was happy with the line art and got Detective Dee’s more “badass” look approved, it was time to start blocking in colors and shading. I don’t like to commit to exact colors at this point, but focus on fills and basic shading on separate layers that can be changed at any time.

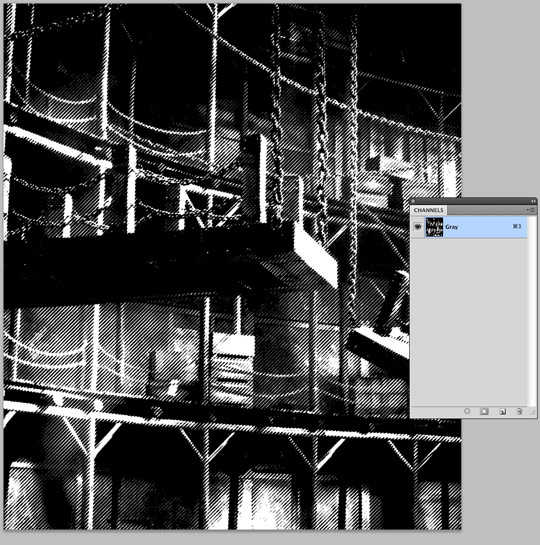
After a lot of the color fields and shading were blocked in, I started choosing colors that fit the mood of the piece and shades that were within the 4 color limit. At this point, I also wanted to incorporate a background into the design for added visual interest. For this I used one of the high-res movie stills sent by the client.

I chopped it up, flipped it and converted it into a halftone pattern. Then I used the channels pallet to select just the black, then copied and pasted it into the background of my illustration.
To give the poster a good amount of lighting and depth, even with the limited color pallet, I like to make the piece appear to have more colors than it actually does. I decided to use a cream-colored paper to allow for 2 shades of tan and 2 shades of teal, mixed with the black line art.

The cream paper color is also used for added highlights throughout the piece. Simply filling the line art with color can make the artwork look flat, so this is the stage where the piece really comes to life!

Now it’s time to drop in my typography and send off the fully rendered poster artwork preview and wait for approval.
Final approval discussions
Chris Parks – Artist
I just put the final touches on the Detective Dee poster and I’m really stoked on how it came out! Please see the attached .jpg preview, let me know what you think and I’ll wrap it up and send over the print file. Talk to you soon.
Lauren Fisher – Client
This looks AMAZING.
Thank you! We are just standing by for producer approval, but we should be all set for delivery.Will you be sending it all set up for screen-printing? We will be sending the artwork to be printed by a company called Vahalla Studios in Kansas City. They are awesome.
Chris Parks – Artist
Very cool! Glad you like it! Yes, I’ll set it up for print and send over the production file as soon as you give me the green light. The artwork was created in Photoshop, so the file will be a super high-res, layered .psd file for printing. Yeah, the guys at Vahalla do amazing work! Should look great! Talk to you soon.
Getting ready to deliver the print ready files
After receiving approval from the client, it’s time to set up the final artwork to be screen-printed. I always like to work in separate layers from the beginning for each color as I’m working in Photoshop, so setting up my files for print is pretty easy. I start by busting out my handy PANTONE color guide and pick some nice “uncoated” ink colors for the printer to use. You should choose ink colors from the uncoated book, not coated. This is because papers used for screen-printing will generally not be coated and the ink color reacts differently on each.

After I’d chosen my PANTONE ink colors, I changed the color mode to CMYK, cleaned up my layers and named each layer with the PANTONE code as shown below. (Note: I could certainly write an entire tutorial about the details of file preparation, trapping etc. here, but this is the basic idea.)

So, because this is a 600 dpi, layered, CMYK .PSD file it’s ends up being about 612MB. Once compressed, it becomes a 200MB .ZIP I use a service called You Send It, which I use just about every day. After uploading the file, I sent my final invoice and file download link to the client to complete the project.
Some production photos
See below for some photos sent from Vahalla Studios after production.

I hope you enjoyed this tutorial and have been inspired to take your creations to the next level!
Thanks for reading and feel to connect with me on Twitter, Facebook and check out more of my artwork on www.palehorsedesign.com.