Blog

Tutorial: How to Use Vector Textures in Adobe Illustrator to Distress Your Logo/Design
Free Vector Textures + How to Use Them
We are so excited to announce the release of a new vector set, the Fistful T-Shirt Design Graphic Vector Set.
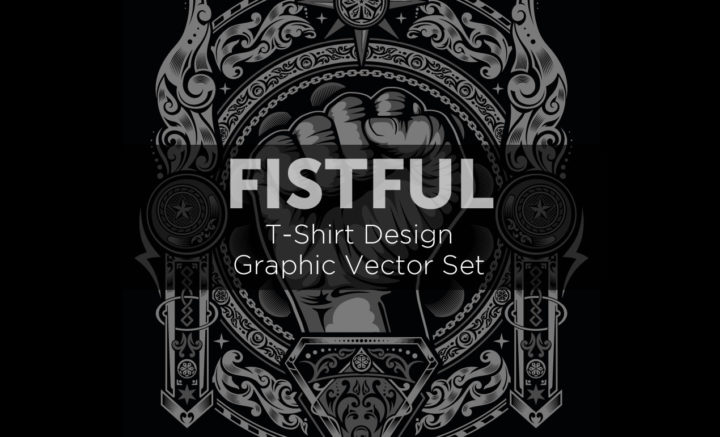
This new vector set was created by new Arsenal Artist, Dedda Sutanto, and can be found over on our Arsenal for purchase now. This set is exclusive to our Arsenal and includes 43 individual elements, plus the fully completed design. These elements include a fantastic array of frames, crests, wings, borders, bullets, stars, ornate elements, and more. A gun and fist are extra elements that complete this unique set.
Purchase the Fistful Vector Set now
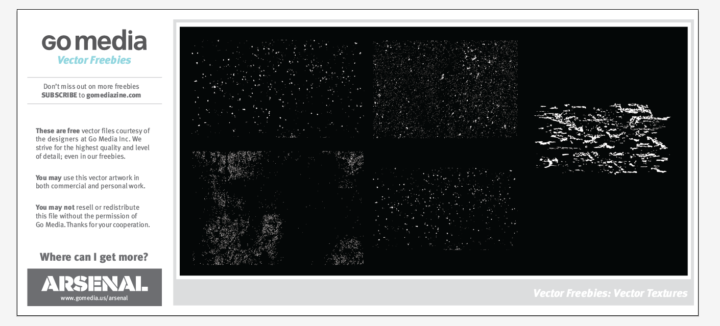
We’ll be using elements from this pack, along with free distressed vector textures, to create a distinct weathered design. So, in order to follow along, you will need to purchase the set, as well as to download the free set of distressed vector textures we’ve made available for you here:
Download now: GoMedia_Vector_Freebie_Distressed-Vector-Texture
Step One: Come Up with Your Own Design in AI.
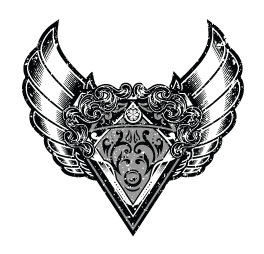
Use the elements from the Fistful T-Shirt Design Graphic Vector Set to create your own unique design. (Or, if you choose, use the fully completed design provided in the set.)
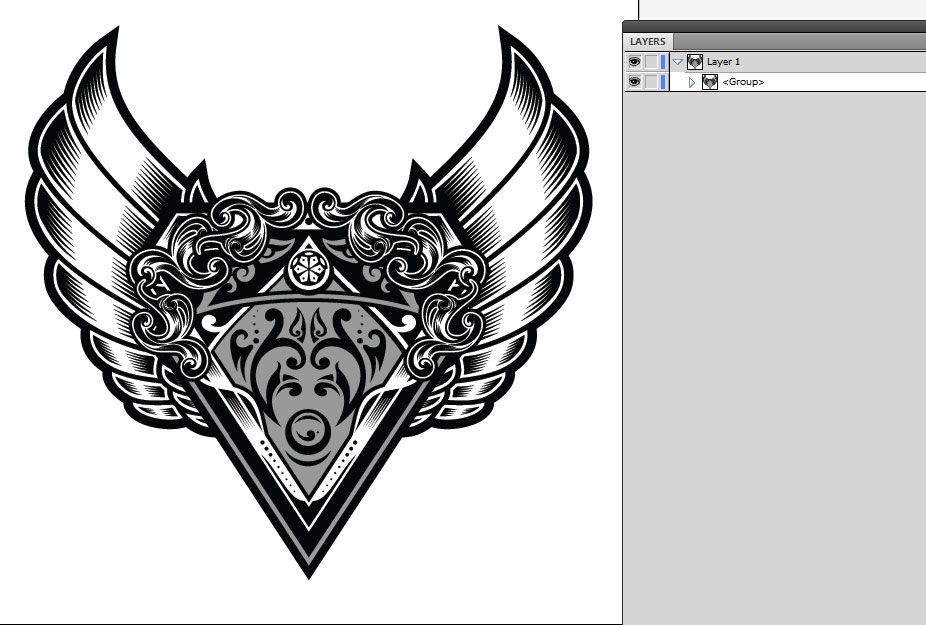
Here’s the design I’ll be using for the purposes of this tutorial:

Step Two: Select (Ctrl + A) and Group (Ctrl + G) all of the elements together. Make sure your design is centered horizontally and vertically within your artboard. This will come into play later.

Step Three: Select (Ctrl + A), then make a copy your design (Ctrl + C). Place your copy next to the original. Then go to Window > Pathfinder to pull up your Pathfinder Window.

Step Four: Making sure your copy is selected, press UNITE on your pathfinder tool. Your copy should merge into one solid shape. Well done!
Let’s leave it there for a moment and go back to our original design.

Step Five: It’s time to paste our vector texture over our original design! Open the vector texture of our choice up in AI.
Copy (Ctrl + C), then (Ctrl + V) to paste the vector texture over top of your design. Head over to your swatch panel in order to change the vector texture from black to white and place your texture where you think it looks best.

Step Six: Add the copy (i.e. the black shape) over top of the original design (and, of course, the vector texture you’ve added to it).
Just like the original design, you’ll want to center this shape to the artboard. You’ll also want to make sure that this shape is indeed at the top of the pile so to speak. You can do this by making sure it’s selected and going to Object > Arrange > Bring to Front.

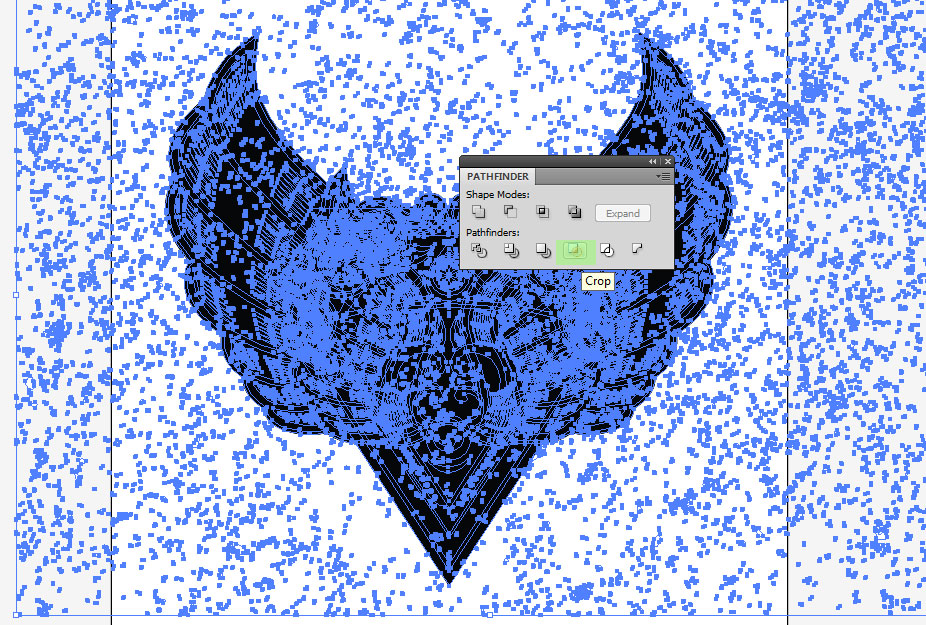
Step Seven: Next, select all (Ctrl + A) and head back to your Pathfinder Tool. Hit CROP.
Purchase the Fistful Vector Set now
Step Eight: and you’re done! But wait!
Step Nine. Let’s see how your newly distressed design looks on one of our mockups! (I’m going to use one of our Men’s Ghosted Pullover Hoodie Mockup Templates featuring displacement maps.)

Hope you guys found that helpful. See you all very soon!
Purchase the Fistful Vector Set nowAccess our full library, only $15 per month