Blog
How to Use Mockup Everything
Mockup Your Designs!
Back in September of 2012, Go Media launched the site called Mockup Everything. We have received some great feedback on the site and a slew of great template suggestions.
How Do I Use the Site?
Now some of you have asked, “How do I use the site?” So in order to answer that question, we have created this post to give you step-by-step instructions so that next time you log into Mockup Everything, you will breeze through the mocking up process! Also don’t forget to check out our “support” page to get answers to our most frequently asked questions.
Step 1:
Go to the Mockup Everything website.

Step 2:
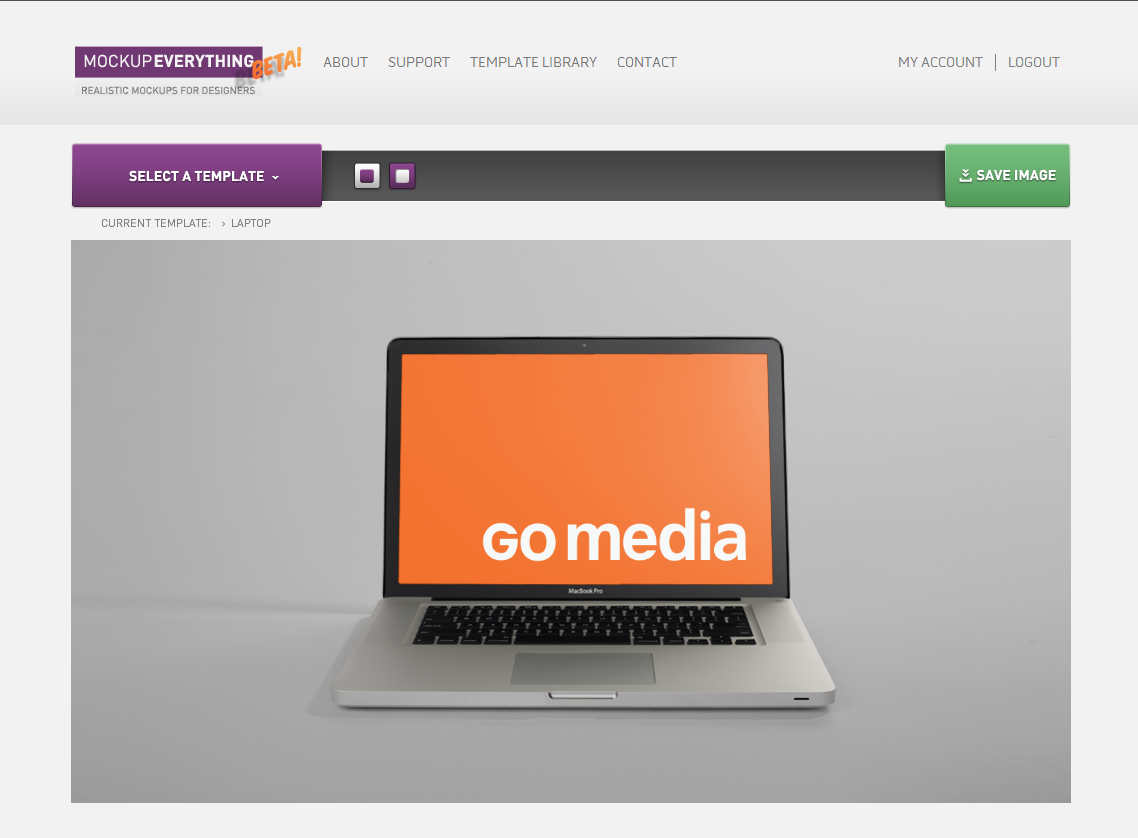
Click on the purple button called “select a template” (it is on the far left of the screen).

Step 3:
Select a category from the drop down after you have clicked the purple button called “select a template.”

Step 4:
Once you have selected your category, click on a product inside that category.
***(please note that products are either flat or perspective with perspective meaning that the object is angled or curved)***

Step 5:
Once you have selected which product you would like to see your designs mocked up on, you will see a blue highlighted area.
That highlighted area is where you will upload your image file from your computer.

Step 6:
Click on the blue highlighted area or mask to upload an image file from your computer.

Step 7:
For a flat product like the laptop, your image file will drop into the blue highlighted area or mask automatically.
***(go to Step 10 if you chose a perspective product)***

Step 8:
Once you have chosen your image file to add to the highlighted area, you will want to position your image file within the highlighted area or mask.

Step 9:
If you do not like the image file you just uploaded to the blue highlighted area, click the image file and then click the “delete” button on your keyboard.

Step 10:
For a perspective product like the angled ipad, once you have clicked on the blue highlighted area to upload your image file, a dialog box will pop-up where you can position, enlarge or shrink the image file you are adding to the highlighted area or mask.
Once you have positioned and sized the image file you have uploaded and are ready to add it to the highlighted area or mask, click on the green “save” button in the dialog box.
If you do not like the image file you have uploaded then click on the purple button called “upload new art” to upload a new image file to see mocked up on the product you have chosen.
***(please note that once you have pressed the green “save” button and aren’t happy with the positioning or size, just click on the image file you just added and the dialog box will pop back up so you can modify or change)***

Step 11:
If you would like, you can change the background color.
Click on the purple box with a smaller white box in the middle of it (the farthest button to the right from the “select a template” button).
When you click on the purple box a color-picker will drop down and you can choose which color you would like to change your background color to. Click the color you would like to change the background color to.
***(please note that for many of the outdoor templates you will not be able to change the background color)***

Step 12:
If you are looking for more color options than what is shown when you click on the “background color-picker” button, click on the “multicolored circle” button that is in the upper right corner of the “background color-picker” drop down box.
You can also input RGB color values as well as change the hue, saturation, and luminosity for more color customization options.


Step 13:
You can also change the color of the product by clicking on the white box with a smaller purple box in the middle of it (the button directly to the right of the “select a template” button and just to the left of the “background color-picker” button).
When you click on the white box a color-picker will drop down and you can choose which color you would like to change the color of the product to.
***(please note that the color will change in the blue highlighted area only)***

Step 14:
If you are looking for more color options than what is shown when you click on the “background color-picker” button, click on the “multicolored circle” button that is in the upper right corner of the “background color-picker” drop down box.
You can also input RGB color values as well as change the hue, saturation, and luminosity for more color customization options.
Step 15:
Once you have chosen your background and product color and have your image placed in the right location within the highlighted area, it is now time to save out your work.
Once you are ready to save the final image, click on the button called “save image” (the green button on the far right).

Step 16:
After you click the green “save image” button, there will be a pop-up that asks whether you would like to “crop” the final image file or to “continue.”

Step 17:
If you click on the “crop” button, your cursor will change to a crop tool and you can select the area you would like to crop.
Use your cursor to select the area you would like to include in your final saved image.
Once you have highlighted the area with the crop tool, press the “save image” button again, and a dialog box will pop up, prompting you to choose a location to save your jpeg image file.
Then click “save” in the dialog box to save your jpeg image.

Step 18:
If you click on the “continue” button, a dialog box will pop up, prompting you to choose a location to save your jpeg image file.
Then click “save” in the dialog box to save your jpeg image.
***(please note that you will only be able to save out a jpeg image, not a PSD file and that Pro Users will get a higher resolution jpeg image at 1000×563 pixels and Free Users will get a lower resolution jpeg image at 540×305 pixels)***

There you have it! You have now seen how to successfully mockup your designs on one of our many templates within Mockup Everything!
Other Questions You May Have
In case there are things that weren’t covered in this how-to tutorial, please read the questions and answers below for further clarification.
When I save my image do I get a PSD file?
When you click on the “save image” button, you will be prompted to save out a jpeg, to use as you wish. If you are a Free User you will get a 540×305 pixel jpeg and for Pro Users you will get a 1000×563 pixel jpeg. If you would like more control over the actual templates, we suggest checking out our online store called The Arsenal, where you can buy the Photoshop (PSD) files for individual templates.
Can I try Mockup Everything for Free?
Why of course you can!
- All you have to do is click on the button called “select template.”
- Then choose which template you would like to see your designs mocked up on.
- Click on the highlighted area to add your image to the canvas.
- Change the background and product color if you wish.
- Once you are finished click the “save image” button.
- After that a dialog box will pop up for you to chose to either save out a: higher resolution jpeg image file (1000×563) which means you would have to sign up for the FREE 7-day Pro Version trial or save out a lower resolution jpeg image file (540×305) for FREE!

How do I upgrade to the Pro version?
Upgrading is easy, especially from the homepage. You’ll see a Go Pro link in two places up top, there’s a banner on the right and Sign Up gives you the same opportunity to enjoy a 7 day free trial! Upgrading to Pro requires a PayPal subscription. The fee is charged monthly, securely through PayPal. Cancel any time!

If you’re already a member, you can upgrade to pro any time! Once you’re logged in, go over to My Account and you’ll see an Upgrade to Pro link. It will take you over to PayPal to process the subscription.

How do I cancel my Pro subscription?
Downgrading back to the Free version is easy! Be sure you’re logged in.

Next, click on My Account where you’ll see Account Info in the right column. Click the Cancel Pro link.

You’ll be taken to your PayPal account. Scroll to the bottom of the page and you’ll see the Cancel Subscription button at the bottom.
That’s it! Your account will be automatically downgraded after you end your subscription. You can upgrade again at any time.
When I click on an image in the Template Library, why doesn’t take me to the template I’ve chosen?
I know this has been confusing for some of our users. The Template Library just shows you image files of the variety of templates we offer (if you are a Pro User you will have access to every template in our library; however if you are a Free User, you would only have access to the following templates: ipad-angled, men’s crew neck shirt flat-front, men’s distressed shirt ghosted-front, women’s crew neck shirt ghosted-front, women’s distressed shirt flat-front, poster with hands, and the magazine cover).
So when you click on one of the template images in the library, it will not take you to the actual template.Our mockup system was built in Flash so we don’t have the ability to link the image files to the actual templates. We apologize for this issue and know that it is not the most ideal user experience, but we have noted the issue and will keep that in mind for future improvements.
Advantages of Becoming a Pro User
Have you been asking yourself, “Why should I upgrade to the Pro Version of Mockup Everything?” Well, here are the reasons why the Pro Version rocks!
- You will have access to every template we have in our template library.
- Each month we will be adding a minimum of 5 templates and you will have immediate access once they are published.
- Save 1000×563 JPEG images, versus 540×305 in the free version.
- Your saved image won’t have the Mockup Everything watermark.
- Advertisements will be blocked.
- It’s only $12 per/month (you know you spend more than that per week on coffee).
- Priority access to Customer Support.
- Priority consideration for template requests.
No hard feelings if you aren’t ready for the supped up Pro Version, you are always welcome to use Mockup Everything as a Free User.
How to Contact Us
If you have any template requests, suggestions or improvements, please don’t hesitate to send them our way. You can get in touch with us either through the Mockup Everything contact form or through our Get Satisfaction Community page where you can share your experiences with the product and send us improvements and suggestions. All you have to do is click on the “feedback” tab in Mockup Everything. We welcome any and all critiques, praise and comments on how to improve the product for users like you.

You can also stay up-to-date on additions to the template library through the Go Media Facebook page and posts on the GoMediaZine. You can also sign up for our free newsletter to get notifications of template releases and other happenings in the Mockup Everything world. You can also email us at [email protected] to chat with us directly.